Make a casting with a mold
Create a plaster casting using a simple mold: shape a clay mold, pour safe plaster of Paris with adult help, remove and paint the cast.


Step-by-step guide to make a plaster casting with a mold
10 DIY Silicone Molds & Plaster Casts - Fast, Easy & Awesome!
Step 1
Cover your workspace with old newspaper so the table stays clean.
Step 2
Put a lump of air-dry clay on the small plate to make your mold base.
Step 3
Press and shape the clay into a shallow bowl shape about one finger deep to form a mold.
Step 4
Make a clear imprint or design in the center of the clay using a small toy or your sculpting tool.
Step 5
Smooth the edges and the inside surface of the mold with the plastic knife or modelling tool.
Step 6
Leave the clay mold to dry until it is hard to the touch (follow the clay package directions).
Step 7
Ask an adult to help prepare the plaster so you stay safe.
Step 8
With your adult helper, follow the plaster package and mix the plaster in the disposable cup until it is smooth and lump-free.
Step 9
Have your adult slowly pour the plaster mixture into the clay mold until it reaches near the rim.
Step 10
Gently tap the sides of the mold a few times to help air bubbles rise to the surface.
Step 11
Leave the filled mold undisturbed until the plaster feels firm to the touch (about 20–40 minutes).
Step 12
With adult help, carefully remove the hardened cast from the clay mold.
Step 13
Smooth any rough spots with fine sandpaper and then paint your cast with your colouring materials; let the paint dry.
Step 14
Share a photo and a short story about your finished plaster casting on DIY.org.
Help!?
What can we use instead of air-dry clay, plaster, or a disposable cup if we can't find those supplies?
Use oven‑bake polymer clay or silicone mold putty instead of air‑dry clay, a craft casting compound or plaster‑of‑Paris substitute if regular plaster isn't available, and a clean yogurt or paper cup in place of the disposable cup for mixing.
My imprint looks fuzzy or the plaster has lots of bubbles—how do I fix that?
Make sure the clay mold is fully dry before you press a small toy or sculpting tool and smooth edges with the plastic knife, then have an adult mix the plaster in the disposable cup until lump‑free, pour slowly and gently tap the sides to release bubbles.
How can I adapt this casting activity for younger or older kids?
For younger children, have an adult prepare and pour the plaster while the child presses a small toy into the air‑dry clay and paints with washable colours, and for older kids encourage detailed carving with the modelling tool, supervised plaster mixing, and sanding with fine sandpaper before painting.
How can we enhance or personalize our finished plaster cast?
After removing and smoothing the cast with fine sandpaper, personalize it by adding plaster dye or mica to the mix before pouring, embedding a small charm in the center, painting with acrylics, or gluing a magnet or ribbon so you can photograph and post it on DIY.org.
Watch videos on how to make a plaster casting with a mold
How To Create a Sculpture From a Lifecasting - Sculpting, Mold Making and Casting Tutorial
4 Videos
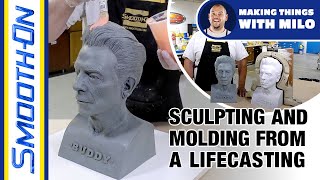
How To Create a Sculpture From a Lifecasting - Sculpting, Mold Making and Casting Tutorial
Mold Making And Resin Casting - How I Make Plastic Copies of My Toys
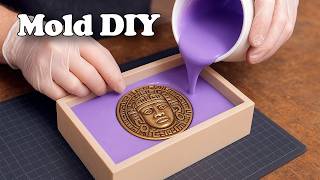
How To Make A Silicone Mold For Casting Aztec Pendants DIY
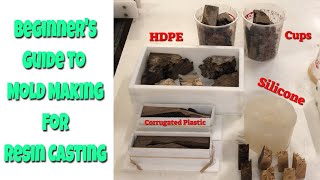
Make Molds for Resin Casting - Beginner's Guide - Easy Mold Making
Facts about mold-making and casting for kids
🎨 Plaster of Paris can begin to set in about 10–15 minutes, so mix and pour quickly for best results!
🏺 Ancient builders and artists (like Egyptians and Romans) used gypsum plaster for walls and sculptures for thousands of years.
🔬 Plaster captures tiny surface details, which is why museums make plaster replicas of fossils and statues for study.
🧰 A simple clay mold can be reused several times if you keep it intact and protected between pours.
🛡️ Always use adult help: dry plaster powder makes dust and the wet mix warms as it cures — basic safety (mask, gloves, supervision) keeps it fun and safe.
How do you make a plaster casting with a simple clay mold?
What materials do I need to make a plaster casting with a mold?
What ages is plaster casting with a mold suitable for?
What are safe variations and benefits of making plaster casts?
