Make a batch of magnetic slime
Make a batch of magnetic slime using school glue, iron filings and a safe activator with adult supervision, then explore magnets' attraction and movement.


Step-by-step guide to make a batch of magnetic slime
Step 1
Put on your disposable gloves with an adult nearby to help.
Step 2
Pour 1/2 cup of school glue into the mixing bowl.
Step 3
Sprinkle 2 tablespoons of iron filings into the glue.
Step 4
Stir the glue and iron filings together until the filings are evenly mixed.
Step 5
Slowly add 1/4 cup of liquid starch to the bowl.
Step 6
Stir continuously until the mixture thickens and starts to pull away from the bowl.
Step 7
Remove the slime from the bowl and knead it with your gloved hands for about 2 minutes until smooth.
Step 8
Use a paper towel to wipe up any spilled iron filings and clean the work surface.
Step 9
Hold the magnet near the slime without touching it and watch the slime move toward the magnet.
Step 10
Slowly move the magnet around the outside of the slime to make the slime crawl and stretch toward the magnet.
Step 11
Put your magnetic slime into an airtight container for storage when you are finished playing.
Step 12
Share your finished magnetic slime project and what you discovered on DIY.org
Help!?
What can I use if I can't find iron filings?
If you can't find iron filings for the 'sprinkle 2 tablespoons of iron filings into the glue' step, use 2 tablespoons of finely ground magnetite (iron oxide) powder or very finely shredded, cleaned steel wool prepared by an adult as a substitute.
Why didn't my slime thicken when I added liquid starch and how do I fix it?
If the mixture doesn't thicken after adding 1/4 cup liquid starch, gradually add a little more liquid starch while stirring and then knead the slime longer until it pulls away from the bowl, and double-check you used school glue and the correct measurements.
How can I adapt this activity for younger children or older kids?
For preschoolers have an adult wear gloves and mix the glue, filings, and starch and let the child watch the magnet move the finished slime, while older kids can measure and stir each step themselves and experiment with different filing amounts and magnet strengths.
How can we extend or personalize the magnetic slime project?
To personalize the project, stir a few drops of washable paint into the glue before sprinkling the iron filings, then use different magnets to create a magnet 'race' as you move the magnet around the slime (steps 9–10) and store favorite samples in the airtight container to share on DIY.org.
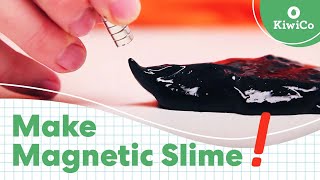
Watch videos on how to make a batch of magnetic slime
Magnetic Slime Recipe: Step-by-Step Tutorial
4 Videos

Magnetic Slime Recipe: Step-by-Step Tutorial
How to Make Magnetic Slime | STEAM DIY | KiwiCo

Slime Experiment - Magnetic Slime - Space Experiments for Kids

How To Make Magnetic Slime? - Raising A Toddler
Facts about magnetism
🧲 Iron filings inside slime line up along a magnet's invisible field, so the slime can stretch and 'reach' toward the magnet.
🌀 Glue-based slime is viscoelastic (a non-Newtonian material): it can slowly flow like a thick liquid but snap when pulled sharply.
🧪 School glue is mostly polyvinyl acetate (PVA); adding a safe activator creates cross-links that turn runny glue into stretchy slime.
🧤 Iron filings are messy and can stain or irritate skin or lungs — always use adult supervision, gloves, and consider a mask and tray.
🔬 Different magnets (bar, ring, and powerful neodymium) produce different effects—stronger magnets make the slime move faster and form sharper spikes.
How do I make a batch of magnetic slime with school glue and iron filings?
What materials do I need to make magnetic slime?
What ages is magnetic slime suitable for?
Is magnetic slime safe and what precautions should I take?
