Make A 3D Halloween Card
Make a pop-up 3D Halloween card using paper, scissors, glue, and markers; design spooky characters like pumpkins and ghosts to surprise friends.


Step-by-step guide to make a 3D Halloween card
👻🕷️Make an Easy 3D Halloween Card in 5 Minutes! # Halloween #easycraft #ghost #diy#craft#scary
Step 1
Fold one sheet of construction paper in half to make your card base.
Step 2
Use your pencil and ruler to draw two parallel vertical lines about 2 to 3 cm apart near the center fold to mark the pop-up tab.
Step 3
Cut along the two pencil lines carefully with safety scissors to create the pop-up slit.
Step 4
Gently push the cut tab inward so it folds into the card and becomes a pop-up piece.
Step 5
Crease the base of the pushed tab flat so it forms a sturdy pop-up platform.
Step 6
On a separate piece of construction paper draw a pumpkin shape and a ghost shape for your spooky characters.
Step 7
Cut out the pumpkin and ghost shapes with safety scissors.
Step 8
Decorate the pumpkin and ghost using your colouring materials to add faces and spooky details.
Step 9
Cut a small rectangle of scrap paper about 3 cm by 1.5 cm to make a hinge strip.
Step 10
Fold the small rectangle in half to create a paper hinge.
Step 11
Put glue on one half of the folded hinge and press it onto the back of your pumpkin or ghost.
Step 12
Put glue on the other half of the folded hinge and press it onto the top of the pop-up tab inside the card.
Step 13
Close the card gently to press the glued hinge and help it dry securely.
Step 14
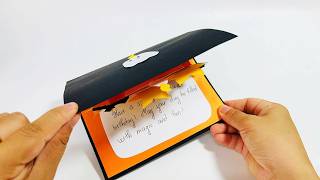
Add extra decorations and a Halloween message on the front and inside of your card.
Step 15
Share your finished 3D Halloween card on DIY.org.
Help!?
What can we use if we don't have construction paper or safety scissors?
You can fold two sheets of regular printer paper together or use thin cardstock for the card base, and swap safety scissors for blunt-tip adult scissors or pre-cut shapes if needed, while using a glue stick or double-sided tape instead of liquid glue.
My pop-up tab won't stand up or the hinge keeps peeling off—what should I check?
Make sure your two parallel vertical pencil lines are about 2–3 cm apart and cut cleanly, firmly crease the base of the pushed tab flat, and press the folded 3 cm by 1.5 cm hinge glue halves in place and close the card to dry so the glue bonds securely.
How can I adapt this activity for younger or older children?
For younger kids, have an adult pre-draw and pre-cut the pop-up slit and pumpkin/ghost shapes and use thicker paper or tape for the hinge, while older kids can add multiple pop-up tabs, detailed coloring, or layered paper elements after cutting and gluing their shapes.
How can we make the 3D Halloween card more special or advanced?
Extend the card by adding extra pop-up platforms, using patterned paper or craft foam for the pumpkin and ghost, attaching a tiny battery tea light behind the pop-up, or writing a personalized Halloween message and decorating the front before sharing on DIY.org.
Watch videos on how to make a 3D Halloween card
You Won't Believe How EASY It Is to Make a 3D Halloween Shaker Card
4 Videos

You Won't Believe How EASY It Is to Make a 3D Halloween Shaker Card
DIY 3D Halloween Birthday Cake Pop-Up Card 🎂 | Spooky & Fun Craft Idea
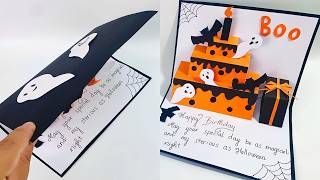
Spooky Pop-Up Birthday Card 🎃 | Easy Halloween Craft Tutorial | DG Handmade
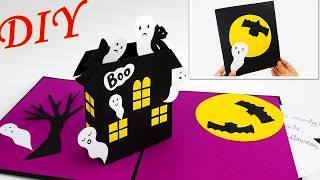
Easy & Quick Haunted House Pop-Up Card Tutorial 👻 | DIY Halloween Card Idea | DG Handmade
Facts about paper crafts and card making for kids
🎃 The first carved lanterns in Ireland and Scotland used turnips—pumpkins became popular in America because they're bigger and easier to carve.
👻 Halloween traces back to the Celtic festival Samhain, celebrated more than 2,000 years ago when people wore costumes to confuse spirits.
✂️ Kirigami (paper cutting) is a key trick for pop-up cards: a few strategic cuts turn flat paper into surprising 3D shapes.
📚 Pop-up mechanisms have been used in movable books and paper toys for centuries; modern pop-up cards can hide dozens of tiny moving parts.
✏️ You can make impressive pop-up effects with just paper, scissors, glue, and markers—no fancy tools required!
How do I make a 3D pop-up Halloween card step by step?
What materials do I need to make a 3D Halloween card?
What ages is this pop-up Halloween card activity suitable for?
What are the benefits, safety tips, and fun variations for making a 3D Halloween card?
