Make 3D paper figures
Fold, cut, and glue paper to create colorful 3D animal and geometric figures, learning measurement, symmetry, and patience through step-by-step hands-on crafting.


Step-by-step guide to make 3D paper figures
Step 1
Gather all your materials and clear a flat workspace so you can craft comfortably.
Step 2
Choose one geometric figure and one animal you want to make today so you have a plan.
Step 3
Pick a size for your shapes such as 4 centimeters or 1.5 inches and use that same size for measurements.
Step 4
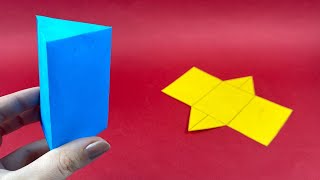
Draw a net for your geometric figure on colored paper using the ruler and pencil for straight lines.
Step 5
Cut out the net carefully along the outer lines using scissors.
Step 6
Score each fold line lightly with a ruler and the back of the scissors or your fingernail to help folds stay neat.
Step 7
Fold along every scored line to form the 3D shape from the net.
Step 8
Apply glue to the tabs and press the edges together to secure the 3D figure.
Step 9
Cut small paper shapes like ears legs tails wings or eyes from extra paper to make animal parts.
Step 10
Glue the paper parts onto your geometric base to turn it into a colorful animal.
Step 11
Let the glue dry completely so your figure is sturdy.
Step 12
Upload a photo of your finished creation to DIY.org with an adult's help to show everyone your work.
Help!?
What can I use if I don’t have colored paper, a ruler, or glue?
Use plain printer paper or cereal-box cardboard for the net, a straight book edge or credit card as a ruler to draw and score lines, and tape or a glue stick instead of white glue when you 'Draw a net', 'Score each fold line', and 'Apply glue to the tabs'.
My 3D shape won’t hold together or the folds look messy—what should I try?
If edges don't meet or folds tear when you 'Fold along every scored line', re-score the fold lines lightly with a ruler and the back of the scissors, make sure tabs are large enough, and hold glued tabs with clothespins or fingers until the glue sets so the '3D figure' stays secure.
How can I change this activity for different ages?
For younger children use larger sizes (bigger than 4 cm), pre-drawn nets to simplify 'Draw a net' and safety scissors for 'Cut out the net', while older kids can try smaller measurements like 1.5 inches, more complex nets, thinner scoring for precise folds, and finer paper for detailed animal parts.
How can we make the finished animal more creative or advanced?
Personalize the project by adding paint, markers, or textured paper to the geometric base, attach movable legs or wings with brads after you 'Cut small paper shapes' and 'Glue the paper parts onto your geometric base', or build a scene and 'Upload a photo of your finished creation to DIY.org' to share it.
Watch videos on how to make 3D paper figures
How to Make a Rectangular Prism | Easy 3D Shape Tutorial
4 Videos

How to Make a Rectangular Prism | Easy 3D Shape Tutorial
How to Make a Triangular Prism | Easy 3D Shape Tutorial
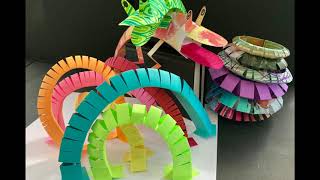
How to Make Movable 3D Paper Sculptures
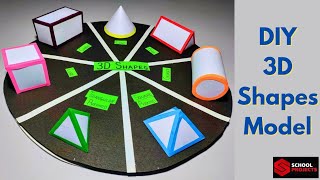
How To Make 3D Shapes Model for School Project | 3D Shapes Maths Project | Geometric Shapes Model
Facts about paper crafts for kids
🦢 The origami crane is one of the most famous models — in Japan folding 1,000 cranes (senbazuru) is a symbol of hope and a wish.
✂️ Kirigami adds cutting to folding and is often used to make pop-up cards and 3D paper sculptures.
📐 There are five Platonic solids (tetrahedron, cube, octahedron, dodecahedron, icosahedron) you can build from paper.
📏 Folding paper is a hands-on way to explore symmetry and fractions — each fold can show halves, quarters, eighths and mirror lines.
⏳ Making paper 3D figures boosts fine motor skills, patience, and spatial thinking — plus it's a fun screen-free family activity.
How do you make 3D paper figures by folding, cutting, and gluing?
What materials do I need to make colorful 3D animal and geometric paper figures?
What ages is the 3D paper figures activity suitable for?
What are the benefits of making 3D paper figures (learning measurement, symmetry, teamwork)?
