Let's Fly an Airplane
Fold and decorate different paper airplanes, test flight distances and angles, and modify designs to learn basic aerodynamics through safe, hands-on experiments.


Step-by-step guide to fold and fly paper airplanes
Step 1
Gather all Materials Needed and lay them out on a table so everything is easy to reach.
Step 2
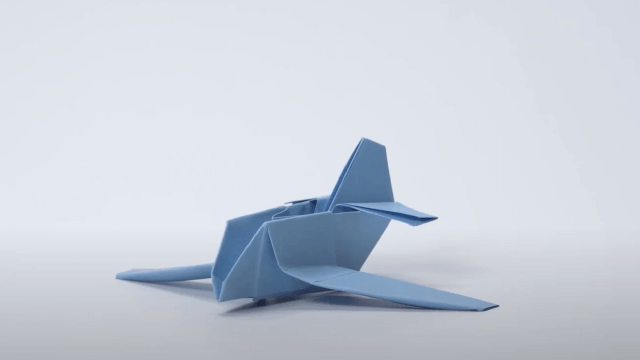
Fold a Classic Dart paper airplane from one sheet of paper following your favorite dart folds.
Step 3
Fold a Glider paper airplane from another sheet of paper using wider wings for slow steady flight.
Step 4
Decorate each airplane with Colouring materials and write a name or number on the side of each plane.
Step 5
Add a small weight to one plane by attaching a paper clip or a small piece of tape to the nose.
Step 6
Find an open flat space and place a start line on the floor or ground with a piece of tape.
Step 7
Use the Measuring tape or ruler to measure and mark distance intervals from the start line (for example every 1 meter or 3 feet).
Step 8
Stand behind the start line and throw the Classic Dart three times using the same smooth motion for each throw.
Step 9
Measure the landing spot of each Classic Dart throw and write the three distances on your paper.
Step 10
Use the Protractor or angle guide to aim about 10 degrees upward and throw the Classic Dart three times at that angle.
Step 11
Modify one plane by bending the wing tips up or down or by moving the paper clip to a new spot on the nose.
Step 12
Throw the modified plane three times using the same motion you used before.
Step 13
Measure the landing spots of the modified plane throws and write the new distances next to your earlier results.
Step 14
Take a photo or write a short note about what you learned and share your finished creation and results on DIY.org
Help!?
What can we use if we don't have a protractor, measuring tape, or paper clip?
If you don't have a protractor use a smartphone level or fold a paper tab to approximate the 10° aim, mark distance intervals with footsteps or a rope instead of a measuring tape, and swap the paper clip for a coin, small washer, or a tiny folded piece of tape as the nose weight.
The plane keeps spinning or falling quickly—what should we check or change?
If your Classic Dart veers or stalls during the three throws, make sure the folds are symmetric, straighten or rebend the wings evenly, try moving the paper clip or tape on the nose as in the 'modify one plane' step, and use the same smooth throwing motion and approximately 10° upward aim.
How can we adapt this activity for different age groups?
For younger kids, simplify by folding only the wide-wing Glider, decorating it together and measuring with footsteps while an adult handles the protractor and nose weight, and for older kids have them fold both Dart and Glider, record three measured throws with a ruler, and experiment with wing tip bends and weight placement themselves.
How can we extend or personalize the airplane tests to make them more fun or scientific?
Extend the activity by decorating unique designs on each plane, testing additional variables like different paper types or heavier coins, recording three-throw averages and plotting results, taking photos or slow-motion video of flights, and holding a start-line distance contest to compare outcomes.
Watch videos on how to fold and fly paper airplanes
Prepare your child for first PLANE Ride ✈️ Educational AirPlane Video for Kids 🧳 Airport for Kids
4 Videos
Prepare your child for first PLANE Ride ✈️ Educational AirPlane Video for Kids 🧳 Airport for Kids
Educational Airplane Videos for Kids 🧳 Airport for Kids ✈️ Prepare your child for first PLANE Ride
Safety Tips in an Airplane ✈️✨ Fly Safe with Pit & Penny 🥑
AIRPLANES for Kids✈️ Prepare your child for first PLANE Ride✈️ Educational Videos for Toddlers
Facts about aerodynamics for kids
✈️ The world record for the longest paper airplane flight is over 69 meters!
📎 Adding a tiny paperclip shifts the center of mass and can make a plane fly straighter or farther.
🎨 Decorating with markers or stickers can change weight and airflow — it can help or hurt flight.
🌀 Simple tweaks like bending wing tips or tail flaps can stop loops, reduce stalling, or make turns.
🏆 There are fun paper airplane contests — and engineers even use paper models to study real aerodynamics.
How do we do the "Let's Fly an Airplane" activity at home?
What materials do I need to fold and test paper airplanes?
What ages is the paper airplane aerodynamics activity suitable for?
What safety tips should we follow while flying paper airplanes?
