LEGOfy your memories
Build LEGO scenes of your favorite memories using bricks, photos, and labels to practice storytelling, design, and display skills you can share.


Step-by-step guide to LEGOfy your memories
Step 1
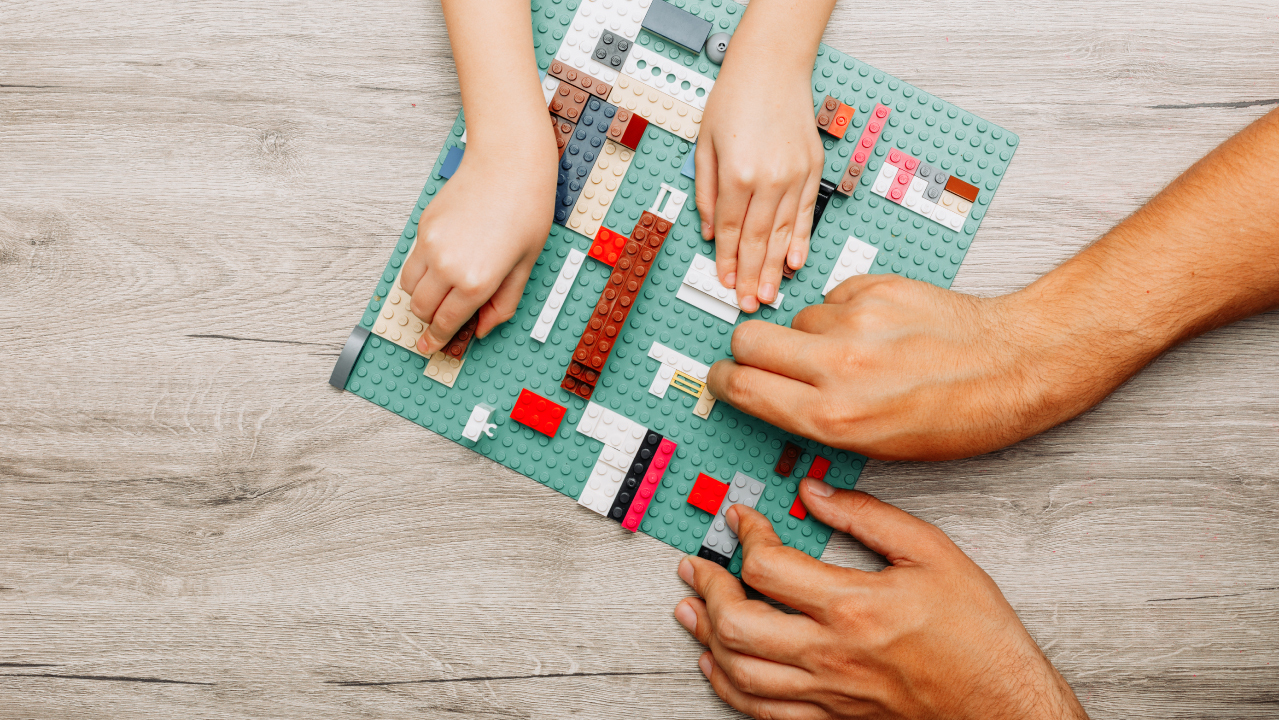
Gather your LEGO bricks and the baseplate on a clear table or floor space.
Step 2
Pick one favorite memory you want to turn into a LEGO scene.
Step 3
Choose a printed photo that shows that memory and place it beside your bricks.
Step 4
Trim the photo to a small size that will fit near your LEGO scene using scissors.
Step 5
Pick three important things from the photo to include in your model (people places or objects).
Step 6
Sort the bricks you need onto the tray by color and size.
Step 7
Build the background first on the baseplate like the ground sky or room walls.
Step 8
Build the main characters and objects to match the photo using the sorted bricks.
Step 9
Add small details like trees furniture or pets to make the scene feel like your memory.
Step 10
Tape the trimmed photo into or next to the scene so viewers can see the real memory.
Step 11
Write a short title and one-sentence description on an index card and place it with your scene.
Step 12
Share your finished LEGO memory on DIY.org
Help!?
What can we use instead of a LEGO baseplate or a printed photo if those are hard to find?
Use a stiff piece of cardboard or a shoebox lid as your baseplate substitute and place a photo on a phone or tablet or draw a small picture to tape next to the scene if you can't print one.
My pieces keep falling off or I can't make the model look like the photo—what should I try?
Build the background first on your baseplate as the instructions say, secure wobbly pieces with a small bit of tape or Blu Tack under them, and focus on the three important things from the trimmed photo so the scene reads like the memory even if some colors differ.
How can we adapt this activity for younger or older kids?
For younger children, use larger DUPLO bricks, have an adult pre-sort bricks on the tray and skip trimming by placing the whole photo beside the build, while older kids can trim the photo themselves, add detailed characters and objects, and write a longer description on the index card before sharing on DIY.org.
How can we make our LEGO memory scene more special or shareable?
Build a brick frame or small diorama box around the taped trimmed photo, add extra details like trees, furniture or pets from the instructions, take a clear photo of the finished scene, and display it with your index-card title when you upload to DIY.org.
Watch videos on how to LEGOfy your memories
Best way to store and organise Lego Instructions
3 Videos
Best way to store and organise Lego Instructions
How to sort LEGO like a PRO? My storage system walkthrough. Storage tips & tricks
The Ultimate LEGO Sorting System
Facts about LEGO building and storytelling
🧱 Over 400 billion LEGO bricks have been produced — that's more bricks than people on Earth!
📸 Toy photography is a popular way to share miniature scenes online; hashtags like #toyphotography gather millions of creative shots.
🧠 Adding photos, textures, and props to a scene taps into sensory memory and helps kids tell richer stories about their past.
🧩 Playing and building with bricks improves spatial reasoning and problem-solving — many designers and engineers credit early brick play.
🏷️ A short label or caption can turn a cool model into a clear story: museum-style tags help viewers instantly understand a scene.
How do I LEGOfy my memories?
What materials do I need to LEGOfy memories?
What ages is this activity suitable for?
What are the benefits of LEGOfying memories?
