Learn to splice
Make a simple rope splice joining two polypropylene ropes using tape and scissors, following step by step instructions with adult supervision to learn secure joins.

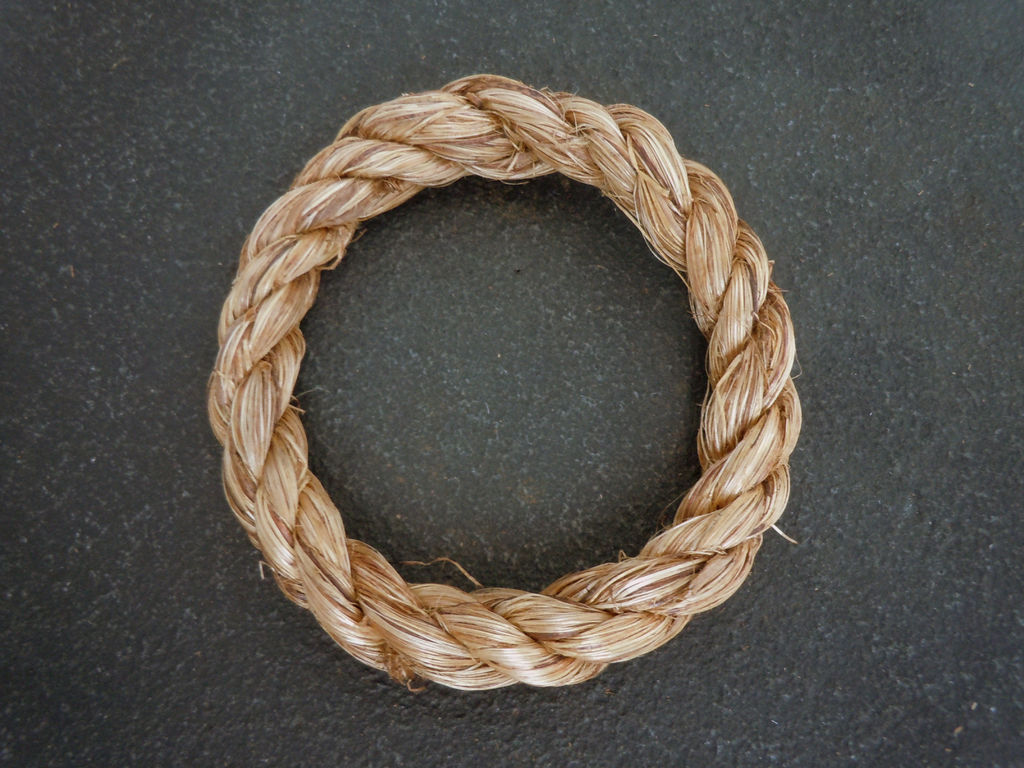

Step-by-step guide to make a simple rope splice
Full Tutorial: Splice Video Editor App
Step 1
Lay the two ropes side by side and use the ruler and marker to mark 8 inches from each rope end.
Step 2
Wrap a tight band of tape around each rope at each marked spot to hold the standing part of the rope.
Step 3
Untwist the last 8 inches of Rope A so it separates into three individual strands; the rope is made of three twisted parts.
Step 4
Untwist the last 8 inches of Rope B so it separates into three individual strands.
Step 5
Wrap a small piece of tape around the tip of each separated strand to keep them tidy.
Step 6
Overlap the two ropes so the taped marks meet and the separated strands fan out opposite each other.
Step 7
Take the outermost strand from Rope A and tuck it under the nearest strand of Rope B about 1 inch in and pull it snug.
Step 8
Take the middle strand from Rope A and tuck it under the next strand of Rope B about 1 inch in and pull it snug.
Step 9
Take the last strand from Rope A and tuck it under the remaining strand of Rope B about 1 inch in and pull it snug.
Step 10
Take the outermost strand from Rope B and tuck it under the nearest strand of Rope A about 1 inch in and pull it snug.
Step 11
Take the middle strand from Rope B and tuck it under the next strand of Rope A about 1 inch in and pull it snug.
Step 12
Take the last strand from Rope B and tuck it under the remaining strand of Rope A about 1 inch in and pull it snug.
Step 13
Trim any long stray ends close to the rope with the scissors so the splice looks neat.
Step 14
Wrap tape around the finished splice to tidy and protect the tucked ends.
Step 15
Share a photo of your finished splice and what you learned on DIY.org.
Help!?
What can I use if I don't have a three-strand rope or a ruler?
If you can't find a three-strand rope, substitute with 3-strand cotton clothesline or make three paracord strands taped together and use a measuring tape or a printable 8-inch template to mark the 8-inch spots before following the untwist and tuck steps.
My tucks keep coming loose — how do I fix that?
If the tucked strands slip, rewrap the tape tightly at the 8-inch marks, tuck each strand 1.5–2 inches instead of 1 inch, and pull each tuck snug before trimming and wrapping the finished splice.
How can I adapt this activity for different age groups?
For younger kids have an adult pre-measure and pre-untwist the last 8 inches and let them perform the simple tucking steps with blunt scissors under supervision, while older kids can do the measuring, untwisting, precise tucks and neat trimming themselves and try longer tucks or omitting the final tape for a cleaner splice.
How can we make the finished splice stronger or more decorative?
To strengthen or personalize the finished splice, whip the tucked ends with colored twine or use heat-shrink tubing over the tucked area, then trim stray ends and wrap the finished splice with decorative or protective tape as described in the last step.
Watch videos on how to make a simple rope splice
Capcut PC Tutorial - How To Splice Videos
4 Videos

Capcut PC Tutorial - How To Splice Videos

How to Cut a Video in CapCut. Split Clips EASILY! (Beginner Friendly)
The Ultimate Splice App Tutorial: Edit Videos on Your Phone like a Pro

How to split videos online
Facts about ropework for kids
🪢 A properly made splice can retain about 90–95% of a rope's original strength, while many knots can reduce strength by up to half.
🌊 Polypropylene is buoyant — it floats on water, which is why it's commonly used for marine ropes and rescue lines.
🧵 Beginners often use tape to hold strand ends steady before tucking them — tape and scissors are great starter tools.
⚓ Splicing is an age-old seamanship skill sailors used for centuries to make permanent, secure joins and rope eyes.
✂️ You don't need fancy gear: with scissors, tape and a little patience you can make a clean, strong splice at home.
How do you make a simple splice joining two polypropylene ropes?
What materials do I need to splice polypropylene rope using tape and scissors?
What ages is this rope splicing activity suitable for?
What safety tips should I follow when teaching my child to splice ropes?
