Invent a zipline powered by an engine
Build a small motor-powered model zipline for a toy cart using a low-voltage motor, string, pulleys, batteries, and safe testing.


Step-by-step guide to build a motor-powered model zipline
Step 1
Gather all the Materials Needed and put them on a clear workspace.
Step 2
Pick two anchor points at different heights like a shelf and a chair back to be the zipline ends.
Step 3
Measure the distance between the two anchors with the ruler to know how much string you need.
Step 4
Attach the top pulley to the top anchor using a clothespin or by tying it securely.
Step 5
Attach the bottom pulley to the lower anchor using a clothespin or by tying it securely.
Step 6
Cut a length of string a few inches longer than your measured distance using the scissors.
Step 7
Thread the string through both pulleys so the string can run from the top anchor to the bottom anchor.
Step 8
Pull the string taut between the two pulleys so the line is straight and steady.
Step 9
Tie one end of the string to the front of the toy cart firmly so the cart can be pulled.
Step 10
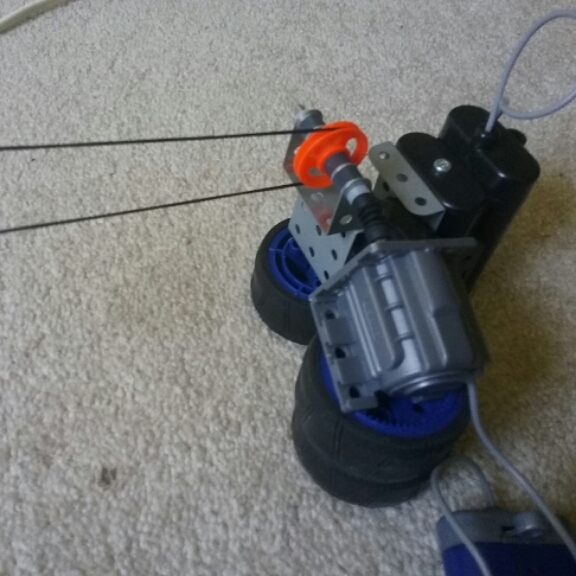
Mount the motor onto the top of the toy cart with tape so the motor is steady and the shaft can turn.
Step 11
Make a small spool on the motor shaft by wrapping tape around the shaft to create a narrow knob that the string can wind onto.
Step 12
Attach the free end of the string to the motor spool by tying or taping it securely so the motor can pull the cart.
Step 13
Insert the AA batteries into the battery holder and connect the battery holder to the motor wires.
Step 14
Have an adult briefly turn on the motor while you stand back and watch to test that the spool winds the string and the cart moves safely along the zipline; stop immediately if anything looks unsafe.
Step 15
Share a photo or video of your finished motor powered zipline on DIY.org.
Final steps
You're almost there! Complete all the steps, bring your creation to life, post it, and conquer the challenge!


Help!?
What can we use if we don't have a pulley or a clothespin?
If you don't have a pulley, use a small spool, large bead, or clean button as the wheel and secure it to the anchor with a sturdy rubber band or zip tie instead of a clothespin.
The motor spool spins but the cart doesn't move—what should we check?
Check that the motor spool made by wrapping tape around the motor shaft (step 'Make a small spool') has enough diameter, that the string is tied securely to the spool and the cart (step 'Tie one end of the string to the front of the toy cart'), that the line is pulled taut between pulleys (step 'Pull the string taut'), and that the AA batteries are inserted and connected.
How can we adjust this activity for different ages?
For preschoolers, have an adult handle the motor wiring, battery connections, and attaching pulleys while the child measures distance and threads the string, for elementary-aged kids let them tie the string, mount the motor with tape, and test under supervision, and for older kids encourage adding a switch or extra batteries to the battery holder for more challenge.
How can we improve or personalize the zipline?
Add a small on/off switch between the battery holder and motor for safer control, decorate the toy cart and motor mount with stickers or tape, and experiment with different pulley anchor heights (step 'Pick two anchor points') or a lightweight brake to change the cart's speed.
Watch videos on how to build a motor-powered model zipline
DIY Backyard Zipline - Short & Sweet Explanation
4 Videos

DIY Backyard Zipline - Short & Sweet Explanation
HOW TO MAKE YOUR OWN 100' Backyard ZIP LINE | Build Your Own Homemade DIY Zipline | Sensei Ryan
Homemade Zipline DIY ~ Backyard Upgrades #7
DIY Fan Powered Zipline Carrier: Kids, make your own zipline to carry your favorite toy!
Facts about electric motors and simple machines
🧗♂️ Some commercial ziplines span over a kilometer—several tourist ziplines are nearly 2.8 km long!
⚡ Small hobby DC motors typically run on 1.5–12 volts and can spin at thousands of RPM.
🔩 A single pulley changes the direction of force, while pulley systems (block and tackle) can multiply force.
🔋 Two AA batteries in series give about 3 volts—often enough to power tiny motors for model projects.
🧠 Building a motorized model zipline teaches gravity, friction, tension, and basic electric circuits all at once.

