Invent a 2-way zipline
Build a safe two way zipline model using string, pulleys, and toy harnesses. Test movement in both directions with adult supervision while exploring forces.


Step-by-step guide to invent a two-way zipline
Step 1
Gather all the materials and place them near your two chosen supports.
Step 2
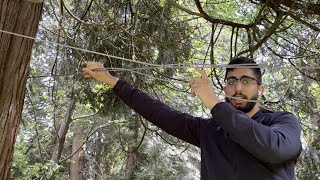
Position the two supports about 2–4 meters apart with one support slightly higher than the other to make a gentle slope.
Step 3
Measure the exact distance between the supports with a ruler or measuring tape.
Step 4
Cut a length of string that is 1 meter longer than the measured distance.
Step 5
Tie one end of the string securely to the higher support using a strong knot.
Step 6
Slide both pulleys onto the free end of the string so they can move along the rope.
Step 7
Tie the other end of the string securely to the lower support and pull tight so the line has a gentle slope.
Step 8
Attach one toy harness to each pulley using the clip on the harness.
Step 9
Place a small weight or a toy into each harness so they act like riders.
Step 10
With adult supervision, gently release the harness at the high end and watch it slide down the zipline.
Step 11
With adult supervision, pull the harness at the low end up along the line to the high end.
Step 12
With adult supervision, release the harness you pulled up and watch it travel the opposite way while noticing how slope and push affect speed.
Step 13
Share a photo or short description of your finished two-way zipline model and what you learned on DIY.org.
Help!?
What can I use if I can't find small pulleys or toy harnesses at the store?
If you can't find pulleys, thread the string through smooth wooden spools or large beads so they can slide (step: 'Slide both pulleys onto the free end of the string'), and substitute toy harnesses with clothespins or small plastic cups tied to the clip point (step: 'Attach one toy harness to each pulley').
The harness won't slide smoothly—what should I check or fix?
Check that you pulled the line tight when you 'tie the other end of the string securely to the lower support' so there's a gentle slope, make sure the pulleys/beads aren't rubbing the supports or the knots, and replace sticky pulleys with smoother beads or add a drop of oil to the axle if safe.
How can I adapt the activity for younger children or make it more challenging for older kids?
For younger kids, shorten the supports distance to about 1–2 meters, pre-cut the string and pre-tie the knots per the 'Cut a length of string' and 'Tie one end' steps with adult supervision, while older kids can increase the slope, measure precisely with the measuring tape, test different weights, and record times to study how slope and push affect speed.
What are simple ways to enhance or personalize our two-way zipline project?
Decorate the harnesses, race two pulleys by placing different weights in each 'harness' and timing runs, add a small camera or flag to a harness to observe motion, and then 'share a photo or short description of your finished two-way zipline model and what you learned on DIY.org.'
Watch videos on how to invent a two-way zipline
ZipLineGear Two Turnbuckle Kit Installation Guide
4 Videos
ZipLineGear Two Turnbuckle Kit Installation Guide
The Problem Solving Process with Zipline
Complete Guide To Safely Installing And Rigging Zipline Tension Line Over A River
How to Setup a Backyard Zipline Kit (Step by Step) - Hyponix Sporting Goods
Facts about simple machines and forces for kids
🎢 Some full-size ziplines let riders reach speeds over 100 km/h (about 62 mph) — models are much slower and safer for testing.
⚙️ Pulleys are one of the six classical simple machines and can change direction of a force or make work easier.
🪢 A tighter line (more tension) reduces sag and usually makes rides faster and smoother — a great thing to test carefully.
🛡️ Safety harnesses spread load across the body so forces are safer; even toy harnesses show how attachment points matter.
📐 Small changes in slope or angle can noticeably change speed, so experimenting with inclines helps you learn about gravity and friction.
How do I build a safe two-way zipline model with pulleys and toy harnesses?
What materials do I need to build a two-way zipline for kids?
What ages is a two-way zipline activity suitable for?
What safety tips and learning benefits come from making a two-way zipline?
