How to draw stairs - a free stairs drawing guide
Draw a set of stairs step-by-step using ruler, perspective lines, and shading. Practice measurement, perspective, and shading to create realistic depth.


Drawing Apps
Get inspired with these


Instructions
【Painting Tutorial】How to Draw Stairs? Master Steps in 1 Minute! ✨ Easy Guide for Beginners.
Step 1
Lightly draw a straight horizontal line across your paper for the horizon or eye level.
Step 2
Mark a single dot on the horizon to be your vanishing point.
Step 3
Near the bottom left of the page draw a straight vertical line for the front corner of the stairs.
Step 4
From the top of that vertical line draw a straight line to the vanishing point and from the bottom draw another straight line to the vanishing point to make a long wedge.
Step 5
Use your ruler to mark equal short segments along the front vertical line to set each riser height.
Step 6
From every mark on the front vertical draw a straight line to the vanishing point so you have several receding guide lines inside the wedge.
Step 7
Draw a vertical line inside the wedge on the right to set the far edge of the stairs so it crosses the top and bottom receding lines.
Step 8
At each place a receding line meets the far vertical draw a vertical line down until it hits the bottom receding line to create the risers.
Step 9
Erase the extra construction lines that are outside the visible edges of the stairs.
Step 10
Darken the visible edges of each step so the stair shapes stand out clearly.
Step 11
Shade the treads and risers to show light and shadow and blend gently with your stump or tissue for smooth tones.
Step 12
Share your finished stairs drawing on DIY.org.
Help!?
What can we use instead of a drawing stump if we don't have one?
If you don't have a drawing stump use a tightly rolled piece of tissue, a cotton swab, or your fingertip to gently blend the shaded treads and risers.
My steps look uneven or don't line up—what should I fix?
If the steps look uneven, make sure every mark on the front vertical is measured with your ruler and redraw each receding guide line from those marks to the vanishing point so they converge correctly inside the wedge.
How can I adapt this stairs drawing for younger or older kids?
For younger kids pre-draw the horizon, vanishing point, and wedge and have them mark equal segments and draw the vertical risers with a marker, while older kids can add more receding guide lines, finer shading with a stump, and longer staircases to practice perspective.
How can we enhance or personalize the finished stairs?
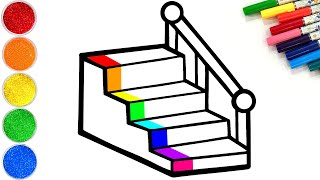
Personalize the finished stairs by adding a handrail, patterned treads, or a person on the steps, then darken the visible edges and shade the treads and risers to match a chosen light source before sharing the drawing on DIY.org.
Related videos
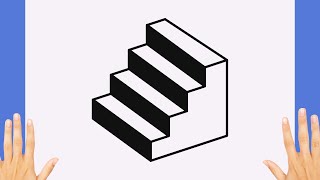
How to Draw 3D Stairs ✏️ Easy Tutorial for Kids #howtodraw #chikiart
4 Videos

How to Draw 3D Stairs ✏️ Easy Tutorial for Kids #howtodraw #chikiart
How to Draw Stairs and Railing | Easy Step by Step Drawing Tutorial | Made for Kids

How to Draw Stairs? Master Steps in 5 Minutes! Easy Perspective Guide for Beginners.
How to Draw Stairs | Easy Drawing Tutorial for Beginners
Fun Facts
🧭 Vanishing points are an optical trick artists use so parallel lines (like stair edges) look like they meet far away — that’s how depth appears on flat paper.
🏛️ Filippo Brunelleschi demonstrated the rules of linear perspective in the 1400s, changing how artists drew buildings and stairways forever.
🎯 One-point perspective is perfect for drawing straight stairs because all the step edges recede toward the same single point on the horizon.
🖌️ Simple shading — darker on the risers and lighter on the treads — instantly makes each step look like it has volume and casts shadow.
📐 Placing the horizon line (eye level) higher or lower in your drawing tells the viewer whether they’re looking up or down at the staircase.
How do I teach my child to draw realistic stairs with vanishing points?
What materials do I need to draw 3D stairs with perspective?
What ages is perspective stair drawing suitable for?
What are the benefits of drawing stairs using perspective?
