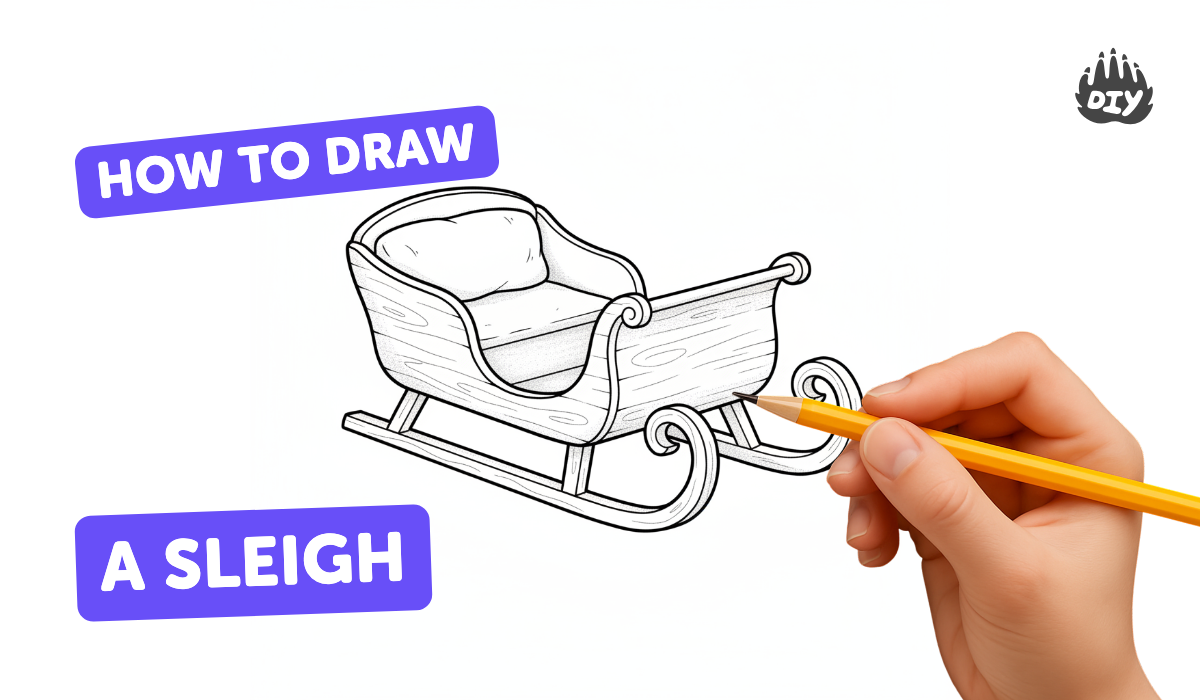
How to draw a sleigh - a free sleigh drawing guide
Draw a sleigh step-by-step using simple shapes, lines, shading, and decorative details to create a finished drawing. Practice proportions, perspective, and texture.

Drawing Apps
Photos of sleigh drawing examples


Step-by-step guide to draw a sleigh
Learn how to draw Sleigh | Easy Drawing Sleigh For Kids | Easy Drawing Tutorial
Step 1
Place your paper horizontally on a flat surface so you have lots of room to draw.
Step 2
Draw a light horizontal ground line about one-third up from the bottom to show where the sleigh sits.
Step 3
Sketch a long shallow rectangle above the ground line to make the sleigh seat.
Step 4
Draw a curved nose rising from the front end of the seat to form the sleigh’s rounded front.
Step 5
Add a backrest by drawing a taller curved rectangle or arc at the rear of the seat.
Step 6
Draw two long parallel runners beneath the seat using gentle S-shaped lines that follow the ground line.
Step 7
Draw two short vertical supports from the bottom of the seat down to the runners to connect them.
Step 8
Erase any extra construction lines and smooth the sleigh’s outline so it looks neat and solid.
Step 9
Add decorative details like panel lines wood grain and small ornaments on the sleigh’s body.
Step 10
Pick a light source by marking a small dot on the edge of the paper to show where light comes from.
Step 11
Lightly shade the areas opposite your light source and under the seat and runners to make shadows.
Step 12
Gently blend the shaded areas with a tissue to soften the shadow edges for a realistic look.
Step 13
Color your sleigh using your coloring materials and leave tiny light spots for highlights.
Step 14
Sign your name on the corner to claim your artwork.
Step 15
Share your finished sleigh drawing on DIY.org
Help!?
What can I use if I don't have a tissue, colored pencils, or an eraser?
If you don't have a tissue use a cotton ball or your fingertip to blend shaded areas from the 'gently blend' step, swap colored pencils for crayons or markers when you 'color your sleigh', and lift construction lines with a clean scrap of paper or soft bread instead of an eraser.
My runners and seat look crooked — how can I fix them?
Make light guide marks along the 'ground line' and sketch the long rectangle and S-shaped runners lightly first, then use the 'erase any extra construction lines' step to correct shapes and smooth the sleigh's outline until the seat and runners look even.
How can I adapt this sleigh drawing for younger or older kids?
For younger children simplify by tracing a pre-drawn sleigh outline and letting them add 'decorative details' and color, while older kids can follow all steps including 'pick a light source', 'lightly shade', and add wood grain, panel lines, and highlights for realism.
What are some ways to extend or personalize the finished sleigh?
Extend the project by drawing a snowy background and reindeer, add metallic pens or glitter to the 'small ornaments' in the decorative details step, and personalize it by signing your name and sharing the finished sleigh drawing on DIY.org.
Watch videos on how to draw a sleigh
How to Draw a Simple Santa's Sleigh | Step-by-Step Lesson
4 Videos
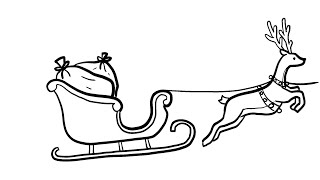
How to Draw a Simple Santa's Sleigh | Step-by-Step Lesson
How To Draw A Kid Sledding + Spotlight

How to Draw a SLEIGH
How To Draw Santa Sleigh With Reindeer Step By Step For Kids ❤️💙Santa Claus Sleigh Coloring
Facts about drawing and sketching for kids
🛷 Sleighs were once essential winter transport in snowy regions, with runners shaped to glide over packed snow.
🎅 The modern image of Santa riding a sleigh full of gifts was popularized by the 1823 poem "A Visit from St. Nicholas" and later 19th-century cartoons.
✏️ Many artists begin drawings with simple shapes—like circles, ovals, and rectangles—to lock in proportions quickly.
📐 One-point perspective uses a single vanishing point and is an easy way to make a sleigh look like it's moving into the distance.
🎨 Shading methods such as cross-hatching, smudging, and changing pencil pressure can make wood, metal, and fabric textures look realistic.
How do I draw a sleigh step-by-step?
What materials do I need to draw a sleigh with my child?
What ages is this sleigh drawing activity suitable for?
What are the benefits, safety tips, and variations for drawing a sleigh?
