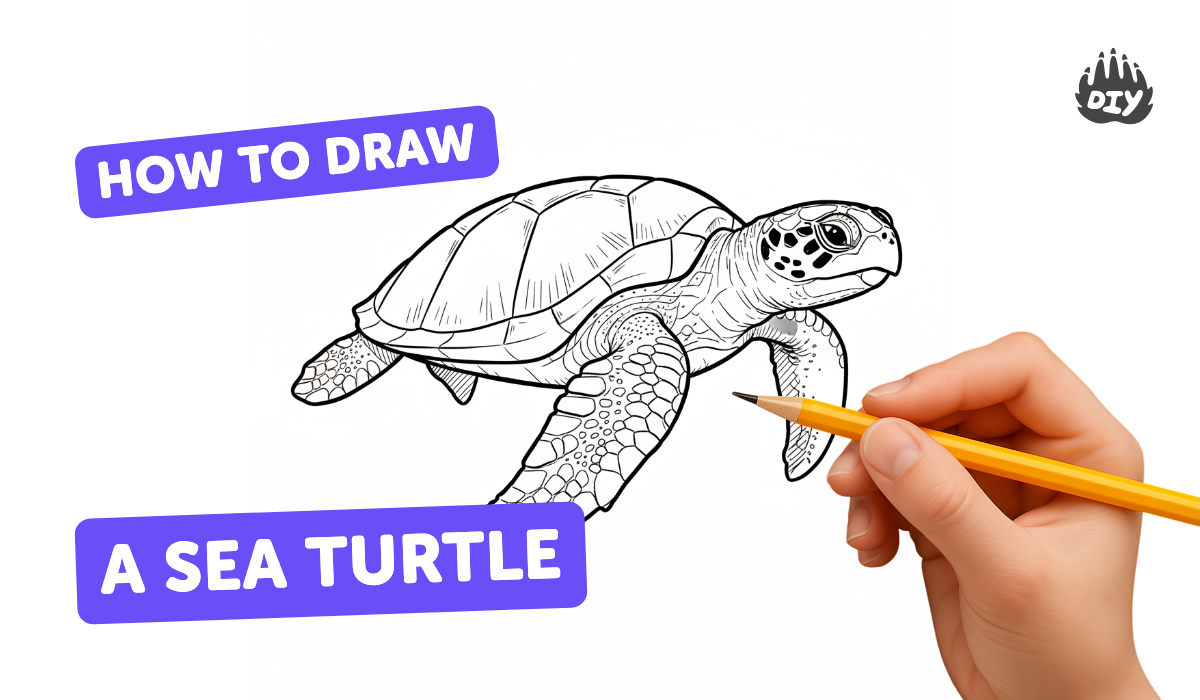
How to draw a sea turtle - a free sea turtle drawing guide
Draw a detailed sea turtle step-by-step using pencil, eraser, and colored pencils. Practice proportions, shell patterns, and shading to create lifelike art.

Instructions
How To Draw a Sea Turtle | Sketch Tutorial
Step 1
Gather all your materials and put them on a clear flat surface.
Step 2
Place your reference photo of a sea turtle next to your paper.
Step 3
Look at the photo and study the turtle's overall proportions for one minute.
Step 4
Lightly sketch a large oval for the turtle's shell in the center of the paper.
Step 5
Lightly draw a smaller oval attached to the front of the shell for the head.
Step 6
Lightly sketch the turtle's flippers by drawing two rounded front flippers and two rear flippers.
Step 7
Draw a gentle curved line under the shell to show the belly.
Step 8
Lightly mark where the water or surface will be around the turtle with simple wavy lines.
Step 9
Draw the shell scutes by sketching a central pattern of pentagons or hexagons and filling outward.
Step 10
Add the facial features by drawing the eye the nostrils and the mouth line.
Step 11
Go over the lines you want to keep with a firmer pencil or fine liner to make the final outline.
Step 12
Gently erase the remaining construction lines so the drawing looks clean.
Step 13
Add shading and texture to the shell and skin with your pencil and blend gently with your tissue or blending stump.
Step 14
Apply color layers to the shell the skin and the surrounding water with your coloring materials keeping some light areas for highlights.
Step 15
Share your finished sea turtle drawing on DIY.org
Help!?
If I don't have a fine liner, blending stump, or a printed reference photo, what can I use instead?
Use a sharpened dark pencil or washable marker to go over final lines in step 11, substitute tissue, a cotton swab, or folded paper towel for the blending stump in step 14, and use a phone or tablet image for the reference photo in step 2.
My turtle's shell or head look wrong after the light sketches — how can I fix that?
If the large shell oval or the smaller head oval from steps 3–5 look off, gently erase with a kneaded eraser, re-check the proportions against your reference photo for one minute as in step 2, then redraw the ovals lightly before adding flippers and scutes.
How can I adapt this drawing activity for different age groups?
For preschoolers, pre-draw the large shell and head ovals and let them color and add sticker eyes, for early elementary have them complete the light sketching and simple scutes, and for older kids encourage detailed scute patterns, careful shading with a blending stump in step 14, and layered coloring in step 15.
What are some ways to enhance or personalize the sea turtle drawing once the basic steps are done?
Extend the drawing by adding wavy water lines from step 7, a background of coral or fish, unique shell patterns or initials instead of the standard pentagons/hexagons in step 10, experiment with watercolors for the water in step 15, and share the finished piece on DIY.org.
Related videos
How to Draw a Turtle Easy Step by Step | Simple Turtle drawing tutorial for beginners
4 Videos

How to Draw a Turtle Easy Step by Step | Simple Turtle drawing tutorial for beginners
Sea Turtle Drawing Tutorial Easy | How to Draw a Cute Sea Turtle 🌈🐢🌊 #shorts #turtle
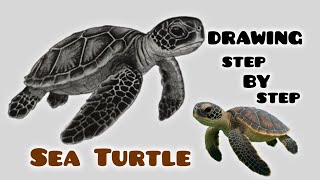
How to Draw a Sea Turtle 🐢 | Easy Step by Step Tutorial
turtle drawing easy step by step 🐢 | turtle drawing simple easy
Get inspired with these


Fun Facts
🐢 Sea turtles have been around for about 110 million years — they even lived alongside dinosaurs!
🌊 The leatherback is the largest sea turtle, growing over 2 meters long and diving deeper than 1,000 meters.
🧲 Female sea turtles often return to the exact beach where they hatched, navigating using Earth's magnetic field.
🎨 A turtle’s shell is covered in scutes (keratin plates) — perfect patterned details to practice with shading and texture.
🟢 The "green" in green sea turtle refers to the color of its body fat, not the shell.
How do you draw a realistic sea turtle step-by-step?
What materials do I need to draw a realistic sea turtle?
What ages is this sea turtle drawing activity suitable for?
What are the benefits and safe variations for drawing a sea turtle?
