How to draw a scientist - a free scientist drawing guide
Learn to draw a friendly scientist step by step using simple shapes, add lab coat, tools, and background details while practicing observation and proportion.

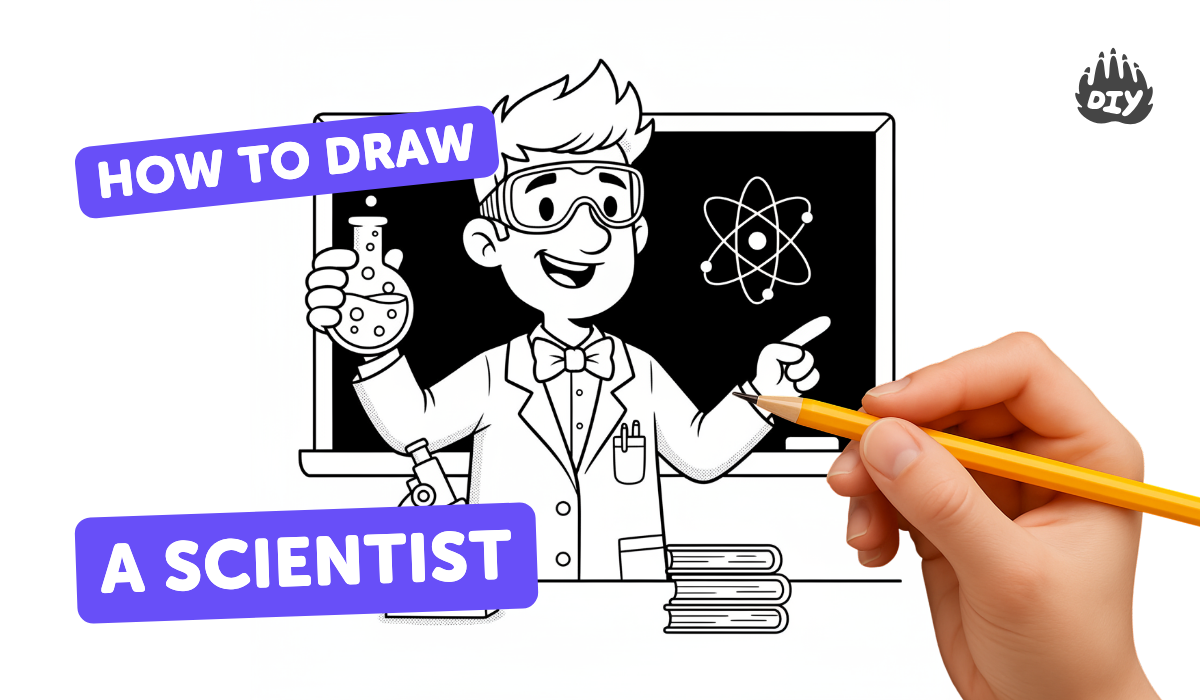
Step-by-step guide to draw a friendly scientist
How to Draw a Scientist For Kids
Step 1
Clear a flat workspace and lay out your paper and drawing tools.
Step 2
Lightly draw a circle near the top center of the paper for the scientist's head.
Step 3
Draw a vertical center line from the top of the head down where the feet will be to help keep everything lined up.
Step 4
Draw a horizontal eye line across the middle of the head circle to place the eyes.
Step 5
Draw a simple trapezoid shape under the head for the torso to show the lab coat shape.
Step 6
Draw a short neck and sloping shoulders to connect the head and torso.
Step 7
Draw two simple arm shapes and round hands attached to the shoulders.
Step 8
Draw two legs and shoes under the torso to finish the body shape.
Step 9
Add the lab coat details by drawing the collar the front opening and a coat hem line.
Step 10
Draw a pocket and a few buttons on the front of the lab coat.
Step 11
Draw a beaker in one hand and a test tube or clipboard in the other hand.
Step 12
Draw friendly facial features and hair to give your scientist personality.
Step 13
Erase the light guideline lines and trace over your final lines with the black marker for a clean look.
Step 14
Color your scientist and add simple background details like a table shelves or a chalkboard.
Step 15
Share your finished creation on DIY.org
Help!?
What can we use instead of a black marker or special drawing paper?
If you don't have a black marker, trace your final lines with a dark pencil, fine-tip pen, or dark crayon and use any sturdy printer paper or sketchbook paper with regular pencils for the initial guidelines.
My scientist's eyes or coat look uneven—how can I fix that?
If the eyes or lab coat look off-center, re-check and lightly redraw the horizontal eye line and the vertical center line to reposition features symmetrically before erasing guidelines and inking your final lines.
How can I adapt the activity for different ages or skill levels?
For younger children, simplify by drawing a large head, basic trapezoid torso, chunky arms and skipping the background, while older kids can add detailed hair, labeled beakers, shading, and use a ruler on the vertical center line for precise proportions.
How can we extend or personalize the scientist drawing before sharing it on DIY.org?
Personalize and extend the drawing by decorating the lab coat with patterns, adding a named pocket badge, labeling the beaker's contents, and drawing shelves or a chalkboard background before coloring and sharing on DIY.org.
Watch videos on how to draw a friendly scientist
How to Draw a Scientist - Easy Step-by-Step Drawing for Kids #howtodraw #learntodraw
4 Videos
How to Draw a Scientist - Easy Step-by-Step Drawing for Kids #howtodraw #learntodraw
How To Draw A Scientist 👨🔬👩🔬 | Step by Step tutorial
Scientist Easy Drawing Tutorial

How to Draw Scientist
Facts about drawing and proportion for kids
🧑🔬 Scientists are often drawn with goggles, lab coats, and wild hair—visual shortcuts that make the character instantly recognizable.
🧪 A few simple props like flasks, microscopes, or test tubes tell a scientist's story without needing lots of detail.
👩🎨 Start your drawing with simple shapes—circles, ovals, and rectangles—to block in a friendly pose fast.
📏 Artists use 'head-lengths' to check proportion—an adult figure is usually about 7–8 heads tall.
🔬 Observation is both a scientist's skill and an artist's tool: notice angles, light, and how parts relate to each other.
How do I teach my child to draw a friendly scientist step by step?
What materials do I need to draw a scientist with my child?
What ages is drawing a friendly scientist suitable for?
What are the benefits of drawing a scientist for children?
