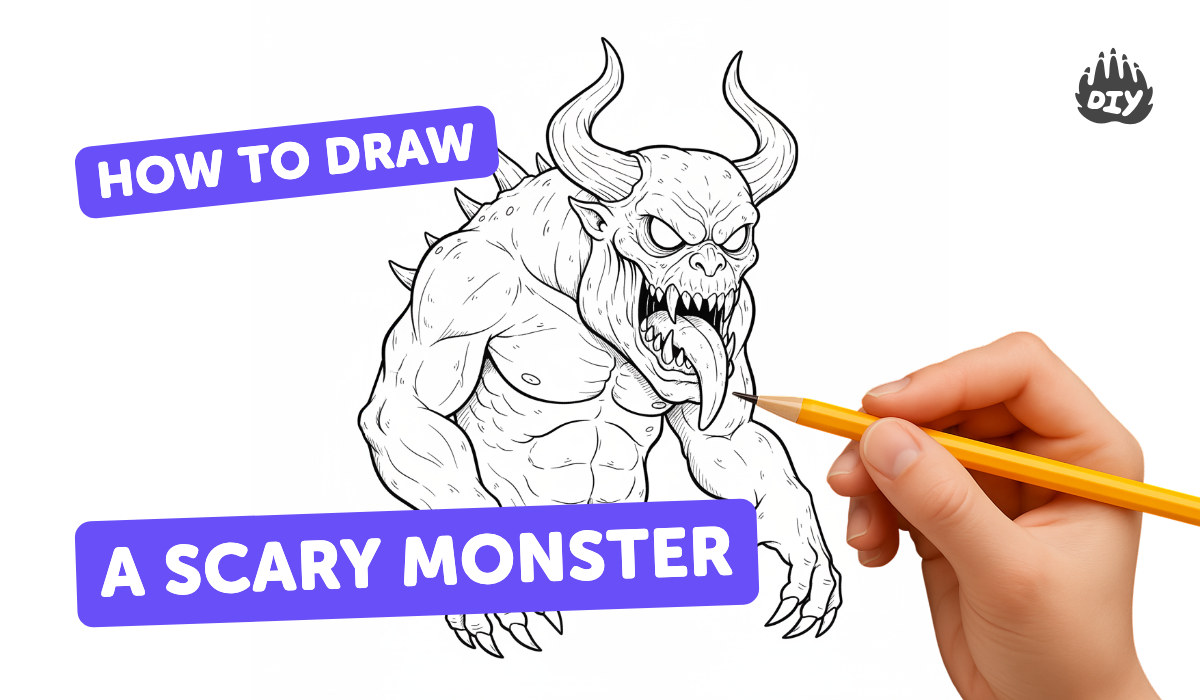
How to draw a scary monster - a free scary monster drawing guide
Draw a scary monster using pencil, simple shapes, shading, and texture. Practice facial expressions, proportions, and contrast to create mood.

Drawing Apps
Photos of scary monster drawings


Step-by-step guide to draw a scary monster
How to Draw a Spooky Halloween Monster | Easy Drawing for Kids
Step 1
Warm up your hand by drawing quick simple shapes like circles ovals and straight lines across the paper.
Step 2
Decide your monster's scary mood such as angry sneaky or spooky so you know the expression to draw.
Step 3
Lightly sketch the basic head and body using simple shapes like a big circle an oval or a blob.
Step 4
Draw a vertical center line and a horizontal eye line to set the monster's proportions.
Step 5
Lightly draw the eye shapes on the eye line to make them big small spooky or squinty.
Step 6
Sketch the mouth shape and add sharp or crooked teeth to match the scary mood.
Step 7
Add a nose and other face features like fangs warts or a long tongue using simple lines and shapes.
Step 8
Sketch the limbs tail or wings to give your monster a pose and show how big or scary it is.
Step 9
Add scary details like horns claws spikes and wrinkles to make your monster unique.
Step 10
Erase extra construction lines so the monster outline looks clean.
Step 11
Decide where the light is coming from so shadows fall on the same side of the monster.
Step 12
Add shading to the shadowed areas with soft pencil strokes to make the monster look three dimensional.
Step 13
Gently blend the shaded areas with a tissue or cotton swab to smooth tones and deepen shadows.
Step 14
Use the eraser to lift small highlights on the eyes teeth and shiny bumps to create contrast.
Step 15
Share your finished scary monster on DIY.org
Help!?
What can I use if I don't have a cotton swab or tissue for blending the shading?
If you don't have a tissue or cotton swab for the 'Gently blend the shaded areas' step, use a clean fingertip, a folded napkin, or a soft piece of felt to smooth the pencil strokes.
My monster's eyes or teeth look crooked—how do I fix proportions and alignment?
If eyes or teeth end up crooked, go back to the 'Draw a vertical center line and a horizontal eye line' step and lightly erase and reposition features using soft pencil strokes, then remove extra construction lines after adjusting.
How can I adapt this activity for different age groups?
For younger kids (4–6) simplify the 'Lightly sketch the basic head and body' step into big shapes and use markers instead of shading, while older kids (9+) should follow 'Decide where the light is coming from' and practice layered shading and blending with a tissue for depth.
How can we make the monster drawing more advanced or personal before sharing?
To enhance it, add textured details like scales or fur during 'Add scary details', apply colored pencils or light watercolor washes after 'Erase extra construction lines', and write a short monster backstory to include when you share on DIY.org.
Watch videos on how to draw a scary monster
How To Draw A Scary Cute Monster (Folding Surprise)
4 Videos

How To Draw A Scary Cute Monster (Folding Surprise)
How To Draw A Monster Stack Folding Surprise
How to Draw a Halloween Ghost for Kids | Easy Draw Along with Bri Reads!

How To Draw A Pumpkin Ghost
Facts about drawing and sketching for kids
😱 Asymmetry (uneven features) often makes creatures feel creepier than perfectly symmetrical faces.
🌗 High contrast—deep shadows and bright highlights—instantly makes drawings feel more dramatic and scary.
✏️ Hatching and cross-hatching are simple pencil tricks to add texture like fur, scales, or cracked skin.
👁️ Small changes in eye size, pupil shape, or eyebrow angle can totally flip a monster's emotion.
🌙 A single light source (like moonlight) casts long shadows that make monsters look larger and more menacing.
How do I draw a scary monster with pencil step by step?
What materials do I need to draw a scary monster?
What ages is drawing a scary monster suitable for?
What are safety tips and creative variations for drawing scary monsters?
