How to draw a pyramid - a free pyramid drawing guide
Draw a three-dimensional pyramid using simple perspective and shading steps. Practice measuring edges, creating depth, and adding texture for realistic results.


Drawing Apps
Get inspired with these


Instructions
How to draw a Pyramid | Pyramid Easy Draw Tutorial
Step 1
Gather all materials and place them where you can reach them easily.
Step 2
Use your ruler to measure and draw a straight vertical guide line 6 cm long near the middle of the paper.
Step 3
Use your ruler to draw a horizontal guide line 6 cm long so it crosses the vertical line at its midpoint.
Step 4
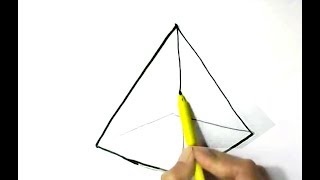
Connect the four endpoints of the guide lines in order to form a diamond shape that will be the pyramid base.
Step 5
Place a small dot above the diamond at a height you like about half the length of the guide lines to mark the pyramid’s apex.
Step 6
Use your ruler to draw straight lines from the apex dot to each corner of the diamond to create the pyramid faces.
Step 7
Erase the original vertical and horizontal guide lines inside the diamond so only the diamond edges and pyramid sides remain.
Step 8
Decide where the light is coming from and draw a small arrow outside the pyramid pointing from that direction.
Step 9
Lightly shade the face closest to the light with soft pencil strokes using the HB pencil.
Step 10
Shade the next visible face with slightly darker strokes using the 2B pencil to make it mid tone.
Step 11
Shade the face farthest from the light with even darker strokes using heavier pressure with the 2B pencil.
Step 12
Gently blend each shaded face with a tissue or cotton swab to create smooth tone transitions.
Step 13
Add texture by drawing faint short lines or tiny dots on the faces to look like stone or rough surface.
Step 14
Draw a flattened triangular cast shadow on the ground opposite the light arrow and shade it to anchor the pyramid.
Step 15
Take a photo of your finished 3D pyramid and share your creation on DIY.org
Help!?
What can we use if we don't have a ruler, 2B pencil, or cotton swabs for blending?
Use the straight edge of a book or a printed card to draw the vertical and horizontal guide lines, substitute a softer pencil like 4B or press slightly harder with an HB for the darker face instead of a 2B, and blend shaded faces with a fingertip, folded paper towel, or cotton ball in place of a cotton swab.
My diamond looks uneven or the pyramid faces don't meet correctly — how do I fix that?
Draw the 6 cm vertical and horizontal guide lines lightly with a straight edge and re-measure the midpoint before connecting the four endpoints with the ruler to form the diamond, then place the apex dot centered above the diamond and redraw any misaligned side lines with the ruler before erasing the inner guides.
How can I change this activity for younger or older kids?
For younger children, make the guide lines longer (for example 12 cm), pre-draw the diamond and let them trace with a chunky pencil or marker and skip detailed shading, while older kids can add more tones by using HB, 2B and 4B pencils, refine blending with a tissue, and add textured stone marks on the faces as in the instructions.
What are simple ways to enhance or personalize our finished pyramid drawing before sharing it on DIY.org?
Add small hieroglyphic or stone texture marks on the faces with a fine pen, experiment with moving the apex dot higher or lower to change the pyramid's steepness, paint a light watercolor wash over the shaded faces, and vary the cast shadow shape according to the light arrow before photographing your finished 3D pyramid.
Related videos
How to draw pyramid easy step by step for beginners
4 Videos
How to draw pyramid easy step by step for beginners

How to Draw Pyramid | Easy Step by Step Kids Drawing and Coloring
How To Draw The Egyptian Pyramids Of Giza

How to draw PYRAMID easy
Fun Facts
🎯 One-point (linear) perspective uses a single vanishing point to make parallel edges recede convincingly into depth.
🏛️ The Great Pyramid of Giza was originally about 146.6 m tall—drawing it in proportion is a great way to practice measuring edges and angles.
✏️ Shading has stages (highlight, midtone, core shadow, cast shadow) — placing them correctly makes flat planes look three-dimensional.
📐 A pyramid is a polyhedron with a polygon base and triangular faces that meet at an apex; square pyramids are commonly used for drawing practice.
🖋️ Albrecht Dürer's 1525 book on measurement and perspective taught artists how to construct accurate 3D forms on a flat page.
How do you draw a three-dimensional pyramid with simple perspective and shading?
What materials do I need to draw a 3D pyramid?
What ages is this pyramid drawing activity suitable for?
What are the benefits of drawing a 3D pyramid?
