How to draw a pom pom - a free pom pom drawing guide
Draw a fluffy pom pom using simple shapes, sketchy lines, and shading to practice texture, observation, and step by step drawing skills.

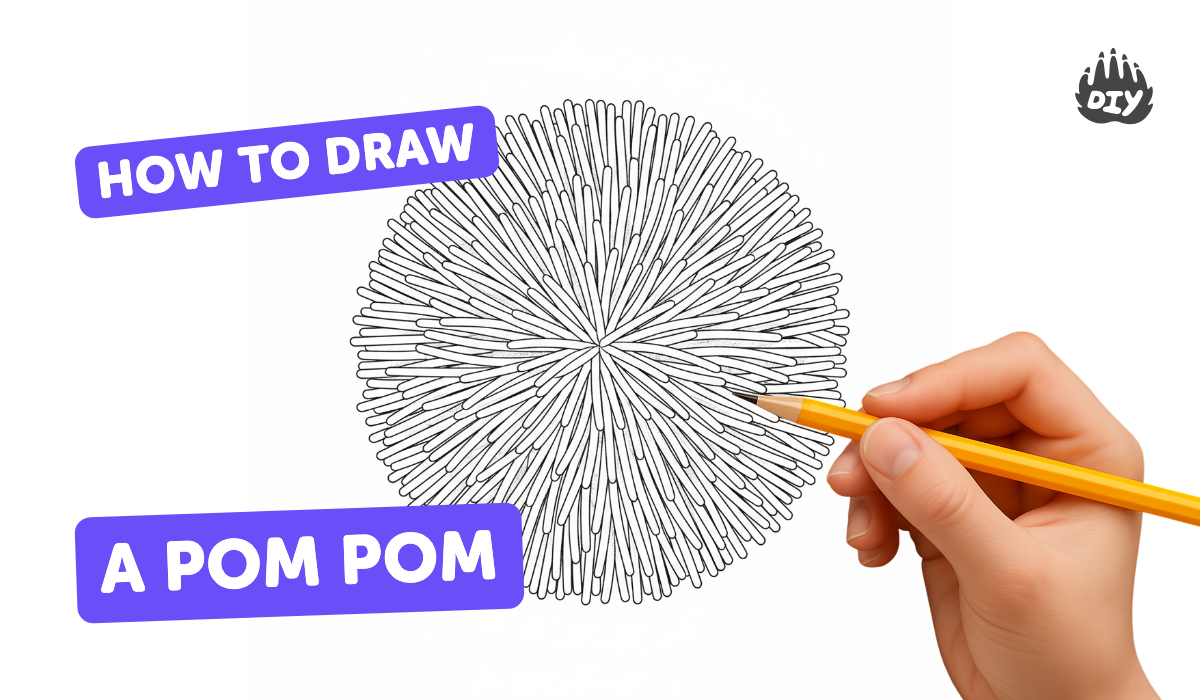
Step-by-step guide to draw a fluffy pom pom
How to Draw a Pom Pom easy
Step 1
Place a sheet of paper on a flat surface so you have lots of room to draw.
Step 2
Lightly draw a circle to mark the pom pom's main shape.
Step 3
Draw a small oval or tiny circle in the center to be the pom pom's core.
Step 4
From the center, draw many short curved sketchy lines radiating outward toward the circle edge.
Step 5
Add a broken cloud-like outer edge of short flicky lines around the circle to make the silhouette fluffy.
Step 6
Erase the original circle outline gently so only the fluffy sketchy lines remain.
Step 7
Fill any gaps by adding more short sketchy lines between the existing ones to make the pom pom look fuller.
Step 8
Shade lightly near the center and under overlapping strands to create a shadow and depth.
Step 9
Blend the shaded areas softly with a tissue or cotton swab to smooth the shadow.
Step 10
Optionally add color with light strokes that follow the fluff lines to keep the texture visible.
Step 11
Share your finished pom pom drawing on DIY.org.
Help!?
What can we use if we don't have a cotton swab or tissue for blending?
If you don't have a tissue or cotton swab for step 9, use a clean fingertip, a soft cloth corner, a paper towel, or a blending stump wrapped in tissue to gently smooth the shaded areas.
My pom pom looks flat or the fluff looks messy — how can I fix it?
If your pom pom looks flat or the fluff is messy, lighten your pencil strokes when drawing the short curved sketchy lines in step 4, erase the original guide circle more gently in step 6, and add light shading under overlapping strands in step 8 then blend in step 9 to create depth.
How can I change the activity for a toddler or a teen?
For toddlers, simplify by pre-drawing the main circle (step 2) and letting them make big flicky lines with markers, while older kids can add finer short sketchy lines (step 4), layered shading (step 8), and subtle color strokes that follow the fluff (step 10).
Any ideas to make the pom pom drawing more fun or unique?
To extend or personalize the activity, draw multiple pom poms in different sizes and colors (steps 2 and 10), glue short yarn scraps onto the fluffy silhouette for a tactile 3D effect, or photograph and share your favorite version on DIY.org (step 11).
Watch videos on how to draw a fluffy pom pom
How to Draw Little Miss Wise Pom Poms Easy Drawing for Kids
3 Videos

How to Draw Little Miss Wise Pom Poms Easy Drawing for Kids
HOW TO DRAW POM POM PURIN | Easy & Cute Sanrio Purin Drawing Tutorial For Beginner / Kids
How to Draw Pom Pom from Bluey | Easy Drawing for Kids | Bluey | Disney
Facts about drawing for kids
🧶 Pom-poms were traditionally made from yarn and appear in folk costumes and hats around the world.
✏️ Quick, sketchy lines called hatching and scribbling are great tricks artists use to show fluffiness without drawing every fiber.
🎨 Smooth shading and tiny highlights make a round pom-pom look three-dimensional on paper.
👀 Observational drawing—looking closely at light and shadow—can turn a few strokes into a convincing fluffy texture.
📏 Pom-poms vary widely: craft poms can be under 1 cm, while cheerleading poms can be 25–30 cm across, giving lots of drawing ideas.
How do I teach my child to draw a fluffy pom pom step by step?
What materials do I need to draw a pom pom with my child?
What ages is pom pom drawing suitable for?
What are the benefits of drawing a pom pom for kids?
