How to draw a plant - a free plant drawing guide
Draw a potted plant step by step using simple shapes, leaf details, stem proportions, and shading with pencil and colored pencils. Practice observing light.


Instructions
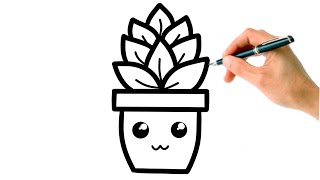
How to Draw a Cute Plant Easy for Kids and Toddlers
Step 1
Arrange your materials on a flat surface.
Step 2
Draw a horizontal ground line across the lower third of your paper.
Step 3
Lightly sketch a vertical center guideline from the ground up to show where the stem will go.
Step 4
Draw a small soil mound at the base of the stem to mark where the roots will start.
Step 5
Sketch two parallel curved lines around the center guideline to form the stem shape.
Step 6
Draw several curved root lines branching down from the stem into the soil area.
Step 7
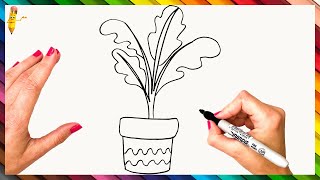
Draw leaf outlines along the stem alternating sides using teardrop or oval shapes.
Step 8
Add a central vein and a couple of side veins inside each leaf.
Step 9
Add tiny short lines or bumps on the stem and roots to create texture.
Step 10
Shade one side of the stem and the undersides of the leaves with gentle pencil strokes to show light and shadow.
Step 11
Lightly erase any extra construction lines so your drawing looks clean.
Step 12
Trace over your final lines with a black pen or a darker pencil to make the drawing pop.
Step 13
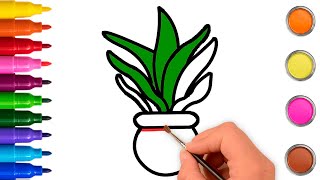
Color the leaves stem roots and soil using your colouring materials.
Step 14
Label the main parts with arrows and words like "root" "stem" and "leaf."
Step 15
Share your finished creation on DIY.org.
Help!?
If I don't have a black pen or a darker pencil for tracing, what can I use instead?
If you don't have a black pen or darker pencil for the 'Trace over your final lines' step, use a dark crayon, washable marker, charcoal stick, or the side of a sharpened pencil to make the lines pop.
My stem looks wobbly and my leaves are uneven—how can I fix that?
Redraw the stem lightly using the 'vertical center guideline' and 'two parallel curved lines' as guides, erase extra construction lines before inking, and make short, controlled strokes to smooth uneven leaves.
How can I adapt this drawing for younger children or for older kids who want more challenge?
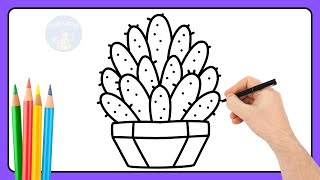
For younger children, simplify 'Draw leaf outlines' to large teardrop shapes and let them color boldly with crayons, while older kids can add multiple side veins, detailed root branching, and careful 'Shade one side of the stem' cross-hatching for realism.
What are some ways to extend or personalize the finished drawing before sharing it on DIY.org?
Personalize by adding a flower or seed pod at the stem tip, coloring distinctive leaf patterns in the 'Color the leaves' step, writing habitat and species notes beside your labels, and adding a simple background scene before sharing on DIY.org.
Related videos
How to draw a Plant 🪴 easy tutorial step by step for kids| Small Artists
4 Videos
How to draw a Plant 🪴 easy tutorial step by step for kids| Small Artists
How to draw a plant easy step by step | Easy and simple drawing and coloring plants
How To Draw A Plant Step By Step 🌿 Plant Drawing Easy
How to draw plant Drawing for Beginners | Easy and Cute Step by Step 🐬 | Color's Artbox
Get inspired with these


Fun Facts
🌱 Some plants (like pothos) can grow roots in water in just 1–2 weeks — great for simple drawing references and experiments.
🌿 There are over 400,000 species of flowering plants, so leaf shapes and patterns are endlessly different and inspiring.
🌳 Tree roots often spread 2–3 times wider than the tree's canopy, showing how big a plant’s hidden parts can be.
🪴 Xylem and phloem are tiny tube systems inside stems that move water and food — imagine invisible plant highways when you draw them.
✏️ Good shading and texture can turn a flat sketch into a 3D-looking leaf or stem; artists use light direction to create that effect.
How do I teach my child to draw a plant step by step?
What materials do I need to draw a plant with my child?
What ages is this plant drawing activity suitable for?
What are the benefits of this plant drawing activity for kids?
