How to draw a ninja - a free ninja drawing guide
Learn to draw a simple ninja step by step using pencil, eraser, and markers, practicing shapes, proportions, and costume details confidently.

Step-by-step guide to draw a ninja
How To Draw a Ninja | Easy Step-By-Step Drawing Tutorial for Beginners
Step 1
Draw a circle near the top of your paper for the ninja's head.
Step 2
Lightly draw a faint vertical center line and a horizontal eye line across the head as guidelines.
Step 3
Draw a rounded oval under the head for the ninja's torso.
Step 4
Draw simple stick lines out from the torso for the arms and down from the torso for the legs.
Step 5
Add small ovals at the ends of the arm and leg lines to make the hands and feet.
Step 6
Draw a hood around the head by sketching curved lines that meet at the neck.
Step 7
Draw a mask band across the lower half of the face along the eye guideline.
Step 8
Draw two almond-shaped eyes on the eye line and add tiny pupils inside them.
Step 9
Draw a belt across the middle of the torso and add a little tied knot on one side.
Step 10
Add wrist wraps by drawing short bands on each lower arm.
Step 11
Draw simple shoe details on the feet like a split-toe line or a sole shape.
Step 12
Carefully trace over the lines you want to keep using a black marker.
Step 13
Gently erase the pencil guidelines and any stray lines once the marker is dry.
Step 14
Color your ninja with markers or crayons, choosing dark colors for the outfit and a color for the belt.
Step 15
Take a picture of your finished ninja and share your creation on DIY.org.
Help!?
I don't have a black marker — what can I use instead for tracing the ninja lines in step 12?
If you don't have a black marker for step 12, substitute a fine-tip black pen, thin Sharpie, or a dark black crayon to carefully trace the final lines, and use a phone camera or scanner to replace the photo in step 15 if needed.
My pencil guidelines smudge or disappear when I try to erase after tracing — how do I fix that?
If the lines smear or erase poorly after tracing, wait until the black marker from step 12 is completely dry, then gently remove the pencil guidelines in step 13 with a soft eraser while resting a scrap paper under your hand to avoid smudging.
How can I change this activity to suit different ages or skill levels?
For preschoolers, skip the faint guidelines in step 2 and use larger pre-drawn head/torso shapes with sticker eyes, while older kids can refine stick limbs from step 4 into jointed poses, add detailed hood folds in step 6, and practice shading in step 14 before sharing in step 15.
What are some fun ways to extend or personalize my finished ninja drawing?
To personalize the drawing, add gear like a shuriken near the hand from step 5, draw a unique emblem or pattern on the belt in step 9, create an action background after step 14, or turn several drawings into a comic strip to photograph and post in step 15.
Watch videos on how to draw a ninja
HOW TO DRAW NINJA | DRAWING STEP BY STEP
4 Videos
HOW TO DRAW NINJA | DRAWING STEP BY STEP
How to Draw a Ninja (Step by Step)
How to draw a Ninja - Easy Drawing Tutorials
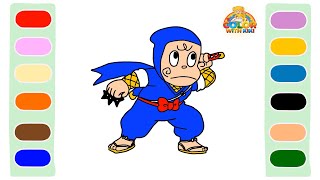
Learn to Draw Ninja Hattori - Drawing and Coloring Tutorial for Kids
Facts about drawing for kids
🥷 Ninjas were real covert agents in feudal Japan, especially active during the 15th–17th centuries.
✏️ Many artists build characters from simple shapes—circles, ovals, and rectangles—to get proportions and poses right.
🖍️ The classic all-black ninja outfit is mostly a stage costume; real ninjas used everyday clothes or dark blues to blend in.
📐 Artists measure bodies in 'head' units—real adults are ~7–8 heads tall, while cute cartoon characters often use 3–5 heads.
🎯 Shuriken (throwing stars) were usually used to distract or wound, not just to kill.
How do I draw a simple ninja step by step?
What materials do I need to draw a ninja?
What ages is this ninja drawing activity suitable for?
What are the benefits, safety tips, and fun variations for drawing a ninja?
