How to draw a ferret - a free ferret drawing guide
Draw a detailed ferret step-by-step using simple shapes, outlines, fur texture, and shading. Practice observation, proportion, and basic drawing techniques.


Drawing Apps
Photos of ferret drawing examples


Step-by-step guide to draw a ferret
How To Draw A Ferret
Step 1
Find a clear photo of a ferret to look at while you draw.
Step 2
Lightly draw a big oval for the ferret's body with your pencil.
Step 3
Draw a smaller circle for the head near one end of the body and add a short curved line to join them for the neck.
Step 4
Add a vertical guideline down the center of the face and a horizontal guideline where the eyes will sit.
Step 5
Sketch four simple leg shapes beneath the body and a long tapered shape for the tail.
Step 6
Smooth the outer lines to make the ferret's real body shape and add two rounded ears and a small pointed snout.
Step 7
Erase the construction guidelines gently so only the clean outline remains.
Step 8
Draw the eyes nose and mouth using the face guidelines and mark the dark mask pattern you see in the reference.
Step 9
Add short curved pencil strokes along the body following the direction of the fur to create texture.
Step 10
Shade the underside and shadowed areas with light pencil layers and gently blend them with a tissue to show roundness.
Step 11
Add colour or darker tones with your colouring materials to match the reference or make your own fur pattern.
Step 12
Share your finished ferret drawing on DIY.org.
Help!?
What can I use if I don't have a tissue or blending stump for the step that says "gently blend them with a tissue"?
If you don't have a tissue or blending stump for blending the shaded underside and shadows in the step that asks you to gently blend, use a clean cotton ball, a soft piece of fabric, or your fingertip to softly smudge the pencil layers.
My ferret's shape looks wrong after drawing the oval and head—what should I do to fix proportions before erasing guidelines?
If proportions look off after you draw the big oval body and smaller head circle with the connecting neck line, lightly redraw or shift those construction shapes and the neck curve until the body-to-head ratio matches your reference before erasing guidelines.
How can I change the activity for younger kids or make it more challenging for older kids?
For younger children simplify by letting them trace or use sticker shapes for the big oval, circle, and legs and color the fur, while older kids should focus on adding the short curved fur strokes, careful shading with a tissue, and accurate dark mask patterns from the reference photo.
What are some ways to personalize or extend the drawing after adding colour in the last step?
To extend the activity beyond adding colour, invent a new fur pattern or pose, draw a background scene, try different colouring materials like watercolour or markers for texture, and then photograph and share your finished ferret on DIY.org with a short description.
Watch videos on how to draw a ferret
How to Draw Disney Zootopia Rabbit Judy Hopps Step by step Cute
4 Videos

How to Draw Disney Zootopia Rabbit Judy Hopps Step by step Cute
How To Draw A Rabbit
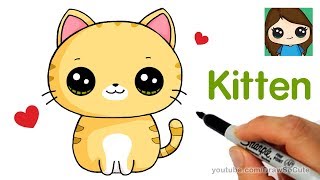
How to Draw a Kitten Super Easy
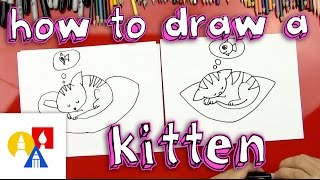
How To Draw A Kitten (For Young Artists)
Facts about drawing animals
🦦 Ferrets are members of the Mustelidae family — the same group that includes weasels and otters, so they share long, flexible bodies.
😴 A ferret can sleep 14–18 hours a day, which makes studying relaxed, curled poses super easy for drawing practice.
🎨 Artists often block in animals with simple shapes (circles, ovals, and cylinders) to get proportion and pose right before adding details.
🖌️ Short, directional strokes and light cross-hatching are great for suggesting soft fur texture and gradual shading on a ferret.
🐾 Ferrets have very flexible spines that let them twist and stretch — use flowing curved lines to capture dynamic poses and movement.
How do I teach my child to draw a detailed ferret step-by-step?
What materials do I need to draw a realistic ferret with my child?
What ages is drawing a detailed ferret suitable for?
What are the benefits and variations of drawing a ferret with kids?
