How to draw a computer - a free computer drawing guide
Draw a computer step by step using simple shapes; add a screen, keyboard, mouse, and shading while learning proportions and basic perspective.


Drawing Apps
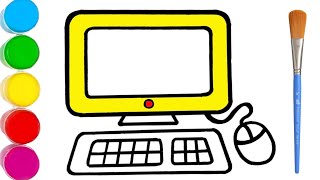
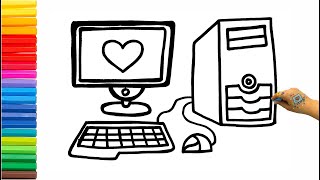
Photos of computer drawing examples


Step-by-step guide to draw a computer
How to Draw a Simple Computer - Easy Tech Fun for Kids!
Step 1
Place your paper flat in landscape (horizontal) so the screen will fit nicely.
Step 2
Lightly draw a large rectangle near the top-center that is about twice as wide as it is tall to be the computer screen.
Step 3
Add thickness to the screen by drawing short lines offset to the right from the screen edges and connecting them to form a thin side and top edge.
Step 4
Draw a slim rectangle centered under the screen to make the stand.
Step 5
Draw a wide flat oval or rectangle under the stand to make the base that the screen sits on.
Step 6
Draw a rectangle below the base angled a little toward the right to be the keyboard.
Step 7
Inside the keyboard rectangle lightly draw horizontal rows and a few vertical lines to make the keys and a longer bottom line for the spacebar.
Step 8
Draw an oval to the right of the keyboard for the mouse and add a short curving line in front if you want a cord or a small center line for the buttons.
Step 9
Draw a smaller rectangle inside the screen rectangle to be the display area leaving a thin border as the bezel.
Step 10
Trace over the lines you want to keep with a slightly darker pencil so your computer looks clean.
Step 11
Erase extra sketch lines and stray marks so only the final shapes remain.
Step 12
Choose a light source (for example top-left) and lightly shade the opposite sides and the undersides of the screen stand and base with soft pencil strokes.
Step 13
Add darker shading between the keys and draw a faint shadow beneath the whole computer to make it sit on the page.
Step 14
Share your finished computer drawing on DIY.org
Help!?
What can I use if I don't have a soft pencil or eraser for this computer drawing?
If you don't have a soft pencil or eraser, use a regular HB pencil for the light sketch lines and a clean cloth or vinyl eraser to remove stray marks when erasing extra sketch lines.
My screen looks lopsided after I add the short offset lines to give it thickness—how do I fix it?
If the screen looks lopsided when you add thickness with short lines offset to the right, lightly redraw those offset lines parallel to the screen edges and connect them straight before tracing over the lines you want to keep.
How can I adapt the steps for different ages so it's fun but doable?
For younger kids, have them trace and color a pre-drawn large rectangle for the screen and a simple oval mouse, while older kids can add detailed keys, beveled edges, and the shading between the keys and the faint shadow beneath the whole computer.
What are some ways to personalize or extend the finished computer drawing?
To enhance the drawing, add icons or a scene inside the smaller display rectangle, color or pattern the bezel, base, and keyboard, draw a cord on the mouse, and then share your finished computer drawing on DIY.org.
Watch videos on how to draw a computer
Simple Computer Drawing Tutorial for Kids | Easy Drawing For Kids | Fun & Easy Art For Children
4 Videos
Simple Computer Drawing Tutorial for Kids | Easy Drawing For Kids | Fun & Easy Art For Children

How to Draw a Computer in Easy & Simple Steps | Computer Parts Drawing
How to Draw a Computer with a PC Case! | Fun and Easy Drawing for Kids

Step-by-Step Guide: How to Draw a Computer for Beginners #ComputerDrawing
Facts about drawing and perspective
🖥️ The first general-purpose electronic computer (ENIAC) was so big it filled a room — drawing a tiny computer is a fun contrast!
⌨️ The QWERTY keyboard layout was created for 19th-century typewriters and is still the most common layout today.
🖱️ The very first computer mouse, invented in 1964 by Douglas Engelbart, was made of wood and had one button.
📐 Linear perspective (using vanishing points) was popularized during the Renaissance to make flat pictures look 3D.
🎨 Adding simple shading and a cast shadow can instantly make a flat drawing look like a solid computer sitting on a desk.
How do I teach my child to draw a computer step by step?
What materials do I need to draw a simple computer with my child?
What ages is this step-by-step computer drawing activity suitable for?
What are the benefits of drawing a computer and how can I vary the activity?
