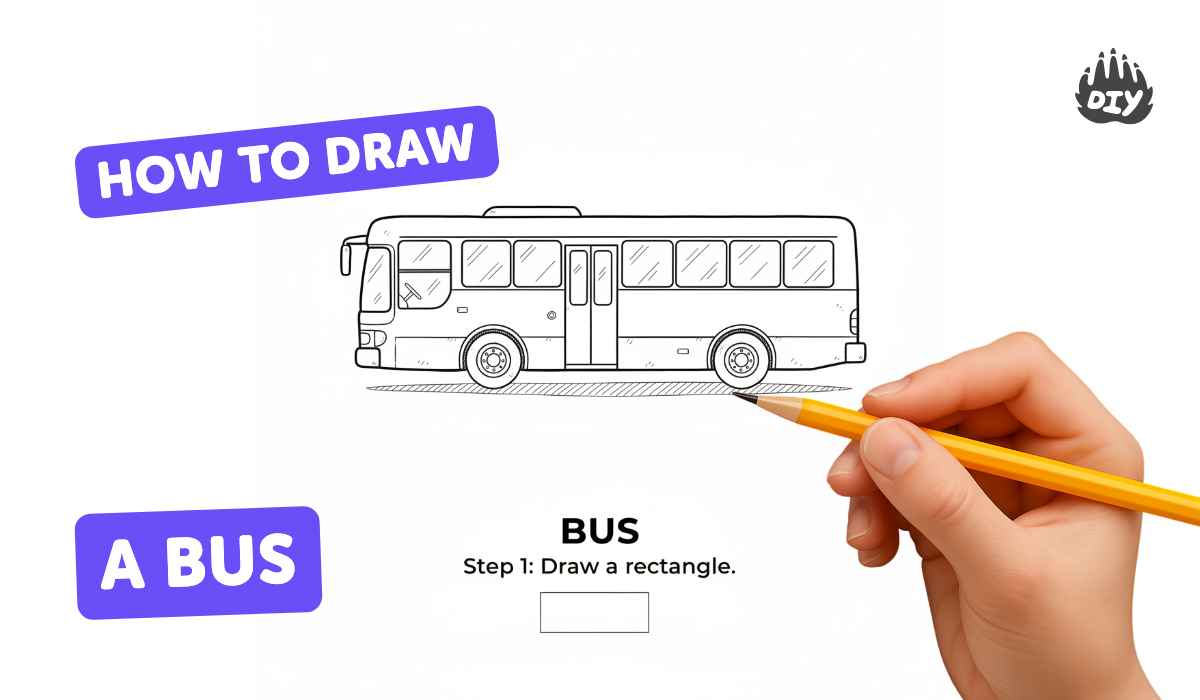
How to draw a bus - a free bus drawing guide
Learn to draw a simple bus step-by-step using pencil, ruler, and coloring tools. Practice shapes, perspective, windows, wheels, and adding details.

Drawing Apps
Photos of bus drawing examples


Step-by-step guide to draw a bus
CBeebies | How to Make a Miniature Biggleton Bus
Step 1
Place your paper landscape and use the ruler to draw a long horizontal rectangle with your pencil for the bus body.
Step 2
Soften the bus shape by sketching small rounded curves on the four rectangle corners.
Step 3
Use the ruler to mark two evenly spaced dots beneath the rectangle for where the wheels will go.
Step 4
Draw two large circles around the dots to make the bus wheels.
Step 5
Draw a smaller circle inside each wheel to make the wheel hubs.
Step 6
Use the ruler to draw four or five equal vertical lines inside the rectangle to make the windows.
Step 7
Draw a tall vertical rectangle near the front of the bus for the passenger door.
Step 8
Draw a slanted rectangle at the front of the bus for the windshield.
Step 9
Draw two small circles at the front for headlights.
Step 10
Draw a small rectangle above the windshield for a destination sign.
Step 11
Draw a small side mirror near the front of the bus as a tiny rounded rectangle or oval.
Step 12
Erase any guide marks and extra pencil lines you do not want in the final drawing.
Step 13
Trace over the final pencil lines with a black marker or dark pencil to make the outline bold.
Step 14
Color your bus using your coloring materials and choose fun colors for the body windows and wheels.
Step 15
Share your finished bus drawing on DIY.org
Help!?
What can we use if we don't have a ruler, black marker, or coloring materials?
Use the straight edge of a hardcover book or folded cardboard to draw the long horizontal rectangle and vertical window lines, trace final lines with a dark pencil or fine-tip pen if you lack a black marker, and color the bus with crayons, watercolor paints, torn colored paper, or stickers.
My wheels look uneven or my window lines are crooked — how do I fix that?
If the wheels are uneven, re-mark the two evenly spaced dots beneath the rectangle with your ruler before drawing circles and use a coin to trace identical wheel circles, and if window lines are crooked erase the vertical window lines lightly and redraw them using the ruler.
How can I adapt this drawing activity for younger or older children?
For younger children pre-draw the softened bus body and wheel dots for them to trace and color or give them chunky crayons and stickers for the windows, while older kids can add perspective, detailed window panes, passengers, and realistic shading after tracing the final lines.
How can we extend or personalize the bus drawing?
Personalize and extend the activity by writing a route or bus number in the small rectangle destination sign, cutting and gluing colored paper for curtains in the windows, adding a logo to the bus body, or attaching the wheel hubs with brass fasteners so the drawn wheels can rotate.
Watch videos on how to draw a bus
Ten Little Buses | Vehicle Song for Kids | Nursery Rhymes & Kids Songs
4 Videos
Ten Little Buses | Vehicle Song for Kids | Nursery Rhymes & Kids Songs
Big Bus Nursery Rhymes | Educational Videos For Toddlers | Buses For Children | Bobby The Bus
Ten Little Buses! + 2 HOURS of Nursery Rhymes and Kids Songs | Little Baby Bum
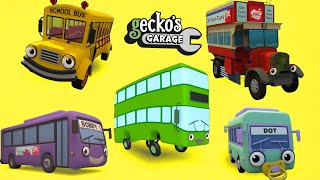
Counting Five Big Buses | Gecko's Garage | Educational Videos For Toddlers | Buses For Children
Facts about drawing for kids
🚍 City buses can carry anywhere from about 30 to 100 passengers depending on their size and design.
🖊️ Using a ruler and pencil makes it much easier to draw the straight sides and windows of a bus cleanly.
🎯 One-point perspective (a single vanishing point) is a simple trick to make a bus look like it's moving away on the page.
⚙️ The wheel was invented over 5,000 years ago — wheels existed long before vehicles like buses were invented.
🟨 School buses are painted a special yellow because our eyes notice yellow quickly, which helps keep kids safer.
How do I teach my child to draw a simple bus step-by-step?
What materials do I need to draw a bus with my child?
What ages is learning to draw a simple bus suitable for?
What are the benefits and easy variations for drawing a bus, and are there safety tips?
