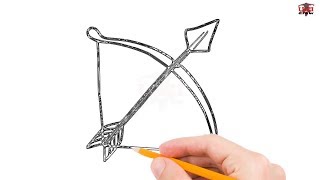
How to draw a bow and arrow - a free bow and arrow drawing guide
Draw a detailed bow and arrow using pencil, ruler, and eraser; practice proportions, curve shaping, string placement, and basic shading to add depth.

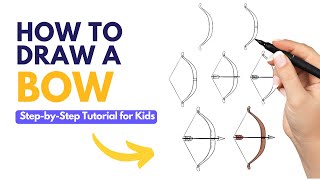
Step-by-step guide to draw a bow and arrow
How To Draw A Bow And An Arrow Step By Step 🏹 Bow And Arrow Drawing Easy
Step 1
Place your paper on a flat surface and draw a light vertical centerline down the middle with your ruler and pencil.
Step 2
Mark two points on the centerline about three-quarters of the paper apart to show the top and bottom of your bow.
Step 3
Draw a small oval or short rectangle centered on the centerline between the two marks to make the bow grip.
Step 4
Draw one smooth outer curve from the top mark down to the grip on one side of the centerline to form one limb.
Step 5
Draw the matching smooth outer curve from the bottom mark up to the grip on the other side to finish the outer shape.
Step 6
Draw a second inner curve parallel to the first curve on one limb to show the bow’s thickness.
Step 7
Draw the parallel inner curve on the other limb so both sides have the same thickness.
Step 8
Lightly erase the centerline outside the grip so your bow shape is clean.
Step 9
Make small notch marks at the top and bottom ends of the bow where the string will sit.
Step 10
Use your ruler to draw a straight string line connecting the two notches.
Step 11
Draw a straight line with your ruler for the arrow shaft lying across or next to the bow.
Step 12
Add a triangular arrowhead at one end of the shaft and three simple fletchings at the other end.
Step 13
Decide where the light is coming from by drawing a tiny sun or arrow to show the light direction.
Step 14
Shade the side of the bow that is away from the light with light pencil strokes and gently blend with a tissue to add depth.
Step 15
Take a photo or scan your finished bow and arrow and share your creation on DIY.org.
Help!?
What can we use instead of a ruler, tissue, or scanner if we don't have them?
Use a hardcover book or a straight piece of cardboard as a ruler for the centerline and string (steps 1 and 10), a clean finger or cotton swab to gently blend shading instead of a tissue (step 14), and a smartphone camera in place of a scanner to take the photo for DIY.org (step 15).
My bow looks lopsided or the curves don't match—how do I fix that?
Lightly redraw using the vertical centerline and re-measure the top and bottom marks so the outer curves mirror each other (steps 1–6), erase the centerline outside the grip to clean the shape (step 8), and use the ruler to make the string perfectly straight (step 10).
How can I adapt this activity for younger or older children?
For ages 3–6, pre-draw the centerline, marks, and grip for them to trace and color the bow, while older kids (10+) can refine the parallel inner curves for thickness (steps 6–7), practice directional shading and blending (step 14), and add a background before photographing for DIY.org (step 15).
How can we enhance or personalize our bow and arrow drawing?
Personalize it by adding decorative patterns on the grip and limbs, sketching wood grain before shading (steps 4–7 and 14), creating custom fletchings and a stylized arrowhead (step 12), or cutting out the bow to make a simple 3D prop to photograph for DIY.org (step 15).
Watch videos on how to draw a bow and arrow
How to Draw a Bow & Arrow Step by Step Easy for Beginners/Kids - Simple Drawing Tutorial
4 Videos
How to Draw a Bow & Arrow Step by Step Easy for Beginners/Kids - Simple Drawing Tutorial
Draw a Bow: Easy and Fun Step-by-Step for Kids! 🏹
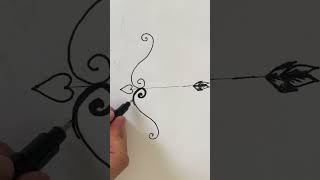
How to Draw a Bow and Arrow | simple drawing archery | step by step #shorts
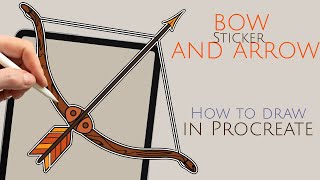
How to draw a bow and arrow | A simple illustration for beginners in procreate
Facts about pencil drawing and sketching
🎯 The bow and arrow have been used for hunting and warfare for thousands of years across many cultures.
🏹 Archery is both an ancient skill and a modern Olympic sport where archers aim for concentric bullseye targets.
✏️ Artist pencils are graded from very soft (9B) to very hard (9H); beginners commonly use HB or 2B for sketching outlines.
📏 A ruler or straightedge makes it easy to keep the arrow shaft straight and check the bow's symmetry and proportions.
🎨 Shading techniques like hatching and varying pencil pressure can turn a flat outline into a convincing 3D form.
How do I draw a detailed bow and arrow step by step?
What materials do I need to draw a bow and arrow?
What ages is drawing a bow and arrow suitable for?
What are the benefits of drawing a bow and arrow for kids?
