How to draw a bearded dragon - a free bearded dragon drawing guide
Draw a detailed bearded dragon step by step using simple shapes, outlines, shading, and texture. Practice observation, fine motor skills, and basic reptile anatomy.

Drawing Apps
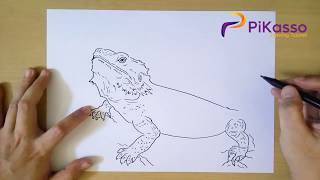
Photos of bearded dragon drawing examples


Step-by-step guide to draw a bearded dragon
Learn How To Draw a Bearded Dragon. (Step by step Drawing tutorial)
Step 1
Gather your materials and put them where you can reach them.
Step 2
Place your paper on a flat well-lit surface.
Step 3
Lightly sketch a large oval in the middle of the page for the bearded dragon’s body.
Step 4
Draw a smaller circle at one end of the oval for the head.
Step 5
Connect the head and body with two short neck lines.
Step 6
Draw a long tapering tail from the opposite end of the oval using two curved lines that meet at a point.
Step 7
Sketch four simple leg placements using ovals or rectangles where the legs will go.
Step 8
Add feet and claws at the ends of each leg using small triangles for the toes.
Step 9
Draw the beard by adding a row of short triangular spikes under the lower jaw.
Step 10
Add rows of small overlapping scales across the back and tail using short curved strokes to show texture.
Step 11
Draw facial details like the eye nostril and mouth using small simple shapes.
Step 12
Refine the outer outline by smoothing and darkening the final contours you want to keep.
Step 13
Erase the light construction lines carefully so your final drawing looks clean.
Step 14
Add light shading with your pencil or blending stump to show form and depth on the body and tail.
Step 15
Share your finished bearded dragon drawing on DIY.org.
Help!?
What can we use if we don't have a blending stump or a kneaded eraser listed in the materials?
Use a clean fingertip, a folded tissue, or a cotton swab to do the 'Add light shading with your pencil or blending stump' step and a soft white vinyl eraser or the corner of a pencil eraser to 'Erase the light construction lines' instead of a kneaded eraser.
My bearded dragon's head or tail looks out of proportion — how do I fix that without ruining the drawing?
When the 'Lightly sketch a large oval' and 'Draw a smaller circle' steps look off, hold your pencil at arm's length to compare sizes, erase only the construction lines that are wrong, and redraw the oval or circle lightly before you 'Refine the outer outline.'
How can I adapt the activity for different ages and skill levels?
For ages 3–6 simplify to tracing a large oval and circle with a thick crayon and skip the 'rows of small overlapping scales,' for ages 7–10 follow all steps with pencil and eraser, and for older kids add extra detail like more scales and careful 'light shading' with a blending stump.
What are fun ways to enhance or personalize the finished bearded dragon drawing?
After you 'Refine the outer outline' and 'Add light shading,' personalize by coloring with colored pencils or watercolors, adding a background habitat like rocks and plants, and then photograph the artwork to 'Share your finished bearded dragon drawing on DIY.org.'
Watch videos on how to draw a bearded dragon
How to Draw Bearded Dragon step by step
4 Videos
How to Draw Bearded Dragon step by step
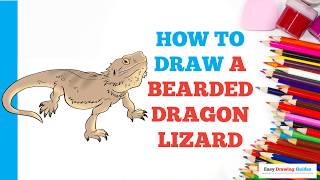
How to Draw a Bearded Dragon Lizard in a Few Easy Steps: Drawing Tutorial for Beginner Artists

Easy Dragon Drawing Step by Step | How To Draw Dragon for Kids & Beginners
How to draw a DRAGON in 5 MINUTES for KIDS (EASY!)
Facts about reptile anatomy
🦎 Bearded dragons (Pogona species) puff out and darken their throat — their “beard” — to look bigger when they feel threatened or are showing off.
🌞 Bearded dragons are cold-blooded and spend hours basking in sunlight or on warm rocks to raise their body temperature.
🎨 Great animal drawings often begin with simple shapes: use circles, ovals, and triangles to map out the body before adding details.
✍️ To suggest scales and spikes, use short, varied strokes and gentle shading — tiny marks can create realistic texture.
👀 Practicing observational drawing improves fine motor skills and helps you spot small details like ear openings, claws, and scale patterns.
How do I draw a detailed bearded dragon step by step?
What materials do I need to draw a bearded dragon?
What ages is drawing a detailed bearded dragon suitable for?
What are the benefits and safe variations of drawing a bearded dragon?
