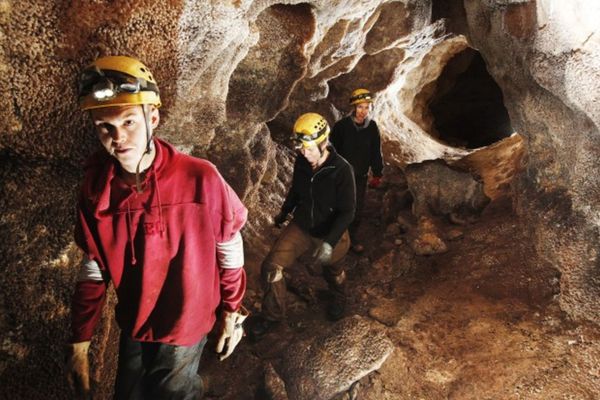
Go spelunking
Explore a supervised local cave with adult guidance, wearing a helmet and headlamp, mapping passages, observing rocks and formations, and practicing safe caving.


Step-by-step guide to explore a supervised local cave
Caves for Kids | Kids explore CAVES with waterfalls, slides and stairs | All about CAVES
Step 1
Put on your helmet and fasten the chin strap.
Step 2
Turn on your headlamp to make sure the light is steady.
Step 3
Put on your sturdy shoes.
Step 4
Put on your gloves.
Step 5
Put a notebook and pencil into your backpack.
Step 6
Put a water bottle into your backpack.
Step 7
Meet the adult supervisor at the cave entrance and listen to the safety instructions.
Step 8
Enter the cave while staying within arm's reach of the adult.
Step 9
Walk slowly behind the adult.
Step 10
Stop at each junction and draw the passage shape in your notebook.
Step 11
Count the number of steps between two visible features.
Step 12
Mark the step count on your map in your notebook.
Step 13
Draw an arrow on your map showing the direction you were facing at that spot.
Step 14
Share your finished cave map and notes on DIY.org.
Help!?
What can we use if we don't have a helmet, headlamp, or sturdy gloves?
Use a bicycle helmet with a securely fastened chin strap, a flashlight with a head strap or clip-on light instead of the headlamp, and gardening or work gloves in place of specialized caving gloves.
My headlamp flickered and my notebook pages got wet—how can we avoid problems during the cave trip?
Before entering, 'Turn on your headlamp to make sure the light is steady' and bring spare batteries or a backup flashlight, and put a pencil and a small waterproof notebook or zip-top bag in your backpack to keep drawings from smudging.
How should we adapt the steps for a 4-year-old versus a 12-year-old?
For a 4-year-old keep the route very short with the adult within arm's reach, have them draw simple passage shapes and count a few steps, while a 12-year-old can walk slowly behind the adult, record detailed passage shapes, mark step counts and arrows, and help prepare the map to share on DIY.org.
What are easy ways to make our cave map more detailed or personalized before sharing it on DIY.org?
Measure your average step length at the cave entrance to convert step counts into distances, add colored-pencil symbols and a legend for features, draw the direction arrow clearly, and attach photos or labeled notes from your backpack before uploading to DIY.org.
Watch videos on how to explore a supervised local cave
Let's Explore Caves! | SciShow Kids Compilation
4 Videos

Let's Explore Caves! | SciShow Kids Compilation
Where Do Caves Come From? | Let's Explore Caves! | SciShow Kids

What is a Cave | Science for Kids

How Can I Teach My Child About Caves? - Childhood Education Zone
Facts about caving for kids
🕳️ Most caves form when slightly acidic water slowly dissolves rock—limestone caves are the most common type.
🪨 Stalactites (hanging) and stalagmites (rising) grow only a few millimeters to centimeters a year and can take centuries to form.
🔦 Modern LED headlamps let cavers keep both hands free for climbing and mapping while shining light for many hours.
⛑️ Wearing a helmet with a chin strap is essential in caves to protect against bumps, falling rocks, and scrapes.
🧭 Some cave systems stretch for hundreds of kilometers—Mammoth Cave is the longest known cave system in the world.
How do I take my child spelunking safely?
What materials do I need for child-friendly spelunking?
What ages are suitable for going spelunking with children?
What safety precautions should I take when spelunking with kids?
