Get creative with wrap and watercolors
Decorate recycled paper using watercolor paints and plastic wrap to create textured, marbled gift wrap; practice color blending, layering, and safe crafting techniques.


Step-by-step guide to get creative with wrap and watercolors
Step 1
Cover your table with the protective table cover or tray to keep paint off surfaces.
Step 2
Tape one recycled paper sheet flat to the covered table so the paper will not move.
Step 3
Set your watercolor paints palette a cup of water and a paper towel within reach.
Step 4
Wet your brush and paint a light wash of one color across part of the paper.
Step 5
Paint a second color next to or over the first while it is still wet so the colors blend.
Step 6
Crumple a piece of plastic wrap gently into a loose ball with your hands.
Step 7
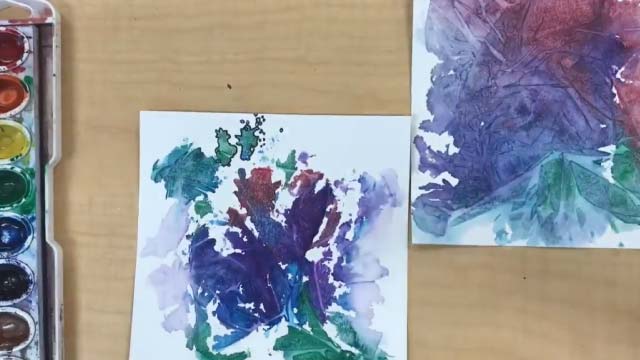
Press the crumpled plastic wrap onto the wet painted areas to create textured patterns.
Step 8
Let the paint dry completely while the plastic wrap stays on the paper.
Step 9
Carefully peel off the plastic wrap and then trim or fold your decorated paper to make gift wrap or gift tags.
Step 10
Share a photo of your finished marbled gift wrap on DIY.org
Final steps
You're almost there! Complete all the steps, bring your creation to life, post it, and conquer the challenge!

Help!?
What can I use instead of the protective table cover, recycled paper sheet, or plastic wrap if I don't have them?
Use a garbage bag or layers of newspaper as the protective table cover or tray, substitute a sturdy white printer paper or brown kraft paper for the recycled paper sheet, and try a clean crinkled zip-top sandwich bag or wax paper in place of the crumpled plastic wrap.
My colors aren't blending or the paper rips when I peel off the plastic wrap—how can I fix that?
Work on smaller areas and paint the second color while the first is still wet or mist with your cup of water to keep it damp, tape the recycled paper sheet flat to the table to prevent movement, and let the paint dry completely before carefully peeling off the crumpled plastic wrap or use thicker paper to avoid tearing.
How can I adapt the activity for a toddler versus an older child?
For toddlers, tape the recycled paper sheet down, give a large brush and washable watercolor paints with pre-crumpled plastic wrap and close supervision for pressing and trimming, while older kids can try multiple wet-on-wet washes, tighter crumples of plastic wrap for varied textures, and precise trimming or folding into gift tags or wrap.
What are some ways to extend or personalize the marbled gift wrap after I peel off the plastic wrap?
Try sprinkling salt onto the wet washes before pressing the crumpled plastic wrap for extra texture, add metallic watercolor highlights or stamped designs after the paint dries, then trim or fold the decorated paper into custom gift wrap or gift tags and share a photo on DIY.org.
Watch videos on how to get creative with wrap and watercolors
Easy Watercolor painting for kids, step by step tutorial, easy painting
4 Videos
Easy Watercolor painting for kids, step by step tutorial, easy painting
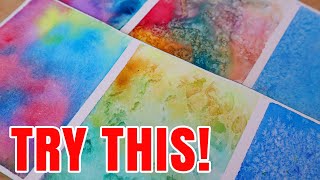
3 Fun and Easy Watercolor Techniques to Try with Kids

How Can You Use Plastic Wrap to Create Textures in Watercolor Painting?
Basic Watercolor Techniques for Kids
Facts about recycled paper and watercolor crafts
♻️ Turning used paper into gift wrap is a fun upcycle: recycled paper often has unique textures that make each sheet one-of-a-kind.
🎨 Many watercolor paints can be reactivated with a little water, so you can lift and blend colors even after they dry.
🌈 Placing similar hues next to each other (like blues and greens) usually gives bright blends; mixing opposites can make browns.
🧪 Traditional paper marbling used floating inks on water; the plastic wrap method gives a safe, kid-friendly version with similar swirls.
🧴 Wrinkled plastic wrap traps wet paint and dries into marbled, textured patterns — a simple trick artists use for cool effects!
How do you make marbled gift wrap with watercolors and plastic wrap?
What materials do I need to create watercolor and plastic-wrap marbled gift wrap?
What ages is this watercolor and plastic wrap marbling activity suitable for?
What safety tips and fun variations can I try with this marbling craft?


One subscription, many ways to play and learn.
Only $6.99 after trial. No credit card required