Fly the hoop planes
Make and decorate lightweight hoop planes from paper and straws, then test launches aiming to fly them through hanging hoops to learn flight basics.


Step-by-step guide to Fly the hoop planes
Step 1
Clear a flat workspace so you have room to fold and throw safely.
Step 2
Fold one sheet of paper into a simple dart-style paper airplane along its center crease.
Step 3
Trim the nose of the airplane with scissors to make the front slimmer.
Step 4
Slide a straw along the center underside of the airplane to act as a stiff fuselage.
Step 5
Tape the straw to the airplane with a small piece of tape so it stays in place.
Step 6
Cut a strip of paper about 2 cm wide and 20 cm long to make a hoop.
Step 7
Tape the strip ends together to form a small paper hoop.
Step 8
Slide the paper hoop over the nose of the airplane until it sits near the front.
Step 9
Secure the paper hoop to the airplane with a tiny piece of tape so it won’t fall off.
Step 10
Decorate your airplane and hoop with coloring materials to make them bright and fun.
Step 11
Tie a length of string to your target hoop and hang it in a doorway or outside where there is open space.
Step 12
Stand a few paces back and gently throw your hoop plane aiming through the hanging target hoop.
Step 13
Try three throws and tweak your throw or plane setup to fly straighter or higher based on what you see.
Step 14
Share your finished hoop plane and your best flight on DIY.org
Help!?
What can I use if I don't have a drinking straw, tape, or scissors listed in the steps?
If you don't have a drinking straw, roll and tape a thin strip of paper along the center underside as the fuselage, and if you lack tape use a small dab of glue and if you don't have scissors slim the nose by folding extra creases and tearing carefully.
My hoop plane keeps falling off the hoop or flies crooked — how can I fix that?
If the hoop slips, secure it with a tiny piece of tape at the front as instructed, and if the plane flies crooked try trimming the nose slimmer with scissors, sliding the straw fuselage a millimeter left or right along the center crease, or adding tiny balance tape tabs near the hoop.
How can I adapt this activity for different ages or skill levels?
For younger children pre-fold the dart airplane and pre-cut the 2 cm × 20 cm paper strip so they can simply slide, tape, and decorate, while older kids can design larger hoops, experiment with straw placement and nose trims, and record distances and three-throw results.
What are some fun ways to extend or personalize the hoop-plane challenge after finishing the basic steps?
Make multiple paper hoops of different sizes to hang at varied heights, add a small paperclip to the airplane nose for longer flights, decorate each plane uniquely, and keep a scorecard for the three throws before sharing your best flight on DIY.org.
Watch videos on how to Fly the hoop planes
A Beginner's Guide to Flying RC Planes
4 Videos

A Beginner's Guide to Flying RC Planes
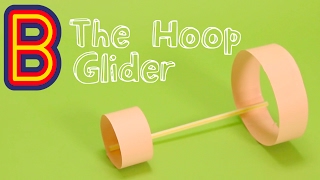
How to Make a Hoop Glider | Beano Makes
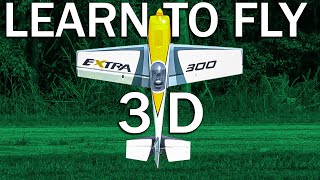
Learn Beginner 3D Flying Techniques
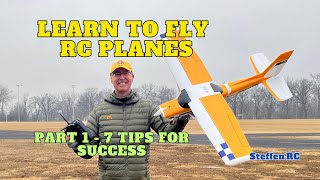
Tutorial on how to fly RC Planes: Introduction to flying - Part 1 of 5
Facts about aerodynamics for kids
✈️ Paper airplanes can fly surprisingly far — clever folds and a smooth launch make a big difference.
🌀 Aerodynamics explains how wing shape and angle affect whether your hoop plane soars or dives.
🪶 Adding a small weight at the nose (like a paper clip) helps stabilize flights so planes are less likely to tumble.
🎯 Slower, steady launches often make it easier to fly through hoops than wild fast throws — aim beats power!
♻️ Drinking straws are lightweight and strong, perfect as body tubes or reinforcements for homemade planes.
How do I make and launch lightweight hoop planes with kids?
What materials do I need to build hoop planes and set up hanging hoops?
What ages are hoop plane activities suitable for, and how much adult help is needed?
What safety tips and fun variations can we try with hoop planes?
