Find ways to get inspired for your Animal Builds
Explore parks, books, photos, and sketches to gather ideas and plan simple animal builds; make mood boards and quick prototypes.


Step-by-step guide to find inspiration for your animal builds
Step 1
Go to a park garden or your backyard and watch animals for 10 minutes with an adult.
Step 2
Make a quick sketch of one animal you saw.
Step 3
Write three short words that describe the animal’s shape color or movement on your sketch page.
Step 4
Look through books magazines or printed photos and pick six animal images you like.
Step 5
Glue or tape those six images onto a large sheet of paper to start your mood board.
Step 6
Stick a sticky note next to each image and write one idea you like from it.
Step 7
Gather small recycled bits for prototypes such as toilet rolls bottle caps fabric scraps and pipe cleaners.
Step 8
Choose one favorite idea from your mood board to turn into a quick prototype.
Step 9
Build a simple prototype using your recycled bits and glue or tape in 20 minutes.
Step 10
Make one small change to your prototype to try a different look or movement.
Step 11
Draw a simple plan of your final animal build showing the main shapes on paper.
Step 12
Label each part of your plan with the materials you will use.
Step 13
Share photos and a short description of your finished mood board sketches and prototypes on DIY.org.
Help!?
I can't find pipe cleaners or bottle caps—what can we use instead when gathering recycled bits for prototypes?
Use twist ties, cut drinking straws, rolled cardboard strips, buttons or beads as replacements for pipe cleaners and bottle caps, and attach them with glue or tape during the 'Build a simple prototype' step.
My prototype keeps falling apart during the 20-minute build—how can we make it sturdier?
Reinforce weak joints by overlapping cardboard, wrapping connections with tape or using paperclips or rubber bands, and let glued areas rest briefly before adding weight while following the 'Build a simple prototype using your recycled bits and glue or tape in 20 minutes' instruction.
How can I adapt the activity for different ages, like preschoolers, elementary kids, and tweens?
For preschoolers shorten the animal watch to 3–5 minutes and provide pre-cut recycled pieces and adult help for gluing, for elementary kids keep all steps but allow simple labels on sticky notes, and for tweens add constraints like using only three material types, enforcing the 20-minute build, and requiring a labeled plan drawing before sharing on DIY.org.
How can we enhance or personalize the animal builds beyond the basic prototype and mood board?
Add movement with split-straw hinges or brad fasteners, decorate using fabric scraps or paint from your gathered bits, write a short backstory on the sticky notes next to each mood-board image, and photograph the finished mood board, sketches and prototype to share on DIY.org.
Watch videos on how to find inspiration for your animal builds
LEGO DUPLO Animals: Penguin Monkey, Turtle, Zebra, Tiger Build Instructions - Easy Activity for Kids
4 Videos
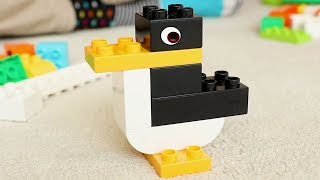
LEGO DUPLO Animals: Penguin Monkey, Turtle, Zebra, Tiger Build Instructions - Easy Activity for Kids
Great LEGO DUPLO Building Ideas! Animals Build Kids Activities: Crocodiles, Birds, Giraffes and More

LIVE: DIY Tiny Animal Mansions 🏡 How to Build Homes for Ants, Rats, Turtles, and More! 🕷️

Build Your Favorite Animals with Toy Sets 🦓 | Fun Learning and Play for Kids!
Facts about creative design and prototyping for kids
🪡 Velcro was inspired by burrs — Swiss engineer Georges de Mestral invented it after examining burrs stuck to his dog's fur.
🐜 Ants can carry about 10–50 times their own body weight, a neat idea to borrow when designing tiny strong limbs for animal builds.
📷 Camera traps use motion and heat sensors so photographers can capture shy wildlife without disturbing them — great for finding natural poses and behaviors.
🎨 Mood boards pull color, texture, and pose ideas together — you can make a playful one in 20–30 minutes with photos, magazine clippings, and fabric scraps.
✂️ Low-fidelity prototypes from cardboard, clay, or paper are cheap and fast — many designers make several versions in under an hour to test shapes and movement.
How do I help my child explore parks, books, photos, and sketches to plan simple animal builds?
What materials do we need to make mood boards and quick prototypes for animal builds?
What ages is this 'find inspiration for animal builds' activity suitable for?
What are the benefits of using mood boards and quick prototypes when planning animal builds?
