Fake an injury with makeup
Use safe, non-toxic makeup and simple supplies to create realistic fake injuries for costumes, practicing blending, color mixing, with adult supervision.


Step-by-step guide to create fake injuries with makeup
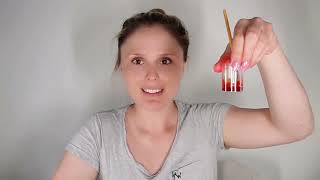
How to Create a Realistic Scar using Scar Wax| Fake Scar wound | Special effect Makeup| SFX Makeup
Step 1
Put on the towel or old shirt to protect your clothes.
Step 2
Prepare your skin by washing your face gently with soap and water and pat it dry.
Step 3
Lay out your makeup palette brushes sponge cotton swabs paper towel cup of water and mirror on a clean surface.
Step 4
With an adult do a patch test by placing a tiny dot of paint on your wrist and waiting five minutes to check for irritation.
Step 5
Choose whether you will make a bruise or a cut for your costume look.
Step 6
Mix the base color for your chosen injury on the palette by blending small amounts of paint with a brush.
Step 7
Press the makeup sponge into the base color so it is evenly loaded.
Step 8
Dab the sponge onto the skin where you want the injury to be to lay down the base.
Step 9
Use a clean part of the sponge or a soft brush to blend the base outward for a soft edge.
Step 10
Use a small brush to add a darker color near the center or edges to create depth.
Step 11
Use a cotton swab to add small touches of bright red for fresh wounds or yellow green for healing and softly blend them.
Step 12
If you made a cut ask an adult to help you add a tiny amount of washable fake blood along the line and blot gently for a realistic look.
Step 13
Clean your tools wash your face to remove the makeup and share a photo of your finished fake injury on DIY.org.
Help!?
If I don't have a makeup palette or washable fake blood, what safe substitutions can I use?
You can use water-based face paints, lipstick or eyeshadow from a cosmetic kit instead of the palette, and a tiny dab of diluted red washable paint or berry jam as fake blood substitute with an adult and only after doing the patch test on your wrist as the instructions say.
What should I do if the base looks streaky or the colors are too harsh when I dab the sponge onto the skin?
If the base is streaky, follow the step to use a clean part of the sponge or a soft brush to blend the base outward and lightly wet the sponge from the cup of water or blot on the paper towel to soften the paint.
How can I adapt this fake-injury activity for different age groups?
For younger children have an adult perform the patch test and handle small brushes and the fake blood step while the child chooses colors and watches, let older children do the sponge dabbing and blending with supervision, and teens can complete all steps including adding depth and uploading the photo to DIY.org on their own.
How can I make the fake cut or bruise look more realistic or personalized?
To enhance realism, layer a small torn piece of tissue over the blended base before adding darker color and, with adult help, a tiny amount of washable fake blood along the cut, then photograph different versions to pick your favorite for DIY.org.
Watch videos on how to create fake injuries with makeup
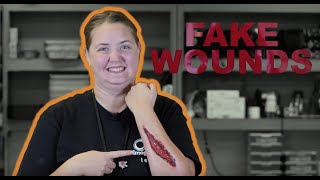
How to make FAKE INJURIES 😳
3 Videos
How to make FAKE INJURIES 😳
Create a fake wound for Halloween

SFX Makeup Wounds | Beginner Friendly Makeup Tutorial | Fast Paced Makeup Tutorial
Facts about face painting and safe costume makeup
🎬 Special effects makeup has been used in films for over a century — the Academy first gave an Oscar for Best Makeup in 1981.
🎨 Bruises change color as they heal (red → purple → green → yellow), and makeup artists copy those stages to make wounds look real.
🧴 Most kid-friendly face paints are water-based and rinse off with soap and water, but you should always patch-test first.
🧪 SFX artists build cuts and scars with materials like liquid latex, gelatin, or silicone — each material behaves differently when painted.
👀 Realistic fake injuries come from layering colors, blending edges, and adding tiny shadows and highlights to create depth.
How do I fake an injury with makeup for a costume?
What materials do I need to fake injuries safely on my child?
What ages is fake injury makeup suitable for?
How can I keep fake-injury makeup safe and hygienic?
