Embroider a design
Embroider a simple design on fabric using a needle, thread, and hoop, learning basic stitches, patterns, and safe hand sewing techniques.


Step-by-step guide to embroider a simple design
20 Basic Hand Embroidery Stitches Sampler for Absolute Beginners
Step 1
Gather all your materials and bring them to a tidy workspace.
Step 2
Choose a simple design and slide the printed pattern under the fabric so the design shows through.
Step 3
Trace the design onto the fabric with the fabric marker or pencil using light lines.
Step 4
Loosen the embroidery hoop and place the fabric over the inner hoop then press the outer hoop on and tighten it so the fabric is smooth.
Step 5
Cut an 18 inch length of embroidery floss using the small scissors.
Step 6
Separate the floss into two strands by pulling them apart gently.
Step 7
Thread one of the two strands through the needle eye until it goes all the way through.
Step 8
Tie a small knot at the end of the thread to stop it from pulling through the fabric.
Step 9
Practice a running stitch by bringing the needle up at the start of a line and making small even up and down stitches along the traced line.
Step 10
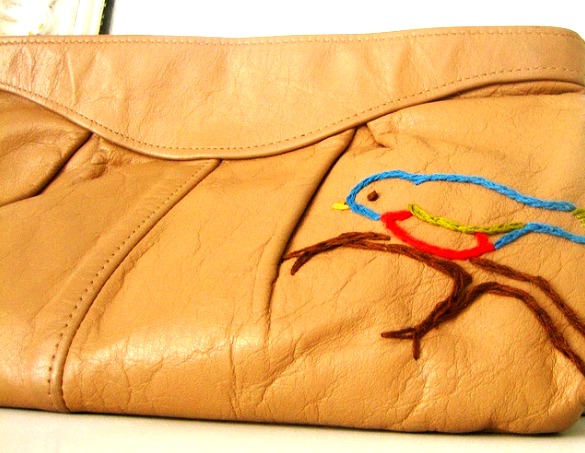
Use backstitch to make a solid outline by bringing the needle up ahead of your last stitch then going back into the end of the previous stitch and repeating.
Step 11
Fill a small shape with satin stitch by laying parallel stitches side by side across the shape until it is covered.
Step 12
Flip the hoop to the back and tie off your thread with a small knot close to the fabric to secure it.
Step 13
Trim the thread close to the knot with the small scissors so the back is neat.
Step 14
Take a photo of your embroidered design and share your finished creation on DIY.org
Help!?
What can we use if we don't have an embroidery hoop or a fabric marker?
If you don't have an embroidery hoop, use a wooden picture frame or tape the fabric taut to a clipboard, and if you lack a fabric marker use a pencil or washable marker to trace the design (steps 4 and 3).
Why is my fabric puckering or my thread pulling through, and how can I fix it?
If the thread pulls through or the fabric puckers, make sure you tied a small knot at the end of the strand (step 8), use only one of the two separated strands (step 6), and tighten the hoop so the fabric is smooth (step 4).
How can I adapt this embroidery activity for younger children or older kids?
For younger children use a large plastic needle and thicker yarn with bold, simple traced shapes to practice the running stitch (steps 5 and 9), while older kids can use two strands of floss, finer needles, and focus on backstitch and satin stitch details (steps 6, 10, and 11).
How can we decorate or turn the finished embroidered design into a gift or display?
To enhance the project add beads or contrasting floss while doing the satin stitch for texture, embroider initials with backstitch, then trim the thread and frame the hoop or take a photo to share on DIY.org (steps 11, 10, 13, and 14).
Watch videos on how to embroider a simple design
Embroidery for beginners - Stitches, knots, needle threading & more - Complete Basics Series
4 Videos
Embroidery for beginners - Stitches, knots, needle threading & more - Complete Basics Series

Hand Embroidery for Beginners || 14 basic embroidery stitches by Let's Explore
10 Beginner-Friendly Embroidery Designs

15 Basic Hand Embroidery Stitches Sampler For Absolute Beginners
Facts about embroidery and hand sewing for kids
🧵 Embroidery is one of the oldest textile arts — archaeologists have found embroidered fabrics thousands of years old!
🪡 Needles come in many sizes; kid-friendly needles often have blunter tips to keep little hands safer.
🧶 Cross-stitch samplers were historically used by children to practice stitches and sometimes record family names and dates.
👗 An embroidery hoop keeps fabric taut so stitches stay even and your design looks neater with less fuss.
🛡️ Thimbles protect your fingertip when pushing a needle and used to be made from silver or decorated metal as collectibles.
How do I teach a child to embroider a simple design step by step?
What materials do I need to embroider a simple design with my child?
What ages is embroidery suitable for and how should I adapt it?
Is embroidery safe for kids and what precautions should parents take?
