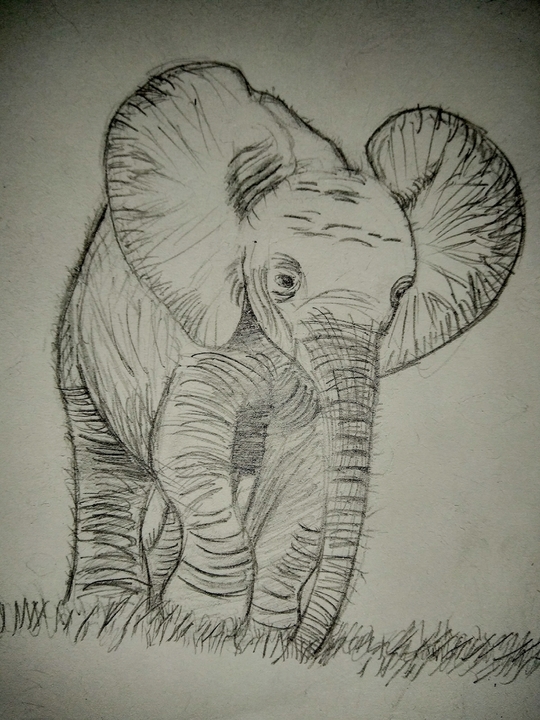
Draw any kind of mammal
Draw any mammal by observing photos, sketching basic shapes, adding details, shading fur, and labeling features to learn anatomy and practice drawing skills.

Drawing Apps
Step-by-step guide to draw any kind of mammal
How to Draw Animals for Kids 🦏🦈🐊🦒 | Easy Step-by-Step Drawing Tutorial
Step 1
Pick a mammal you want to draw and choose two or three clear reference photos to look at.
Step 2
Look closely at the photos and spot the big simple shapes like circles ovals and rectangles that make up the animal.
Step 3
Lightly sketch those basic shapes on your paper to block in the head body and main limbs.
Step 4
Connect the basic shapes with smooth lines to form the animal's outer contour.
Step 5
Place and draw the eyes nose mouth and ears in the right spots on the face.
Step 6
Add limb details like paws claws hooves and the tail shape you see in the photos.
Step 7
Add markings such as stripes spots or color patches using short strokes or light shapes.
Step 8
Use short pencil strokes in the direction the fur grows to build fur texture.
Step 9
Shade the areas that are in shadow to show where the light hits and make the animal look round.
Step 10
Erase any extra construction lines and neatly label the main features like head ear eye nose leg and tail.
Step 11
Share your finished creation on DIY.org
Help!?
What can we use if we don't have a pencil, eraser, or printed reference photos?
Use a sharpened colored pencil or crayon for the light sketching step, the sticky edge of masking tape or a kneaded eraser substitute to lift stray marks instead of a standard eraser, and view reference photos on a phone or tablet screen rather than printed images.
My drawing's proportions look wrong after I connected the shapes—what should I do?
Before adding fur texture or shading, return to the instruction to 'lightly sketch those basic shapes' and erase or resize the head, body, or limb ovals to match your reference photos, then reconnect the contours.
How can I adapt this activity for younger or older kids?
For younger children simplify by tracing or using pre-cut circles and ovals to block in the head and body and labeling major features aloud, while older kids can focus on directional pencil strokes for fur, subtle shading to show light and shadow, and more detailed limb and marking work.
How can we enhance or personalize the finished drawing?
Extend the activity by adding a painted or collaged habitat background, experimenting with colored pencils or markers to emphasize stripes, spots, or color patches, and photographing the neatly labeled final drawing to share on DIY.org.
Watch videos on how to draw any kind of mammal
How to Draw Animals for Kids 🐋🐯🦈🐘🐬🦏🐢🦁 | Easy Step-by-Step Drawing Tutorial
4 Videos
How to Draw Animals for Kids 🐋🐯🦈🐘🐬🦏🐢🦁 | Easy Step-by-Step Drawing Tutorial
Easy Animal Drawings for Kids | How to Draw Cute Animals for kids and toddlers
😻 Learn the Secret Method to Draw a Cat Like a Pro! ✏️ Step by Step Drawing for Kids
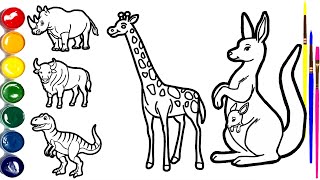
How to Draw 5 Animals for Kids 🦏🐃🦖🦒🦘 Easy Drawing Tutorial
Facts about mammal anatomy and drawing
🐾 There are about 6,400 known mammal species — from tiny bumblebee bats to the blue whale, the largest animal that ever lived.
🐑 All mammals have hair at some stage of life — even whales and humans have hair, though sometimes it's sparse.
✏️ Quick gesture sketches (30–60 seconds) help capture a mammal's pose and movement before you add details and shading.
🎨 To suggest realistic fur, draw short strokes that follow the direction of hair growth and vary pressure for light and shadow.
🔬 Whiskers (vibrissae) are sensory hairs rooted deeper than regular fur — they sense touch and should be drawn separately from coat texture.
How do I teach my child to draw any mammal step-by-step?
What materials do I need to draw mammals with my child?
What ages is this mammal-drawing activity suitable for?
What are the benefits of drawing mammals with photos and labeling features?
