Draw a picture of mindfulness
Draw a picture of mindfulness by creating a calm scene using simple shapes, colors, and labels to show breathing, focus, and feelings.


Drawing Apps
Step-by-step guide to draw a picture of mindfulness
5 Mindfulness Exercises for Kids 🌟😊 | Cosmic Kids
Step 1
Find a quiet comfy spot to sit and lay out your materials.
Step 2
Decide whether you want your picture tall (portrait) or wide (landscape) and place your paper that way.
Step 3
Draw a large simple shape on your paper to be the calm space frame like a circle square or rounded rectangle.
Step 4
Pick one main calm element to draw such as a person meditating a tree a cloud or a calm lake and draw it using simple shapes.
Step 5
Add small peaceful details around the main element like a sun waves leaves or stars using simple shapes.
Step 6
Choose two or three calm colors such as blues greens or pastels and decide which parts will use each color.
Step 7
Color the main element with your chosen colors using your coloring materials.
Step 8
Color the smaller details and background with the other chosen colors.
Step 9
Draw soft arrows or wavy lines that move in and out near the main element to show slow breathing.
Step 10
Write short labels like Breath next to the breathing lines Focus near the main element and Feelings near a little area for emotions.
Step 11
Draw three small faces or color circles to show different feelings and give each a simple expression or shade.
Step 12
Erase any stray pencil lines to make your picture neat.
Step 13
Share your finished creation on DIY.org
Help!?
What can we use if we don't have colored pencils or markers?
If you don't have markers or colored pencils, substitute crayons, watercolor paints, or torn magazine collage pieces to color the main element and background and use a pen or darker crayon to write the labels like Breath, Focus, and Feelings.
My large calm-space frame or breathing lines look messy—how can we fix that?
Trace the large shape or soft arrows first with a pencil or by using a round object (like a cup) as a stencil, then go over them with color and erase stray pencil lines for a neater result.
How can I adapt this activity for younger or older kids?
For younger children pre-draw the calm space frame and main element and use stickers or chunky crayons for the small faces, while older kids can add shading, patterns, extra labels, or mixed media details around the calm element.
How can we make the finished picture more special or longer-lasting?
Personalize and extend the project by adding textured materials (fabric, foil, or glued-on leaves) to the calm element, creating movable breathing arrows with a paper fastener, or photographing and sharing a step-by-step on DIY.org.
Watch videos on how to draw a picture of mindfulness
MINDFULNESS FOR KIDS 🧘♀️ Bee Breathing 🐝 Mindfulness Techniques
4 Videos

MINDFULNESS FOR KIDS 🧘♀️ Bee Breathing 🐝 Mindfulness Techniques
![7-Minute Emotion Regulating Activity To Help Kids Calm Down! [with mindful breathing techniques]](https://img.youtube.com/vi/ORRdf_nLc_I/mqdefault.jpg)
7-Minute Emotion Regulating Activity To Help Kids Calm Down! [with mindful breathing techniques]
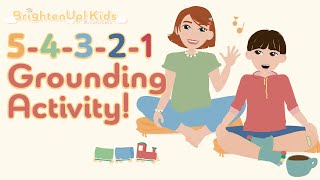
5-Minute Mindful Activity Using The 5-4-3-2-1 Grounding Technique For Kids

🌬️🌈 Rainbow Breathing for Kids | Mindfulness & Relaxation Exercise | Twinkl USA
Facts about mindfulness and art for kids
🧘 Just 5 minutes of simple mindful breathing can help kids feel calmer and more focused.
🎨 Making art is a great way to show feelings—artists use colors and shapes instead of words.
🌬️ A popular kid-friendly breathing trick is 4 breaths in, 4 breaths out to slow the body down.
😊 Psychologists often talk about six basic emotions kids can draw: happiness, sadness, anger, fear, surprise, and disgust.
✏️ Peaceful scenes can be built from just a few shapes—circles for sun and clouds, waves for water, and rectangles for houses.
How do I help my child draw a picture of mindfulness step by step?
What materials do we need to draw a mindfulness picture with my child?
What ages is a mindfulness drawing activity suitable for?
What are the benefits of drawing a mindfulness picture and how can I vary it?
