Draw a geological map
Create a simple geological map by observing rocks, noting layers, using colored pencils and symbols, and drawing a legend to explain your findings.


Step-by-step guide to draw a geological map
Geological map | How Geologist make Geologic map | Interpretation and drawing process
Step 1
Gather all the materials listed and put them where you can reach them easily.
Step 2
With an adult, go to a small safe area that has a few rocks to study.
Step 3
Place your paper on the clipboard or another flat surface so it stays steady.
Step 4
Use your pencil to draw the boundary of the area you will map on the paper.
Step 5
Walk slowly around the area and look for different rock types or visible layers.
Step 6
Mark each different rock type or layer location on your paper outline with a simple shape or shaded patch.
Step 7
Write a short note beside each mark describing the rock color and whether you see layers or grain.
Step 8
Use a magnifying glass to inspect any small layers or fossils and add that detail to your notes.
Step 9
Choose a different colored pencil for each rock type and color the matching patches on your map.
Step 10
Draw arrows on your map to show the direction that rock layers slope or change.
Step 11
Use the ruler to draw and label a simple scale bar (for example 1 cm = 1 m).
Step 12
Draw a legend box and list each color or symbol with the rock name and a one-word description.
Step 13
Add a clear title and the date to your map.
Step 14
Share your finished geological map on DIY.org.
Help!?
What can we use instead of a clipboard, magnifying glass, or colored pencils if we don't have them?
If you don't have a clipboard, use a hardcover book or piece of cardboard to keep paper steady, substitute a smartphone camera zoom or reading glasses for the magnifying glass, and use crayons or colored markers instead of colored pencils to color the map.
What should we do if we can't tell different rock types or layers while walking the area?
If rocks look similar, mark suspected differences on your paper outline, use your magnifying glass or smartphone zoom to check grain and fossils, and ask an adult to help confirm colors before coloring patches and writing the legend.
How can we change the activity for younger kids or make it more challenging for older kids?
For younger children, an adult can pre-draw the boundary and let them use stickers or crayons to mark and color patches with one-word notes in the legend, while older kids can add a ruler-made scale bar, measure and draw slope arrows, take photos of features, and write a detailed legend before sharing on DIY.org.
What are some ways to extend or personalize our geological map after we finish the basic steps?
To extend the project, keep a field notebook with multiple maps over time, paste photos from your smartphone or magnifying-glass observations next to each colored patch in the legend, draw a simple cross-section showing the layer slopes you indicated with arrows, and add a creative title and unique symbols before uploading to DIY.org.
Watch videos on how to draw a geological map
Geological map cross section with pdf
4 Videos
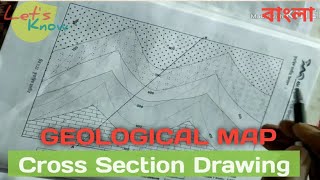
Geological map cross section with pdf

Drawing a Cross section of a Geological Map | strike line, bedding plane Lithology | Earth detective
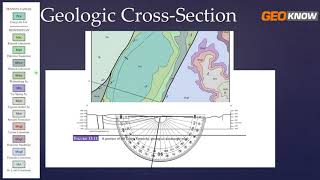
Geologic Cross Section! How to draw or construct a geologic cross-section!
How to draw World Map step by step for kids
Facts about geological mapping for kids
🗺️ Geological maps use colors and symbols to show different rock types and ages — one map can capture millions of years of Earth’s story!
🪨 There are three main rock types (igneous, sedimentary, metamorphic) — while mapping you'll likely spot at least two of them.
🧭 A map legend is like a decoder ring: once you make a clear legend, anyone can read your map and know what each color and symbol means.
🕵️♀️ Fossils and rock layers act like time clues — their order helps geologists figure out which layers are older or younger.
📏 Geological maps use scales and symbols so a few colored pencils can represent hills, rivers, and layers that stretch for miles.
How do you draw a simple geological map with a child?
What materials are needed to make a kid-friendly geological map?
What ages is a geological mapping activity suitable for?
What are the benefits and safety tips for kids making geological maps?
