Do the Helicopter
Make and test a paper helicopter using cardstock, scissors, and a paperclip; measure how blade angle and weight affect fall speed.


Step-by-step guide to make and test a paper helicopter
Step 1
Gather all the materials on a clear table so you can reach them easily.
Step 2
Use the ruler and pencil to draw a rectangle 3 cm wide by 12 cm long and add a 2 cm by 2 cm square at one short end for the helicopter head.
Step 3
Cut out the drawn shape from the cardstock using the scissors.
Step 4
Fold the 2 cm square tab down at a right angle so it makes a little head for the helicopter.
Step 5
Measure from the folded head 9 cm down the center and mark that point with the pencil.
Step 6
Cut a straight slit up the center from the opposite short end to the 9 cm mark to make two blades.
Step 7
Use the protractor to bend both blades so they sit straight down along the body (0°) and crease the folds.
Step 8
Hook one paperclip onto the folded head tab so it hangs as the first test weight.
Step 9
Mark a safe release height with tape (about 1.5 meters high or a grown-up’s shoulder height) so every drop starts from the same place.
Step 10
Have a helper use the stopwatch to time three drops from the release mark while you release the helicopter; write down the three times and calculate the average fall time.
Step 11
Add a second paperclip to increase the weight and repeat three timed drops from the same release mark; write down the three times and calculate the new average.
Step 12
Change the blade pitch to 30° using the protractor and repeat Steps 10 and 11 (test with one paperclip and with two paperclips) to compare times, then change the blade pitch to 60° and repeat those tests again.
Step 13
Take a picture or note of your best test results and share your finished helicopter experiment and what you learned on DIY.org.
Help!?
I don't have cardstock, a protractor, or paperclips — what can I use instead?
Use cereal-box cardboard or two glued sheets of construction paper for the cardstock, print or use a smartphone angle app instead of the protractor, and replace paperclips with a small coin or washer taped to the folded 2 cm head tab so you can still test one and two weights as in Steps 8–11.
My blades tear when I cut or the helicopter tilts to one side when dropped — how do I fix that?
Reinforce the cardstock where you will cut the center slit with clear tape before cutting up to the 9 cm mark, and make sure both blades are creased evenly at 0° with the protractor and that the paperclip(s) are hooked centrally on the folded 2 cm head tab to prevent tilting.
How can I adapt the activity for younger or older kids?
For younger children have an adult pre-measure, cut the 3×12 cm shape and fold the 2 cm head tab and use a lower release height with timing help, while older kids can run extra trials with different weights, record averages at 0°, 30°, and 60° blade pitch, and graph their results as in Steps 10–13.
How can we extend or personalize the helicopter experiment?
Decorate the cardstock head and blades, try extra weights like coins instead of paperclips, change blade length or add small fins to compare fall times, take pictures of your best tests, and share your findings on DIY.org as the final step suggests.
Watch videos on how to make and test a paper helicopter
This Pilot Teaches Children How to Fly
4 Videos

This Pilot Teaches Children How to Fly
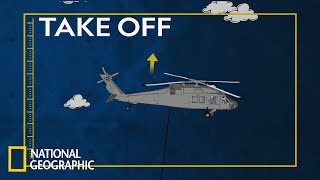
How Helicopters Fly | Science of Stupid: Ridiculous Fails
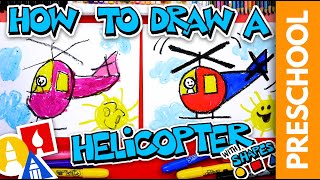
How To Draw A Helicopter With Shapes - Preschool
Airplanes, Helicopters and Things that Fly ✈️ Planes for Kids 🚁 Helicopters for Kids
Facts about aerodynamics for kids
🌀 Paper helicopters spin as they fall — the rotating blades create lift and slow the descent, turning a quick drop into a graceful whirl.
🍁 Many tree seeds (like maple samaras) act like tiny helicopters to drift away from their parent tree — kids call them 'whirlybirds'!
🚁 Autorotation is the same emergency spin pilots use to land helicopters safely without engine power — your paper helicopter shows autorotation on a tiny scale.
🧪 Small changes matter: adjusting blade angle or adding a little weight can dramatically change how fast and how steadily a paper helicopter falls.
📎 A single paperclip is a perfect test weight — adding or removing one gives a clear, repeatable change you can measure in fall time.
How do I make and test a paper helicopter?
What materials do I need for a paper helicopter experiment?
What ages is the paper helicopter activity suitable for?
What are safe variations and benefits of the paper helicopter activity?
