DIY Jewelry: Sell Handmade Jewelry
Make handmade bracelets and earrings using beads, string, and clay, learn pricing, packaging, and simple selling skills with safe adult supervision.


Step-by-step guide to make and sell handmade jewelry
How To Start A Handmade Jewelry Business And Sell On Etsy
Step 1
Gather all your materials on a clean table so everything is ready to use.
Step 2
Choose the colors and patterns you want for your bracelets and earrings and decide how many pieces to make.
Step 3
Pinch off small bits of air-dry clay and roll them into bead shapes with your fingers.
Step 4
Push a toothpick through each clay bead to make a hole big enough for string or a headpin.
Step 5
Let the clay beads dry on a flat surface for 24 hours or until they are completely hard.
Step 6
Thread beads onto the string to make each bracelet in the pattern you planned.
Step 7
Tie a strong double knot to close each bracelet and trim the extra string with scissors.
Step 8
Slide a dried clay bead onto a headpin and use pliers to bend the wire into a loop to make an earring component.
Step 9
Open a jump ring with pliers and link the looped headpin to an earring hook, then close the jump ring.
Step 10
Add up the cost of the materials for one item and then multiply by 2 to set a selling price that covers costs and earns a profit.
Step 11
Write the price on a sticker label with your marker and stick it on the box or package.
Step 12
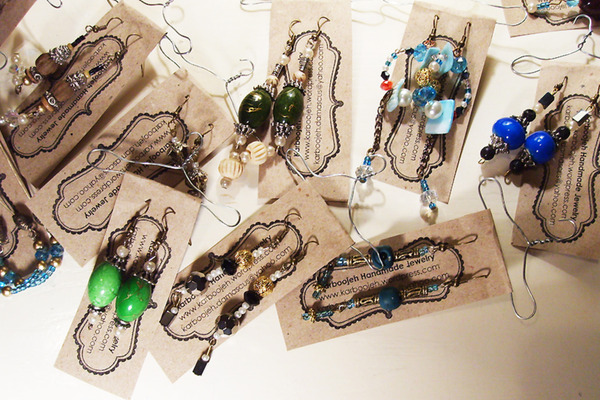
Place each jewelry piece in a small box on tissue paper and close the box neatly.
Step 13
Write one short sentence that tells people why your jewelry is special and practice saying it out loud.
Step 14
Arrange your boxed jewelry on a small display area at home with price labels so customers can see them.
Step 15
Take photos of your finished jewelry and share your creation on DIY.org
Help!?
What can we use if we don't have headpins, jump rings, earring hooks, or air-dry clay?
If you don't have air-dry clay, use oven-bake polymer clay and, instead of headpins/jump rings/earring hooks, bend thin floral wire or straightened paperclips into loops and use small paperclip loops or twisted wire to attach them in the earring steps while using needle-nose tweezers in place of pliers.
My clay beads are cracking or the toothpick hole closes up after drying—what should I do?
If beads crack or holes shrink during the 24-hour drying step, gently re-open the hole with a toothpick while the clay is still slightly damp or carefully sand/drill the dried bead and secure bracelet knots with a tiny drop of craft glue before trimming string.
How can this project be changed for a 4-year-old, a 9-year-old, and a 13-year-old?
For a 4-year-old, let them choose colors and string pre-made beads while an adult handles toothpicks, pliers, and scissors; for a 9-year-old, supervise them rolling clay, pushing toothpicks, and tying double knots; and for a 13-year-old, let them make headpin loops, calculate costs and prices, and photograph their finished jewelry for DIY.org.
What are simple ways to make the jewelry and packaging more professional or unique before selling?
To enhance presentation, paint or seal dried clay beads with acrylic paint and clear varnish, add charms or stamped name tags, write the one-sentence 'why special' on a small card, and arrange tissue-lined boxes with neat sticker price labels for staged photos.
Watch videos on how to make and sell handmade jewelry
Easy DIY Rings to Make and Sell // Beginner Wire Jewelry Making Tutorial
4 Videos

Easy DIY Rings to Make and Sell // Beginner Wire Jewelry Making Tutorial

How to Start Selling Jewelry Online Step by Step for Beginners | Reselling Jewelry on Ebay 2025

Selling Handmade Jewellery: How to Sell your First 10 Pieces
🤑Earn CASH Making These BEST SELLING JEWELRY BOXES! Step By Step DIY Acrylic Art.
Facts about jewelry making and selling for kids
🎨 Beadwork goes back tens of thousands of years — shell and bone beads over 40,000 years old have been found by archaeologists.
💎 The global jewellery market is worth hundreds of billions of dollars, so handmade pieces can reach lots of buyers.
🧪 Polymer clay hardens in a home oven at low heat (about 130°C / 275°F), making tiny charms and beads easy to bake with adult help.
💰 A common pricing guideline for handmade goods is to charge about 2–3 times the cost of materials plus fair pay for your time.
📦 Simple packaging touches — a small box, a sticker, or a handwritten thank-you — can make your jewelry feel special and encourage repeat customers.
How do I run a DIY jewelry project where kids make and sell handmade bracelets and earrings?
What materials do I need to make bracelets and earrings for a kid-friendly jewelry sale?
What ages is DIY jewelry making and selling suitable for?
What safety tips should I follow when kids make and sell handmade jewelry?
