DIY Jewelry: Make Rainbow Loom Jewelry
Make colorful Rainbow Loom bracelets and charms using rubber bands, a loom, and a hook while learning patterns, patience, and fine motor skills.

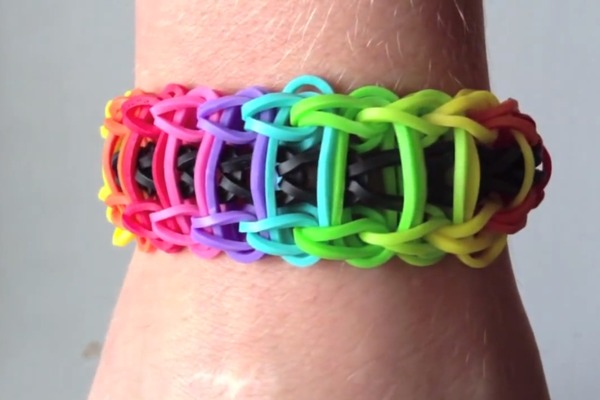

Step-by-step guide to Make Rainbow Loom Jewelry
Rainbow Loom Bracelet Tutorial - Cute & Creative DIY Jewelry for Kids!
Step 1
Put your Rainbow Loom board flat on the table with the arrows pointing away from you.
Step 2
Choose 3 to 5 rubber-band colors you want to use for your bracelet.
Step 3
Lay the bands out in the color order you want on the table so you can follow the pattern.
Step 4
Place the first band on the first and second center pegs without twisting the band.
Step 5
Continue placing bands in your color order forward along the center row until the row is as long as your wrist plus two extra pegs.
Step 6
Put one final band over the last two pegs to cap the end of the row.
Step 7
Use the hook to grab the bottom band on the second peg and pull it up and over onto the first peg.
Step 8
Repeat grabbing the bottom band on each next peg and pull it back over to the previous peg all the way to the capped end.
Step 9
Use your hook to lift the loop off the first peg and hold it gently so it does not stretch.
Step 10
Attach that first loop to one side of an S-clip.
Step 11
Lift the loop off the last peg and attach it to the other side of the S-clip to close the bracelet.
Step 12
Share a photo of your finished Rainbow Loom bracelet on DIY.org
Help!?
What can I use instead of a Rainbow Loom board, hook, or S-clip if I can't find them?
If you don't have a Rainbow Loom board, make a single peg row by spacing thumbtacks in cardboard or lining up pencils, substitute a crochet hook or straightened paperclip for the hook, and use an open paperclip or small safety pin in place of the S-clip to join the final loops.
Why do my bands keep slipping off or the bracelet comes undone, and how can I fix it?
If bands slip while you pull the bottom band over to the previous peg or the bracelet comes undone when attaching the S-clip, check that you placed bands without twisting, use fresh undamaged bands, hold the first loop gently as you lift it off the first peg so it does not stretch, and make sure the S-clip fully secures both end loops.
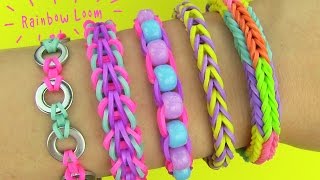
How can I adapt this Rainbow Loom project for different ages?
For younger children have an adult pre-place the center-row bands and help with the pulling and S-clip step, for elementary kids use 3 colors and make the row wrist-length plus two extra pegs as instructed, and for older kids try longer patterns, 4–5 colors, or two-row designs using extra pegs for a wider bracelet.
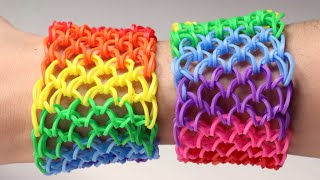
How can we personalize or level-up the bracelet beyond the basic instructions?
To personalize, slide small pony beads onto specific bands before placing them on the pegs, lay the bands out in a gradient color order as you follow the pattern, place two bands together on each peg for a thicker bracelet, or attach charms to the S-clip after closing the bracelet.
Watch videos on how to Make Rainbow Loom Jewelry
DIY - How to make Rainbow Loom Bracelet with your fingers - EASY TUTORIAL - Friendship Bracelet
4 Videos

DIY - How to make Rainbow Loom Bracelet with your fingers - EASY TUTORIAL - Friendship Bracelet

How To Make a Basic Rainbow Loom Bracelet
Rainbow Loom English - DRAGON SCALE BRACELET - Loom Bands, easy, how to, DIY, Tutorial
Rainbow Loom! DIY 5 Easy Rainbow Loom Bracelets without a Loom (DIY Loom Bands)
Facts about jewelry making for kids
🧶 Rainbow Loom was invented by Cheong Choon Ng and became a huge kids' craft trend in the 2010s.
🌈 A single Rainbow Loom kit can be used to create hundreds of different bracelet and charm patterns.
🧠 Making loom bracelets helps kids build fine motor skills and improves pattern recognition.
⏱️ Simple bracelets can take 5–15 minutes, while intricate charms or fishtail designs can take 20–60 minutes.
♻️ Many crafters reuse and upcycle rubber bands to reduce waste and try eco-friendlier projects.
How do I make Rainbow Loom bracelets and charms step by step?
What materials do I need to make Rainbow Loom jewelry?
What ages is Rainbow Loom jewelry suitable for?
What are the benefits and safety tips when making Rainbow Loom jewelry?
