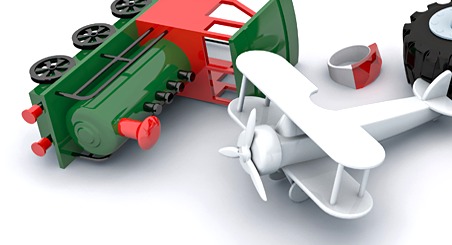
Design in 3d cad software
Use simple, kid-friendly 3D CAD software to design a small toy or keychain, learning shapes, measurements, and basic digital modeling skills.


Step-by-step guide to design a small toy or keychain in kid-friendly 3D CAD software
TinkerCAD - Tutorial for Beginners in 10 MINS! [ FULL GUIDE 2024 ]
Step 1
Sign in to your kid-friendly 3D CAD account.
Step 2
Click Create New Project to start a new file.
Step 3
On paper draw a simple sketch of your toy or keychain.
Step 4
Write three measurements on your sketch: length width and thickness.
Step 5
Pick one base shape from the shape menu such as a box or cylinder.
Step 6
Place the base shape onto the workspace.
Step 7
Use the measurement tool to set the base shape to the sizes on your sketch.
Step 8
Choose one small shape to be a decoration like a star or letter.
Step 9
Place the decoration onto the base where you want it to appear.
Step 10
Create a small cylinder and set it as a hole for the keyring.
Step 11
Move the hole to the edge of the base where the keyring will go.
Step 12
Group all shapes so they become one solid object.
Step 13
Use the align tool to tidy up and center parts of your design.
Step 14
Save your project and export the file as STL or the format your software uses.
Step 15
Share your finished creation on DIY.org.
Help!?
What can we use if we can't access the kid-friendly 3D CAD account or the software doesn't export STL?
Sign in to an alternative free browser-based kid CAD like Tinkercad or Onshape's free student plan and if your software doesn't export STL, export OBJ/3MF or use a free converter/slicer to create an STL file before exporting.
My hole didn't cut out when I grouped shapes — how do I fix it?
Ensure the small cylinder is explicitly set as a hole object, that it overlaps fully through the base shape, then use the align tool to center it and finally 'group all shapes' so the cut registers.
How can I adapt the steps for different ages or skill levels?
For younger kids pick one base shape and one decoration and have an adult set the measurement tool values, while older kids can hand-sketch more detailed dimensions, use multiple decorations, and adjust precise measurement tool settings themselves.
How can we personalize or enhance the toy/keychain after completing the basic design steps?
Place letters or thin decorative shapes onto the base before grouping to engrave or raise designs, export the STL, then 3D print, sand, paint, or share photos of the finished piece on DIY.org for extra personalization.
Watch videos on how to design a small toy or keychain in kid-friendly 3D CAD software
Learn FreeCAD for 3D Printing - Complete Quick and Easy Guide (Beginner)
4 Videos
Learn FreeCAD for 3D Printing - Complete Quick and Easy Guide (Beginner)
Learn to Create 3D Models in FreeCAD in 15 Minutes - Starting from Scratch!
![TinkerCAD - Tutorial for Beginners in 9 MINUTES! [ COMPLETE ]](https://img.youtube.com/vi/gOs6Mdj7y_4/mqdefault.jpg)
TinkerCAD - Tutorial for Beginners in 9 MINUTES! [ COMPLETE ]
Beginner Tutorial 1/5 - Onshape 3D CAD - Creating Sketches and Objects
Facts about 3D CAD and digital modeling for kids
🖥️ Tinkercad is a free, browser-based 3D design tool that many kids and teachers use to learn CAD basics.
🧩 3D models are often built from simple 'primitives' like cubes, spheres, and cylinders—think of them as digital LEGO pieces.
🧮 CAD uses real-world units (mm, cm, or inches), so a tiny measurement mistake can make a keychain too big or too small!
🖨️ Hobby 3D printers usually print from STL files, which describe an object's surface using lots of tiny triangles.
🌟 Practicing CAD boosts spatial thinking and problem-solving—skills used by engineers, architects, and game designers.
How do you design a small toy or keychain in kid-friendly 3D CAD software?
What materials do I need to do 3D CAD design with kids?
What ages is kid-friendly 3D CAD suitable for?
What are the benefits of kids learning 3D CAD design?
