Design a vehicle
Design and build a simple model vehicle using cardboard, bottle-cap wheels, axles, and rubber bands, then test, modify, and measure speed and stability.


Step-by-step guide to design and build a model vehicle
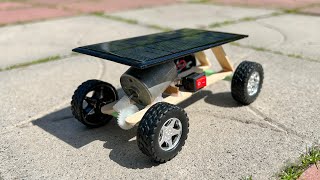
How to Make a Car - Mini Solar Powered Car - Easy to Build
Step 1
Gather all your materials and clear a space on a table to work.
Step 2
Use the ruler and marker to draw a rectangle about 15 cm by 8 cm on the cardboard for your vehicle body.
Step 3
Cut out the cardboard rectangle to make the vehicle body.
Step 4
Mark two axle positions on the underside about 2 cm from each end and centered from left to right.
Step 5
Make two straw axle holders by cutting the drinking straws to a little shorter than the body width and placing them over your axle marks.
Step 6
Tape the straw pieces firmly to the underside of the body so they line up straight as axle guides.
Step 7
Push a wooden skewer through each taped straw so each skewer can rotate as an axle.
Step 8
Attach a bottle cap to each end of the skewers so they act as wheels and secure them so they stay in place while still turning.
Step 9
Make a small notch in the rear edge of the cardboard and hook one end of a rubber band into that notch.
Step 10
Loop the rubber band once around the rear axle so turning the axle will wind the band and store energy.
Step 11
Make a start and finish line on the floor about two big steps or 2 meters apart using tape or markers.
Step 12
Wind the rear axle by turning the rear wheels backward several turns then place the car at the start line and release it while timing the run to measure speed.
Step 13
Test stability by placing a small coin on the car and running it again to see if it stays upright.
Step 14
Make one simple change like moving the coin, adjusting wheel position, or changing rubber band turns and run again to compare results.
Step 15
Share a photo of your finished vehicle and what you learned about speed and stability on DIY.org.
Help!?
What can we use instead of wooden skewers, bottle caps, or drinking straws if we can't find them?
If you don't have wooden skewers use straight pencils or bamboo chopsticks as axles, replace bottle caps with jar lids, large buttons, or toy wheels taped to the skewer ends, and swap drinking straws for short pieces of plastic tubing or cut-up soda bottles to make the axle holders.
The wheels don't turn smoothly—what should we check and fix?
If the wheels bind check that the straw axle holders are taped straight and not squeezed to the underside, confirm each skewer can rotate through the taped straw, and if needed widen the straw hole, add a tiny bead or washer at the wheel end, or loosen the tape to reduce friction.
How can I adapt this activity for younger or older children?
For younger children have an adult draw and pre-cut the 15 cm by 8 cm cardboard body and tape the straw axle holders so they can wind the rubber band and race the car, while older kids can modify axle positions, change wheel sizes, and record timed runs over the 2-meter course to study speed and stability.
How can we improve the vehicle to go faster or stay upright better?
To increase speed or stability try reducing friction by using smoother tubing for the straw axle holders and lighter bottle-cap wheels, adjust the coin location to change the center of mass as in the 'Make one simple change' step, or add a small fin to the body to help it stay upright during the 2-meter run.
Watch videos on how to design and build a model vehicle
How to Make a Car - Mini Solar Powered Car - Easy to Build
4 Videos
How to Make a Car - Mini Solar Powered Car - Easy to Build
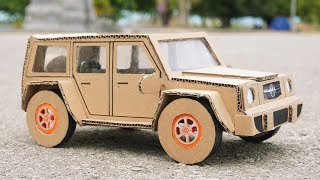
How to Make a Car Mercedes G63 from Cardboard | DIY Mercedes Car | YP Studio
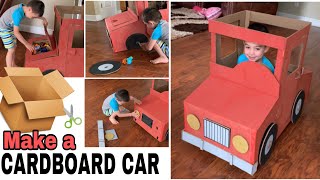
DIY Car | How to make a cardboard car (foldable)
How to make a cardboard car for kids, DIY cardboard projects, kids rainbow craft
Facts about engineering and vehicle design for kids
🛞 Wheels were invented over 5,000 years ago and revolutionized how people move heavy things.
🪢 A rubber band can store energy like a tiny spring — the first rubber-band patent was registered in 1845.
🚗 Toy cars powered by rubber bands or simple axles are classic engineering projects used in classrooms worldwide.
🧪 Reducing friction (smoother axles and lighter wheels) often makes a small model car much faster.
⚖️ Placing weight low and near the center helps a model vehicle stay stable and travel in a straight line.
How do you design and build a simple cardboard model vehicle with rubber-band propulsion?
What materials do I need to build a bottle-cap wheel vehicle?
What ages is this cardboard vehicle activity suitable for?
What are the benefits, safety tips, and variations for this model vehicle activity?
