Design a puzzle
Design and cut a custom cardboard jigsaw puzzle by drawing and cutting shapes, then trade and solve puzzles to learn about patterns and spatial thinking.


Step-by-step guide to design and cut a custom cardboard jigsaw puzzle
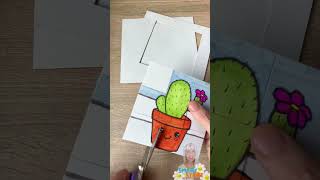
Easy DIY Puzzle For Kids || Make Your Own Puzzle
Step 1
Gather all materials and clear a flat workspace so you have room to draw and cut.
Step 2
Decide how big your puzzle will be and how many pieces you want to make.
Step 3
Use the pencil and ruler to draw the outer shape of your puzzle on the cardboard.
Step 4
Draw a picture or pattern across the whole puzzle surface that will help solve it.
Step 5
Colour or decorate the picture so the design is bright and easy to match.
Step 6
Draw interlocking jigsaw piece lines over the picture making unique shapes that will fit together.
Step 7
Cut out the outer shape of the puzzle from the cardboard carefully.
Step 8
Cut along the jigsaw lines to separate the puzzle into pieces slowly and safely.
Step 9
Mix the pieces up so your puzzle is scrambled and ready to solve.
Step 10
Trade your finished puzzle with a friend by swapping the mixed pieces.
Step 11
Solve the puzzle you received to practice pattern spotting and spatial thinking.
Step 12
Give the pieces back to your friend after you finish solving their puzzle.
Step 13
Share a photo and a description of your finished puzzle creation on DIY.org
Help!?
What can we use if we don't have cardboard, a ruler, or colouring markers?
Flattened cereal boxes or the back of a notebook work for the cardboard (steps 3 and 6), a hardcover book can act as a straightedge for the ruler when drawing the outer shape (step 3), and crayons or coloured pencils can replace markers for the colouring step (step 5).
My pieces keep tearing when I cut them—how can I stop that?
Before you cut along the jigsaw lines (step 8), reinforce the cardboard with clear tape on both sides and use sharp scissors or have an adult carefully cut with a craft knife so the pieces separate cleanly without tearing.
How do I change this activity to suit younger or older kids?
For younger children, make a larger outer shape with fewer, bigger pieces and pre-draw simple interlocking lines for them to cut or match (steps 2, 5, 7), while older kids can increase the piece count, draw more complex jigsaw lines, and trade puzzles with friends for added challenge (steps 2, 7, 10).
How can we extend or personalize the puzzle to make it more fun or durable?
Glue a printed photo or collage to the cardboard before drawing your picture (step 4), seal the coloured surface with clear tape or varnish for durability after colouring (step 5), or write a numbered solution on the back to create timed challenges when you trade with a friend (steps 10–12).
Watch videos on how to design and cut a custom cardboard jigsaw puzzle
Easy DIY Puzzle Craft for Kids Using Recycled Boxes!
4 Videos
Easy DIY Puzzle Craft for Kids Using Recycled Boxes!
How to make Jigsaw puzzle at home | DIY Jigsaw puzzle | Learn Maths using Jigsaw puzzle | PlayfulDNA
How to Make a Kids Wooden Puzzle
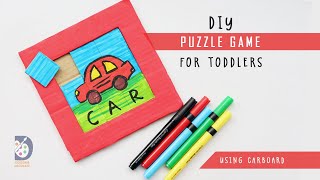
DIY Puzzle Games for toddlers/How to make puzzles using waste cardboard
Facts about puzzle-making and spatial reasoning
🧩 The very first jigsaw puzzle was made by John Spilsbury in 1767 as a geography teaching tool.
📦 Cardboard is recyclable and paper fibers can usually be reused about 5–7 times—great for upcycling into puzzles!
🔺 The tangram is a classic seven-piece dissection puzzle used for centuries to teach spatial thinking.
🧠 Putting puzzles together helps build spatial ability, pattern recognition, patience, and fine motor skills.
🔁 Trading puzzles with friends mixes up piece shapes and designs, making solving more social and inspiring new ideas.
How do you design and cut a custom cardboard jigsaw puzzle?
What materials do I need to make a cardboard jigsaw puzzle?
What ages is this cardboard puzzle activity suitable for?
What are the benefits and safe variations of trading and solving cardboard puzzles?
