Design a probability game
Create a spinner and colored counters to play a probability game, predict outcomes, record results, and compare expected versus actual probabilities.
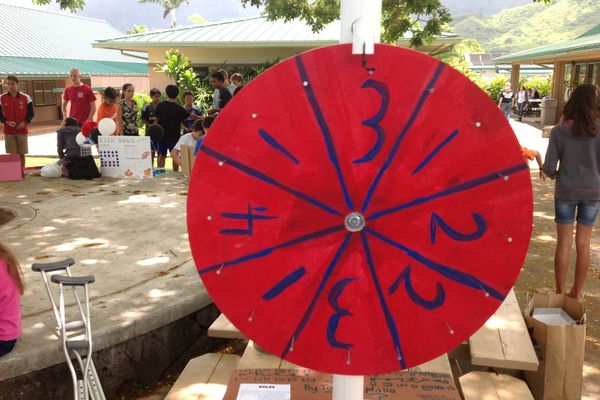
About this activity
Create a spinner and colored counters to play a probability game, predict outcomes, record results, and compare expected versus actual probabilities.
What you need
Step by step
- 1
Step 1
Draw a circle about the size of your paper plate on the cardboard or on the paper plate using your pencil.
- 2
Step 2
Mark the exact center of the circle with a dot and draw two straight lines that cross at the center to divide the circle into 4 equal sections.
- 3
Step 3
Color each of the 4 sections a different color using your coloring materials.
- 4
Step 4
Write the name or a number for each color in its section so you can tell them apart easily.
- 5
Step 5
Put a paperclip flat on the center dot of the circle.
- 6
Step 6
Push the pencil tip through one loop of the paperclip so the paperclip can spin freely on the pencil.
- 7
Step 7
Gather 30 small counters and put them in a pile; make sure the counters are easy to move and count.
- 8
Step 8
Predict the expected probability for each color and write your prediction in your notebook (for 4 equal sections each is 1 out of 4 or 25%).
- 9
Step 9
Spin the spinner 30 times and after each spin place one counter on the color the spinner lands on.
- 10
Step 10
Count how many counters are on each color and write those counts in your notebook.
- 11
Step 11
Calculate the experimental probability for each color by dividing each color count by 30 and write the results as fractions and percentages.
- 12
Step 12
Compare your predicted probabilities to the experimental probabilities and write one sentence about which colors matched your prediction and which ones were different.
- 13
Step 13
Share your finished creation and your results on DIY.org
Fun facts
How do you set up and play the spinner probability game?
Start by making a spinner: draw a circle on cardboard or a paper plate and divide it into colored sections (equal or unequal). Attach an arrow with a brad or a paperclip. Choose matching colored counters. Predict each color's theoretical probability (area or fraction of sections). Run many spins (50–100), record each result on a chart, calculate experimental probabilities (counts/total), and compare them to your predictions. Discuss differences and try more trials to see probabilities converge.
What materials are needed for this probability spinner activity?
You’ll need cardboard or a paper plate, markers or paints, scissors, a brad pin or paperclip for the spinner arrow, a ruler and pencil to divide sections, colored counters/beads/coins or colored paper pieces, a clipboard or paper for recording results, and a pen or pencil. Optional: a protractor for precise angles, stickers, a calculator, and a laminated chart to reuse. Supervise cutting and brad use with younger children.
What ages is a spinner probability game suitable for?
This activity suits preschoolers (with adult help) through teens. Ages 5–7 enjoy simple versions with 2–4 colors and basic counting. Ages 8–11 can predict probabilities, record outcomes, and compare fractions or percentages. Ages 12+ can run larger trials, analyze variance, discuss expected vs. experimental results, and explore statistical concepts. Adapt complexity, supervision, and language to each age for best learning.
What are the benefits, safety tips, and fun variations of this game?
Benefits include practicing counting, fractions, ratios, hypothesis testing, and data recording; it builds logical thinking and patience. Safety tips: supervise scissors and brads, use blunt craft tools with young kids, and secure small parts to prevent choking. Variations: make unequal sectors, use weighted counters, try two spinners together, change numbers of trials, or turn it into a classroom experiment comparing groups.
Watch & Learn
Need help?
What can we use instead of a paper plate, paperclip, or counters if we don't have them?
If you can't find a paperclip or paper plate, make the circle on cardboard, use a straightened bobby pin looped around a pencil or a pushpin through a bead as the spinning axle, and replace the 30 counters with coins, dried beans, or Lego studs.
Why won't my spinner spin properly or why does it stop quickly, and how can I fix it?
If the paperclip won't spin freely because it rubs the cardboard or the pencil wobbles, flatten the paperclip on the center dot, push the pencil tip through only one loop and use a toothpick or bead under the paperclip as a low-friction spacer so the clip can rotate smoothly.
How can I change the activity for younger or older kids?
For younger children, reduce the spins to 10, use bigger counters and help color and place the paperclip, while older children can increase spins to 100, record detailed fractions and percentages in their notebook, and compare predicted versus experimental results with a bar chart.
How can we make the game more challenging or more personal after we finish the basic version?
To extend the activity, personalize the spinner by making sections different sizes or adding extra colors to test biased probabilities, decorate the plate, run separate 30-spin trials to compare results, and post a photo and your conclusion on DIY.org.