Describe a rival or antagonist you'll animate
Create and animate a rival character using drawings or simple stop-motion. Develop personality, feelings, and movement while practicing storytelling and basic animation skills.


Step-by-step guide to create and animate a rival character
My Hero 🦸🏻 | Minibods | Preschool Cartoons
Step 1
Think of a rival name and write one sentence that says what they want and why they oppose your hero.
Step 2
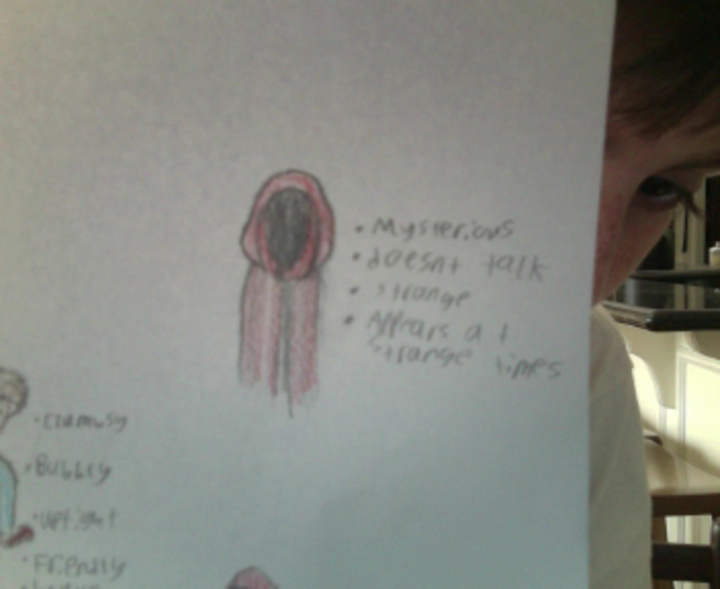
Pick three words that describe your rival’s personality and circle the one feeling they show most.
Step 3
Draw three tiny thumbnail sketches that try different looks or poses for the rival.
Step 4
Choose your favorite thumbnail to turn into the full character.
Step 5
Draw a full-size version of the rival on paper or cut them out of cardboard to make a puppet.
Step 6
Color your rival and add one signature detail (like a hat scar or glowing eye) that shows their personality.
Step 7
Make a simple background scene on cardboard or paper where your short story will happen.
Step 8
Write three short action beats for a scene (what the rival does first then next then last).
Step 9
Create 6 to 12 frames that show the rival’s main movement or expression change by drawing each frame on separate papers or by slightly moving your cutout for each step.
Step 10
Flip the frames quickly like a mini flipbook or move the cutout step-by-step to watch the motion happen.
Step 11
Fix any frames that look jumpy by redrawing or adjusting those frames until the movement looks smooth.
Step 12
Share your finished rival character and your short animation or flipbook on DIY.org.
Help!?
What can we use if we don't have cardboard, markers, or lots of paper?
Use a flattened cereal box or thin book cover for the full-size rival or puppet and background, swap markers for colored pencils or crayons, and tape or staple several sheets together to make thicker pages for the flipbook.
My flipbook motion looks jumpy—how can we fix it?
When frames look jumpy in the 'Fix any frames that look jumpy' step, add simple registration marks in the same spot on every page, clip the stack together, trace on a window (onion-skinning) or a light surface to line up drawings, and insert one or two in-between frames to smooth the motion.
How can we adapt the activity for different age groups?
For younger kids simplify by choosing a cutout puppet instead of drawing many frames and making only 6 big frames and three clear action beats, while older kids can create 12+ frames, refine the signature detail, and use a stop-motion app to shoot their full-size rival against the cardboard background.
How can we extend or personalize the rival beyond the basic flipbook?
Expand the project by adding dialogue to your three short action beats, introducing a second character to interact in the cardboard scene, recording simple sound effects or music, and sharing a short video or GIF of the rival's signature detail on DIY.org.
Watch videos on how to create and animate a rival character
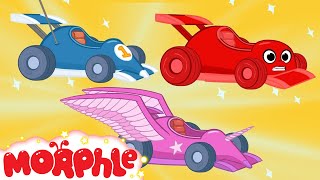
Morphle vs Orphle Super Race - Cartoons and Superheroes for Kids | My Magic Pet Morphle
4 Videos
Morphle vs Orphle Super Race - Cartoons and Superheroes for Kids | My Magic Pet Morphle
Morphle's Super Family Fun - Cartoons for Kids
Morphle Cartoons for Kids
Race Car Morphle and The kids Super Heroes! My Magic Pet Morphle Animations For Kids
Facts about animation and character design
🎬 Snow White and the Seven Dwarfs (1937) was the first full-length cel-animated feature film — a huge milestone for animation.
⏱️ Stop-motion often uses 12–24 frames per second, so one minute at 24 fps needs 1,440 separate photos or drawings!
🦹 The word "villain" comes from Old French 'vilain', originally meaning a farm worker or peasant — not always a baddie.
✏️ Character designers check a character's silhouette to make sure it's instantly recognizable even as a dark shape.
😀 Tiny changes to eyes, eyebrows, or a smile can completely change a character's emotion — that's animation magic.
How do I guide my child to create and animate a rival or antagonist character?
What materials do I need to create and animate a rival character?
What ages is this activity suitable for?
What are the benefits and safety tips for animating antagonist characters?
