Customize your skateboard
Decorate and personalize a skateboard using paints, grip tape, stickers, and safe tools to design art and learn creativity and basic handiwork.


Step-by-step guide to customize your skateboard
How to Customize Your Skateboard with Roll-to-Film Attachment
Step 1
Spread a drop cloth or newspaper on a flat surface and put on old clothes to protect from paint.
Step 2
Flip the skateboard so the bottom (underside) faces up and set it on the drop cloth.
Step 3
Gently sand the bottom surface with sandpaper to roughen it so paint will stick better.
Step 4
Use masking tape to mark off shapes or borders where you want crisp lines or different colors.
Step 5
Lightly sketch your design inside the taped areas with a pencil so you have a guide.
Step 6
Paint a base coat over the taped or sketched areas using acrylic paint to create your main background.
Step 7
Let the base coat dry completely before touching it so your colors don’t smudge.
Step 8
Add details and patterns with smaller brushes or permanent markers to make your design pop.
Step 9
Let the detail work dry fully so each layer stays nice and bright.
Step 10
Carefully peel off the masking tape to reveal clean edges and shapes in your artwork.
Step 11
Spray the painted bottom with clear sealant outside while an adult watches and follows the spray can directions to protect your art.
Step 12
Place stickers where you like on the top or bottom to add extra flair and personality.
Step 13
With an adult watching, cut small shapes from the new grip tape using scissors for custom top accents.
Step 14
Press the cut grip tape shapes onto the top of the skateboard and smooth out any bubbles so they stick well.
Step 15
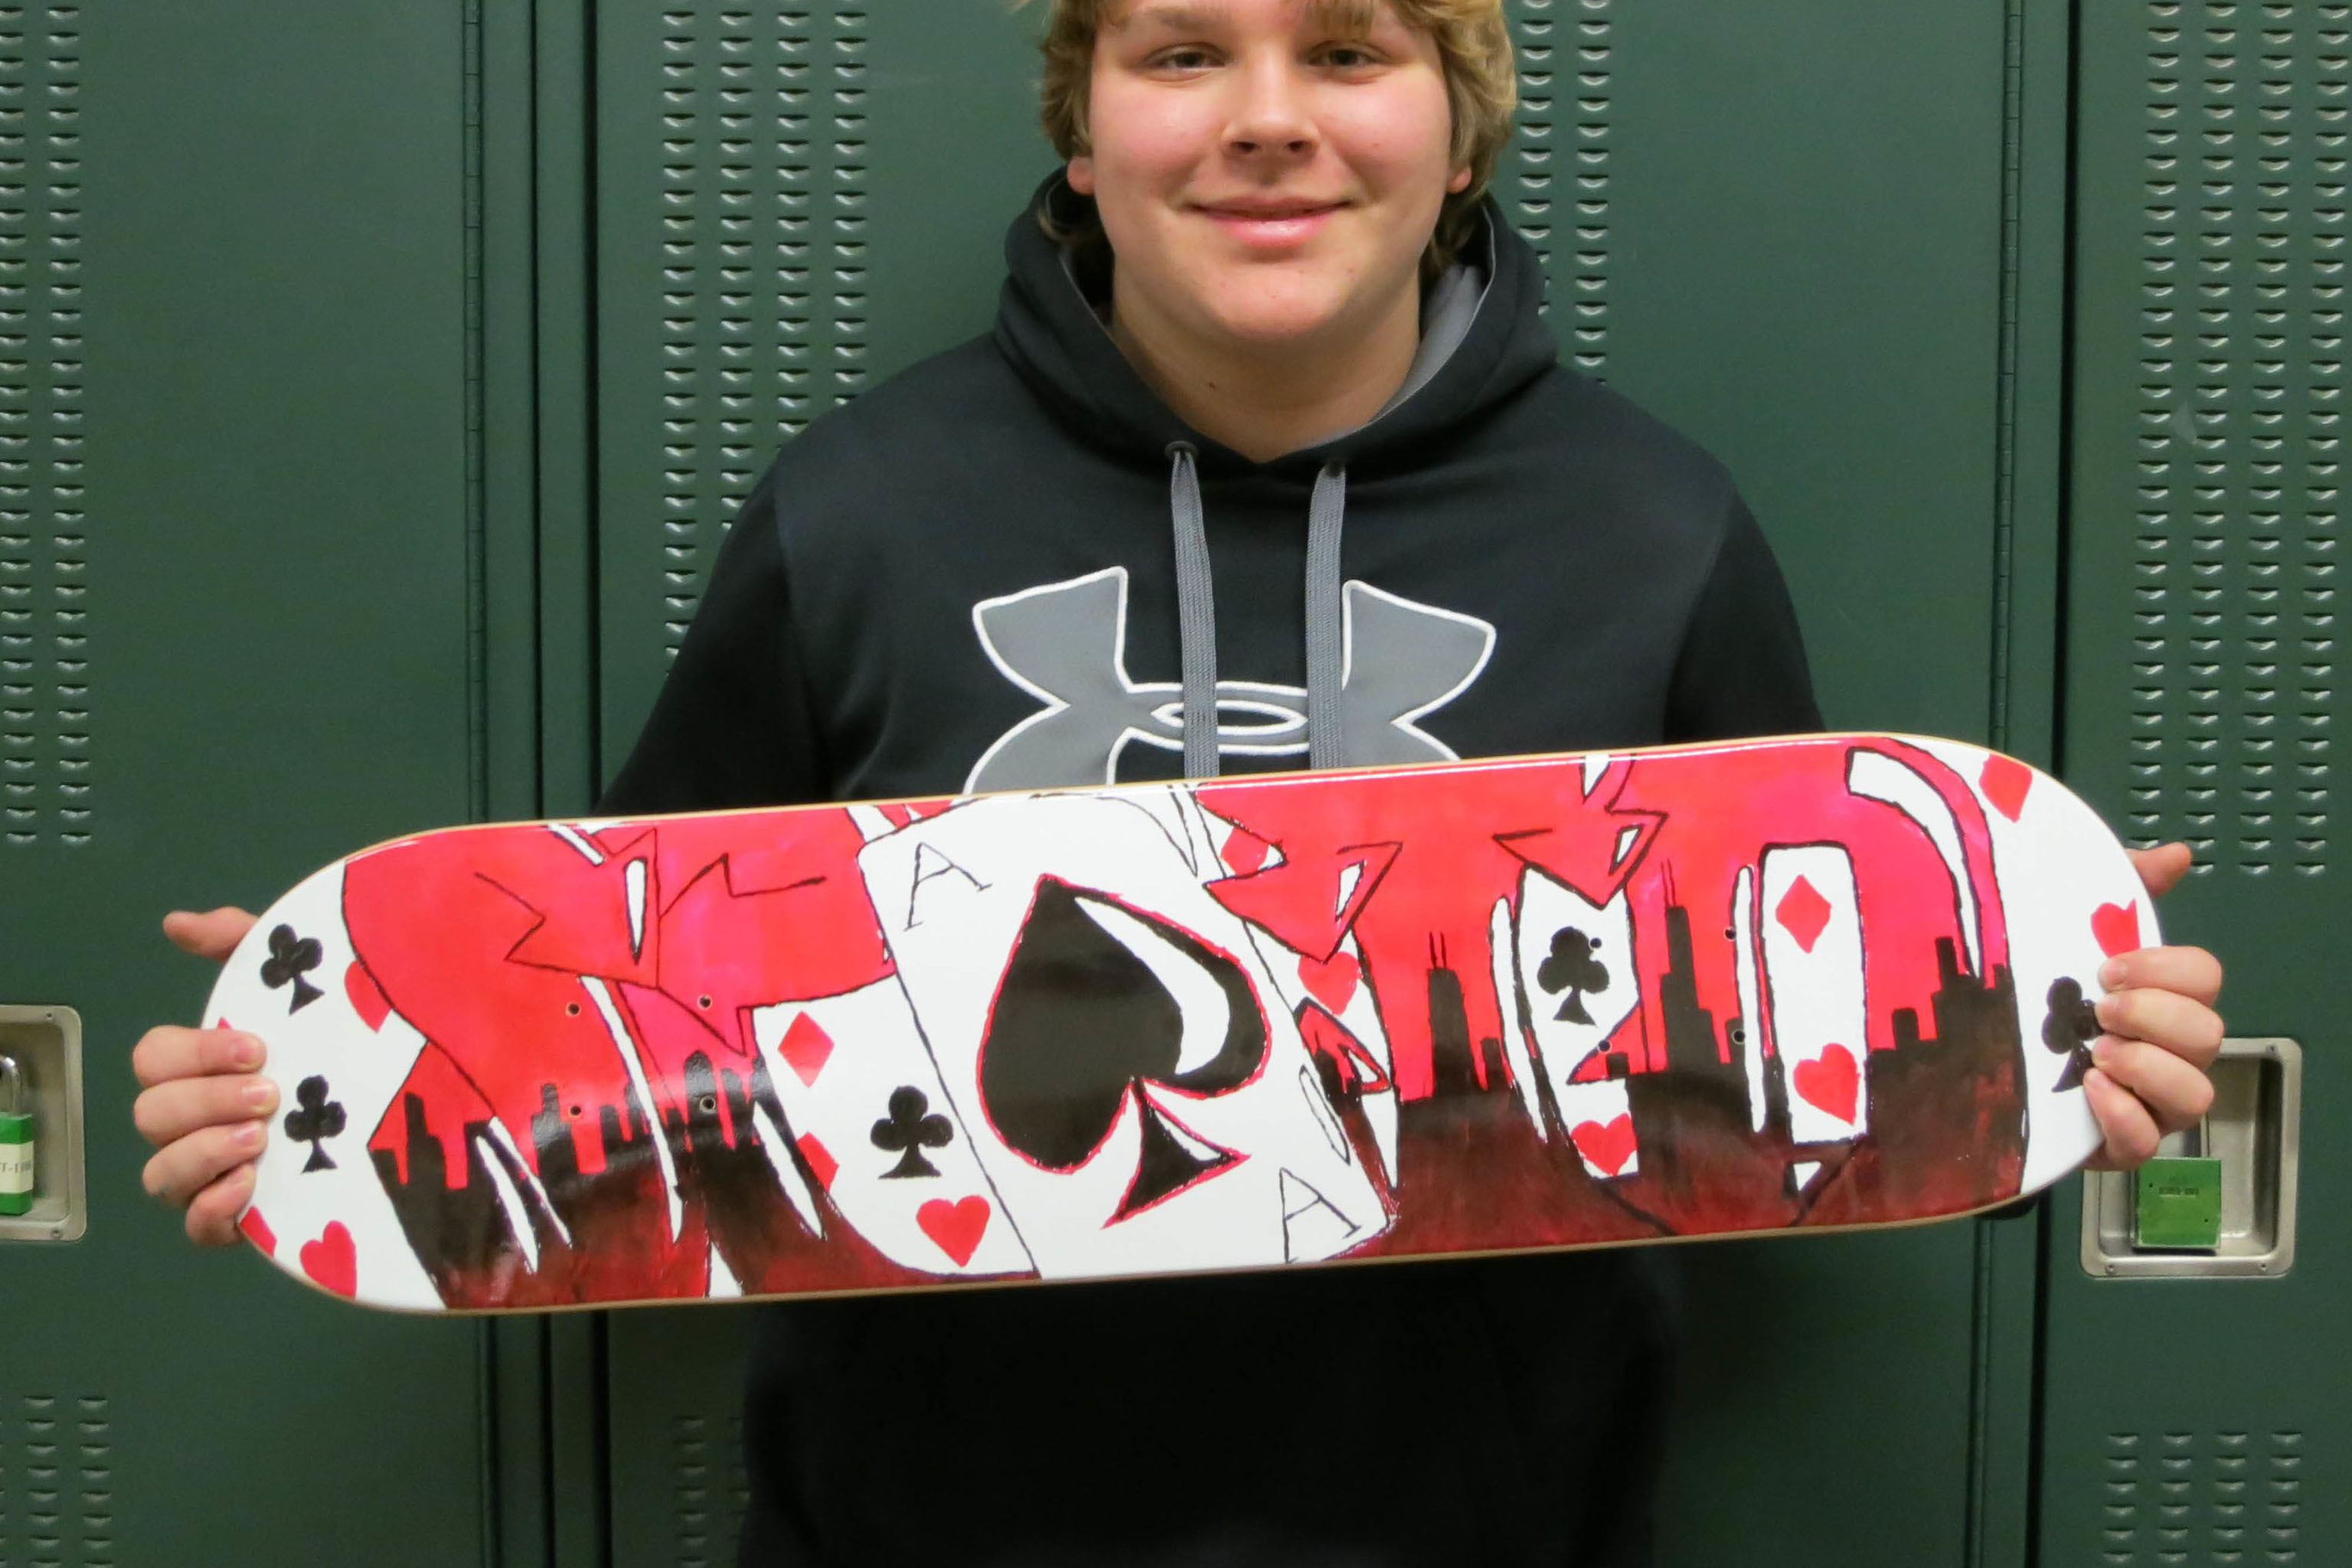
Take photos or a short video of your finished custom skateboard and share your creation on DIY.org
Help!?
What can I use if I can't find acrylic paint or spray clear sealant for the base coat and final protection?
Use outdoor-grade enamel or spray paint for the base coat and substitute the aerosol clear sealant (step 11) with a brush-on water-based polyurethane or marine varnish applied outside under adult supervision.
Why is my paint smudging, bleeding under the tape, or peeling off the skateboard and how do I fix it?
If paint smudges or peels, re-sand the bottom with sandpaper as in step 3, press masking tape edges firmly and apply thin coats for step 6, let each coat dry completely per step 7, and remove tape carefully to avoid bleeding.
How can I change this activity for younger kids versus older kids?
For younger children, skip sanding and let them stick to base coats, stickers, and marker details while an adult handles spray sealing and cutting grip tape, whereas older kids can sketch detailed designs, use masking tape for crisp shapes (step 4), cut custom grip tape shapes (step 13) and apply sealant themselves with supervision.
What are some ways to extend or personalize the finished skateboard beyond the basic instructions?
Add glow-in-the-dark or metallic acrylic details during the detail step (step 7), apply colored or patterned grip tape shapes for texture (steps 13–14), and consider an extra high-gloss brush-on polyurethane coat after the sealant for extra durability and shine.
Watch videos on how to customize your skateboard
How to Paint Your Skateboard Like a Pro DIY
4 Videos
How to Paint Your Skateboard Like a Pro DIY
Learning to Try Again with Skateboards! 🛹⚡️ | Skateboards for Kids | I Can Do Hard Things | Skating
Learn How to Skateboard for Kids
How Can You Customize A Skateboard When Assembling It? - Skateboard Daily
Facts about skateboard decoration and safety
🛹 Skateboard decks commonly range from about 7.5 to 8.5 inches wide — smaller for kids, wider for tricks and stability.
🎨 Acrylic paints are a kid-friendly choice: they dry quickly, clean up with water, and stick well to wood decks.
✂️ Grip tape works like super-fine sandpaper to keep shoes from slipping — you can cut it into patterns for cool designs.
🏷️ Stickers have been a skate-culture staple for decades; many brands gave away sticker packs to spread their art.
🧤 Safety first: use non-toxic paints, work in a ventilated area, and wear gloves or a mask when using strong adhesives or sprays.
How do I customize a skateboard with paints, grip tape, and stickers step-by-step?
What materials do I need to customize a skateboard for kids?
What ages is customizing a skateboard suitable for?
How can I keep my child safe while customizing a skateboard?
