Create Some Quill Art
Make colorful quill art by rolling, shaping, and gluing paper strips into flowers, shapes, and patterns while learning fine motor skills and design.

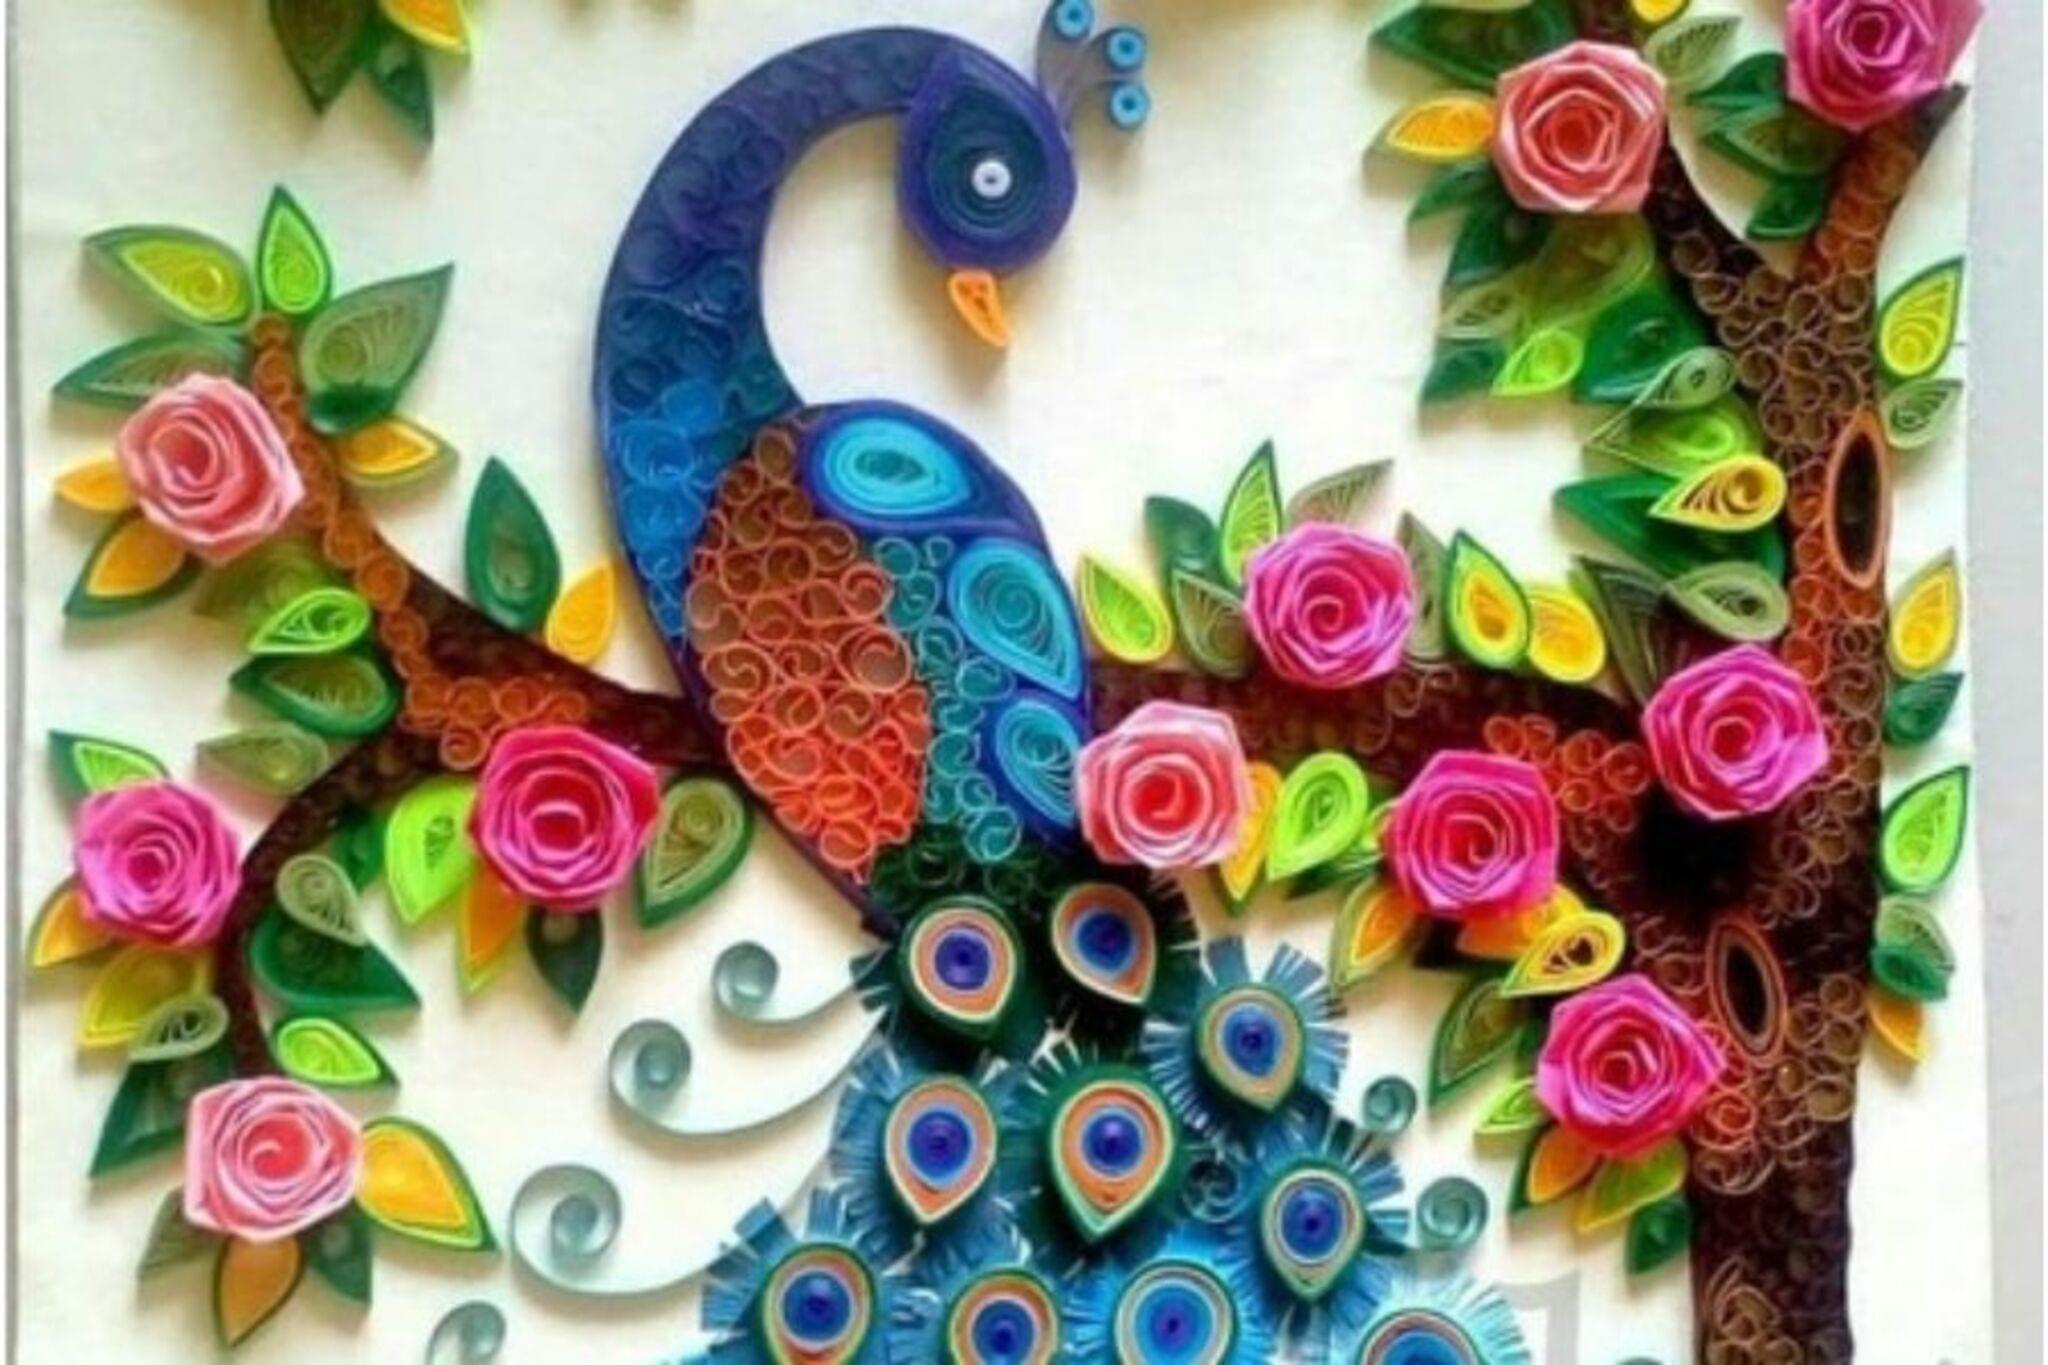

Step-by-step guide to create quill art
Parents Turned Their Kids' Drawing Into Artworks
Step 1
Clear a flat workspace and place your cardstock or cardboard base in the middle.
Step 2
Use the ruler and pencil to draw light lines and mark where you want flowers or shapes on the base.
Step 3
Cut colored paper into long strips about 1 cm wide using scissors.
Step 4
Hold one paper strip at one end and tightly roll it around the toothpick or quilling tool.
Step 5
Slide the rolled paper off the tool and let the coil loosen slightly to the size you like.
Step 6
Put a small dab of glue on the strip end and press it down to keep the coil closed.
Step 7
Pinch one side of a closed coil to make a teardrop petal shape or pinch both sides to make a leaf shape.
Step 8
Repeat rolling and shaping to make many coils in different sizes and shapes for flowers and patterns.
Step 9
Arrange your coils on the base following the light marks you made so you like the design.
Step 10
Glue each coil onto the base one at a time and press gently to secure.
Step 11
Add extra details with a marker or colouring materials like stems dots or highlights.
Step 12
Let all the glue dry completely before touching the picture.
Step 13
Take a photo of your quill art and share your finished creation on DIY.org
Help!?
What can we use instead of a quilling tool or toothpick if we don't have one?
If you don't have a quilling tool or toothpick for the step where you 'Hold one paper strip…roll it around the toothpick,' use a thin pencil, the eraser end of a pen, or a bamboo skewer as a safe substitute.
My coils keep unrolling after I slide them off the tool—how can I fix that?
When you slide the rolled paper off the tool and let the coil loosen, immediately add a very small dab of glue to the strip end and hold the coil gently for 10–15 seconds or try slightly thicker coloured paper so the coil keeps its shape.
How can I adapt this activity for different ages?
For younger children have an adult pre-cut the 1 cm strips and pre-roll or partially roll coils for them to pinch and glue, while older kids can cut their own strips, make teardrop and leaf shapes, and plan complex layouts with the ruler and pencil before gluing.
Any ideas to enhance or personalize my quill art?
After arranging and gluing your coils to the cardstock, personalize the piece by layering coils for 3D flowers, adding marker highlights or glitter to stems and petals, or mounting it in a frame before photographing for DIY.org.
Watch videos on how to create quill art
Modern Art Sculpture for Kids | Inner Child Fun
4 Videos

Modern Art Sculpture for Kids | Inner Child Fun
Parents Turned Their Kids' Drawing Into Masterpieces
Back-To-School Art Lessons - Art For Kids Hub Collection
How to create an Alma Thomas collage for kids | Art Tales
Facts about paper quilling
🌀 Quilling (paper rolling) dates back to the Renaissance when people rolled gilded paper to decorate boxes and frames.
🌸 A single quill flower can be made from just one strip of paper curled and shaped into petals—simple but magical!
✂️ Paper quilling strips come in many widths (about 3mm–10mm), so you can make tiny details or big bold shapes.
🤲 Rolling and pinching tiny paper strips is excellent practice for fine motor skills and hand-eye coordination.
🎨 Modern quillers layer colors and coils to create 3D effects—quill art can look like miniature sculptures.
How do I make quill art with my child?
What materials do I need for paper quilling?
What ages is quill art suitable for?
What are the benefits, safety tips, and fun variations for quill art?
