Create Mandala Art!
Create colorful mandala art by drawing symmetrical patterns from a center point, using simple measurements, rulers, compasses, and colored pencils to explore shapes.

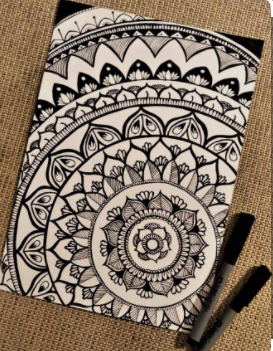

Step-by-step guide to create mandala art
Step 1
Gather all your materials and place them on a clean flat table so you are ready to begin.
Step 2
Put your paper on the table and use your pencil and ruler to lightly mark the exact center point.
Step 3
Use a compass or trace a round object to draw three or four concentric circles around the center.
Step 4
Use a protractor or ruler to draw straight lines from the center to the outer circle to divide the circle into equal wedges.
Step 5
Pick one wedge and draw a small simple shape near the center like a dot petal or triangle.
Step 6
Repeat that same shape in the same position in every wedge so the center ring is symmetric.
Step 7
Choose a different simple shape for the next ring and draw it once in one wedge.
Step 8
Repeat that new shape in the same ring across all wedges so the second ring is symmetric.
Step 9
Continue adding patterns in each outer ring and repeat each shape all the way around to keep the mandala balanced.
Step 10
Use your eraser to gently remove any extra construction lines you do not want in the finished design.
Step 11
Trace over the pencil shapes with a fine tip marker if you want bolder clean lines.
Step 12
Color matching shapes in each wedge with the same colors to keep a bright symmetrical look.
Step 13
Share your finished mandala on DIY.org
Help!?
What can we use instead of a compass if we don't have one?
If you don't have a compass, trace round objects like cups, jar lids, or tape rolls to draw the concentric circles around the center, or tie a string to a pencil and hold it at the center to draw rings.
My shapes aren't lining up in each wedge—how do I fix that?
If your shapes don't match across wedges, gently erase the misplaced shapes, then use your ruler or protractor to redraw evenly spaced straight lines from the center before repeating the shape in every wedge.
How can I adapt this mandala activity for younger or older kids?
For younger children use fewer wedges, larger simple shapes, and washable thick markers, while older kids can add more wedges, use a compass and fine-tip markers, and create more detailed repeating patterns.
How can we enhance or personalize our finished mandala?
To personalize your mandala, follow the color-matching step for symmetry and then add metallic gel pens, glitter glue, or glued-on sequins around outer rings for sparkle before sharing it on DIY.org.
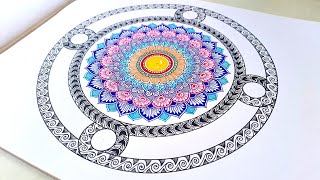
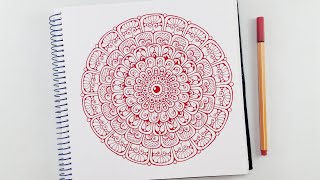
Watch videos on how to create mandala art
Create Your Own STUNNING Colourful Mandala Art/ Mandala Art For Beginners/ Step By Step
4 Videos
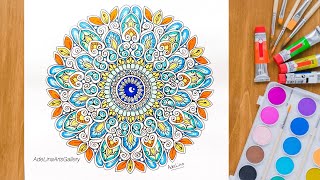
Create Your Own STUNNING Colourful Mandala Art/ Mandala Art For Beginners/ Step By Step
Colorful Mandala Art | How to draw a Mandala Art for Beginners Step-by-Step Tutorial | #vanithaarts

Let's create Mini Mandalas with some basic & easy Patterns ✨🥰 How to draw Mandala Art for beginners
Easy & Simple Mandala using Colored Pens | How to Draw Basic Colorful Mandala Art for Beginners
Facts about symmetry and geometry for kids
🌀 Mandalas are circular designs used for meditation and spiritual practice in many cultures, especially Hinduism and Buddhism.
🕉️ Tibetan monks can spend days or weeks creating intricate sand mandalas and then sweep them away to symbolize impermanence.
🎨 A traditional color wheel has 12 hues (3 primary, 3 secondary, 6 tertiary) — a great guide for choosing eye-catching mandala palettes.
📐 Using a compass and straightedge lets you draw perfect circles and split them into equal-angle segments (like 4, 6, or 8) for precise symmetry.
🔁 Mandalas use radial symmetry: motifs repeat around a center point, making designs feel balanced and meditative.
How do I create mandala art step by step?
What materials do I need for creating mandala art?
What ages is mandala art suitable for?
What are the benefits and safety tips for making mandala art?
