Create an Animation Clip With DIY's Yowie
Build a simple DIY Yowie character, then film a short stop-motion animation using clay, paper, or toys to learn motion and storytelling.

Step-by-step guide to Create an Animation Clip With DIY's Yowie
Step 1
Gather all the Materials Needed and bring them to a clear table or workspace.
Step 2
Choose whether you will make your Yowie from clay paper cutouts or use small toys.
Step 3
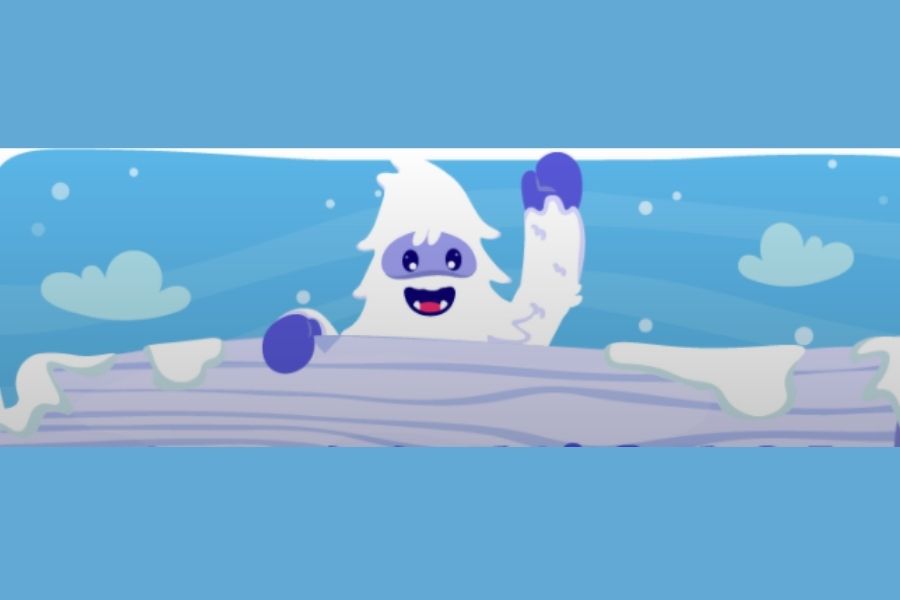
Build a simple Yowie character with a round body two eyes and a mouth using your chosen materials.
Step 4
Decorate your Yowie with colouring materials to give it bright colors and personality.
Step 5
Make a small background by taping paper or cardboard upright behind a flat area for your scene.
Step 6
Draw three quick storyboard frames showing what your Yowie will do at the start middle and end.
Step 7
Put the scene on a table and place a lamp nearby or use steady daylight so the light stays the same.
Step 8
Put a camera or tablet on a stable surface so it points straight at the scene and will not move.
Step 9
Place your Yowie in the starting spot and take the first photo.
Step 10
Move your Yowie a tiny bit toward the next pose then take another photo and repeat this move-and-photo step until your storyboard is finished.
Step 11
Play back the photos as a quick slideshow or in a stop-motion app to check how the motion looks.
Step 12
Edit the clip if you want to trim frames add titles or simple music then save the video file.
Step 13
Share your finished animation on DIY.org.
Help!?
What can we use if we don't have clay for the Yowie or a lamp to light the scene?
If clay is unavailable use the paper cutouts or small toys option from step 2, and if you don't have a lamp use steady daylight near a window as suggested in step 6.
My photos are coming out blurry or the Yowie keeps falling over—what should I try?
Follow step 7 by placing your camera or tablet on a stable surface or stacked books, secure loose pieces with a bit of tape, keep the lamp or daylight steady from step 6, and make very small consistent moves during the move-and-photo step to avoid blur and toppling.
How can I adapt this activity for younger kids or make it more challenging for older kids?
For younger children simplify by building a basic Yowie together, drawing only two storyboard frames and doing larger moves between photos, while older kids can create more detailed storyboards, add layered backgrounds in step 5, and use the edit clip step to trim frames and add music.
What are simple ways to enhance or personalize our finished animation?
Enhance the project by decorating your Yowie more elaborately, building a layered cardboard background from step 5, recording sound effects to add during the edit clip step, and then share the finished animation on DIY.org as in the final step.
Watch videos on how to Create an Animation Clip With DIY's Yowie
How to Make Kids 3D - Animated Stories Video | Fast, Easy and Free
4 Videos

How to Make Kids 3D - Animated Stories Video | Fast, Easy and Free

How to Create Your First Animated Film
How to Create Animated Kids' Story Videos with AI! | Step-by-Step Tutorial

How to Make a cut-out, stop motion animation - longer version
Facts about stop-motion animation for kids
🎬 At 12 frames per second, a 10-second stop-motion clip needs 120 photos — plan your shots!
🧪 Plasticine, a favorite for clay animators, was invented by William Harbutt in 1897 and doesn't dry out.
🏆 Aardman Animations' clay short "The Wrong Trousers" won the Academy Award for Best Animated Short in 1993.
⏳ Stop-motion goes way back to the late 1800s — early trick films like "The Humpty Dumpty Circus" made toys seem alive.
🤏 Pro animators often move characters just 1–3 millimeters between frames to create smooth motion.
How do I create a short stop-motion animation with a DIY Yowie character?
What materials do I need to build a DIY Yowie and film a stop-motion clip?
What ages is making a DIY Yowie stop-motion animation suitable for?
What are the benefits and safety tips for making a DIY Yowie animation, and any simple variations?
