Create a unique set for a LEGO® minifig
Design and build a unique LEGO minifigure scene using bricks, accessories, and simple craft materials; plan, customize, and display your finished creation.
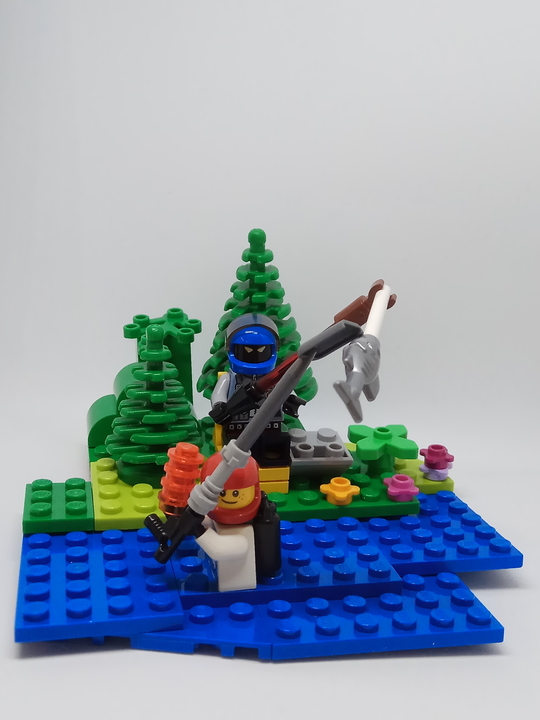
About this activity
Design and build a unique LEGO minifigure scene using bricks, accessories, and simple craft materials; plan, customize, and display your finished creation.
What you need
Step by step
- 1
Step 1
Find a clean flat workspace where you can build without losing pieces.
- 2
Step 2
Lay out your LEGO bricks minifigure(s) baseplate accessories and craft materials so you can see everything.
- 3
Step 3
Pick a fun theme or story for your minifigure scene like space adventure city park or jungle quest.
- 4
Step 4
Draw a simple sketch plan showing where your minifigure and the main props will go.
- 5
Step 5
Choose the minifigure you will feature and decide its role in the story.
- 6
Step 6
Build the ground and main structures of your scene on the baseplate using LEGO bricks.
- 7
Step 7
Add small LEGO accessories to make props like benches tools signs or treasure chests.
- 8
Step 8
Cut one or two paper props such as a sign cape hat or backdrop from construction paper.
- 9
Step 9
Attach the paper props to the minifigure or to the scene using tape or glue.
- 10
Step 10
Decorate your paper props and background with colouring materials to add color and details.
- 11
Step 11
Arrange and tweak the minifigure and props until your scene looks just right.
- 12
Step 12
Write a short title or description of your scene on a sticky note.
- 13
Step 13
Place the sticky note beside your display so people know your story.
- 14
Step 14
Share your finished creation on DIY.org
Fun facts
How do I design and build a unique LEGO minifigure scene?
Start by imagining a short story or theme for your minifigure scene (space, park, shop). Sketch a simple layout on paper, choose a baseplate and the minifigure, then select bricks and accessories to match the idea. Build a background, add props and small details, and use craft materials for textures (paper trees, felt blankets). Adjust pieces for stability, take photos, and place the finished scene on a shelf or small display stand.
What materials do I need to create a custom LEGO minifigure scene?
You will need a LEGO minifigure, a baseplate, assorted bricks and plates, and small accessory pieces. Add simple craft supplies like cardstock, felt, pipe cleaners, stickers, and safe glue or double-sided tape for non-LEGO details. Include child-safe scissors, markers for decorating, a tray for sorting small parts, and optional items like a camera to photograph the scene and a display box or shelf to show off the finished creation.
What ages is designing and building a minifigure scene suitable for?
This activity suits children aged about 5 and up who can handle small pieces safely and follow simple building steps. Younger kids (3–4) can join using larger DUPLO bricks and supervised crafting. Older children and tweens enjoy more detailed customization and storytelling. Always supervise young children because minifigure parts are small and present a choking hazard, and adapt complexity to each child’s skill level and attention span.
What are the benefits of making a custom LEGO minifigure scene?
Designing and building minifigure scenes boosts creativity, fine motor skills, spatial reasoning, and planning. It encourages storytelling, problem-solving, and patience while kids decide how pieces fit and balance. Working together promotes communication and cooperation, and photographing or displaying finished scenes builds pride and presentation skills. The activity is low-cost, adaptable, and can be repeated with new themes to keep learning and imagination growing.
Watch & Learn
Need help?
What can we use if we don't have LEGO bricks or a baseplate?
Substitute a cardboard or stiff craft foam sheet for the baseplate and use Duplo, Mega Bloks, small action figures, or printable minifigure cutouts and bottle caps for accessories to complete the scene.
My paper prop keeps falling off the minifigure—how can I fix it?
Secure paper props by using double-sided tape or a small dab of tacky glue when you 'attach the paper props to the minifigure or to the scene using tape or glue,' or fasten them to the baseplate with a paperclip or thin wire anchor while drying.
How can I change the activity for different ages?
For younger children skip the cutting step and use pre-cut shapes and Duplo on a large base while older kids can make a detailed sketch plan, complex builds, and write a longer sticky-note description before sharing.
What are some ways to enhance or personalize our minifigure scene?
Add fabric capes, laminated signs, small LED lights, movable hinges on props, more detailed painted backdrops, or photograph a stop-motion story to share on DIY.org.