Create a Robotic Hand
Build a simple robotic hand from cardboard, straws, string, and tape to learn how joints and levers make movement through hands-on experimentation.


Step-by-step guide to create a robotic hand
Robotic Hand Science Project | Simple Paper Robot Hand for Kids | STEM Activity
Step 1
Place your hand on the cardboard and trace around it with the pencil.
Step 2
Cut out the traced hand shape from the cardboard using the scissors.
Step 3
Use the ruler to draw two straight lines across each finger to divide them into three segments.
Step 4
Cut the drinking straws into short pieces about the length of each finger segment.
Step 5
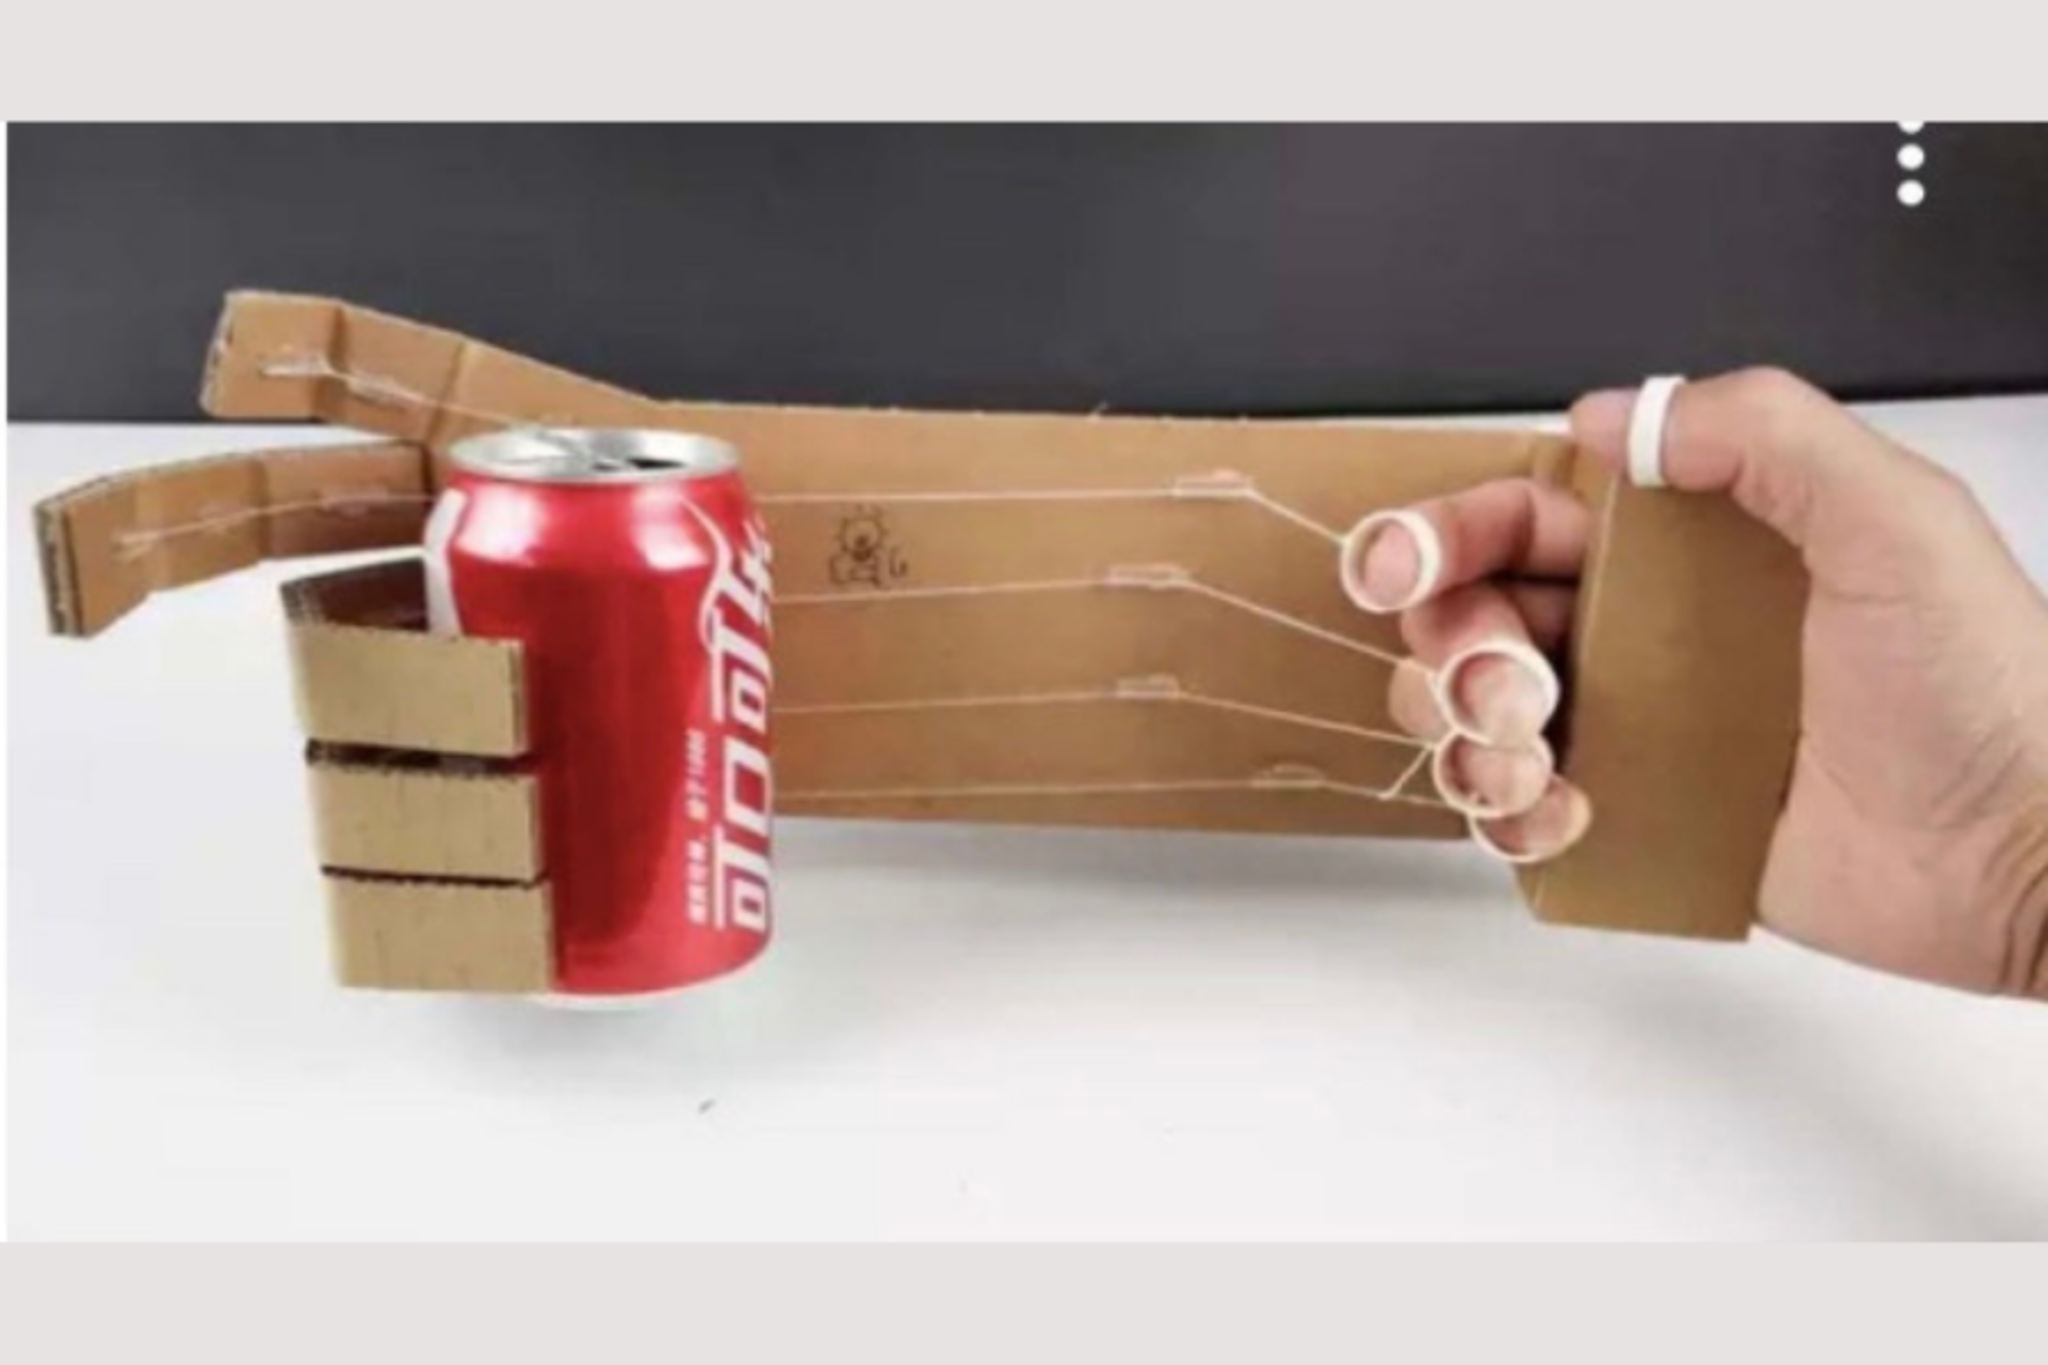
Tape one straw piece over each finger segment along the back of each finger.
Step 6
Make a small hole at the tip of each finger and one hole at the base of the palm using the tip of the scissors.
Step 7
Thread a piece of string through the fingertip hole then back through the straw pieces toward the palm for each finger.
Step 8
Tie a small knot at the fingertip end of each string so the string cannot slip back through the straw.
Step 9
Gather all the loose string ends at the palm and tape them securely to a short straw or stiff paper tab to make a pull handle.
Step 10
Pull the handle to make the cardboard fingers curl and adjust tape or knots if any finger does not bend smoothly.
Step 11
Share your finished robotic hand on DIY.org.
Help!?
What can I use instead of drinking straws if I can't find any?
If you don't have drinking straws, use empty pen barrels or tightly rolled strips of cardboard cut to the length of each finger segment and tape them over the finger segments as in step 6.
My fingers don't bend smoothly when I pull the handle—what should I check and fix?
If a finger won't curl when you pull the handle (step 11), make sure each straw piece taped in step 6 is aligned over the segments, tighten or remake the fingertip knot from step 9 so it won't slip back through the hole, and reinforce the straw tape joints where needed.
How can I adapt this activity for different ages?
For preschoolers have an adult trace and cut the hand (steps 1–2) and make the holes (step 7) while the child tapes straw pieces (step 6) and pulls strings (step 11), and for older kids let them measure with the ruler (step 3), cut the straw pieces (step 4), and tie the knots (step 9) by themselves.
How can we improve or personalize the robotic hand after it's working?
To enhance and personalize the hand, decorate the cardboard before cutting (steps 1–2), add elastic bands across the back of the palm for automatic finger return, and glue small beads to the fingertip knots from step 9 for smoother pulls before sharing on DIY.org (step 12).
Watch videos on how to create a robotic hand
Build Your Own Bionic Hand - STEM Projects for Kids. Engineer A Simple Robot Hand
4 Videos
Build Your Own Bionic Hand - STEM Projects for Kids. Engineer A Simple Robot Hand

DIY Robotic Hand 🤖✋ | Easy Science Project for Kids | STEM Craft Idea
How To Make a Robotic Hand | DIY Paper Robot Hand | Science Project
DIY Robotic Hand for Kids
Facts about robotics and simple machines
🤖 Many robotic hands copy the idea of tendons — using strings or cables to pull fingers just like muscles do.
✋ The human hand has 27 bones and dozens of muscles and tendons that let us do tiny precise movements.
🔧 A lever can multiply your force: change the pivot point or arm lengths and a small pull moves a bigger load.
🥤 Drinking straws are great for DIY joints because string slides easily inside them, acting like low-friction tendons.
📦 Corrugated cardboard is lightweight but surprisingly strong, which is why designers use it for quick prototypes.
How do I build a simple robotic hand from cardboard, straws, and string?
What materials do I need to make a cardboard robotic hand?
What ages is this cardboard robotic hand activity suitable for?
What are the benefits of making a cardboard robotic hand?
