Create a magician costume
Make a magician costume using fabric, cardboard, and safe craft supplies; design a cape, wand, hat, and simple props while learning sewing and decoration skills.


Step-by-step guide to make a magician costume
🎃 Amazing Kids' Halloween Costume Ideas That Worked Like Magic! 🧙♀️ | Happy And Fun
Step 1
Gather all the materials in one place so you can work easily.
Step 2
Measure from the top of your shoulders down to where you want the cape to end and remember that number.
Step 3
Fold the fabric in half and draw a half-cape curve using the measurement from Step 2.
Step 4
Cut along the curved line to make the cape shape while the fabric is still folded.
Step 5
Cut a small semicircle at the top center of the cape for the neck opening.
Step 6
Fold the raw edges of the cape over about 1 centimeter all the way around.
Step 7
Sew along the folded edges with needle and thread to secure the hem.
Step 8
Thread a ribbon or elastic through the neck opening and tie or knot it so the cape stays on comfortably.
Step 9
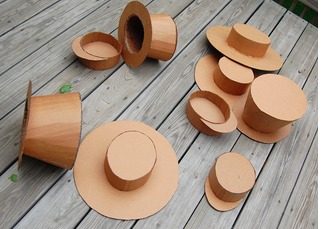
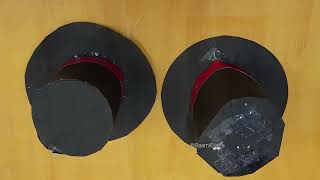
Measure around your head to get the head circumference for the hat.
Step 10
Draw a cone template on the cardboard using the head measurement and cut out the cone shape.
Step 11
Tape the cardboard cone into a hat shape and trim any extra so it fits well.
Step 12
Wrap the stick or cardboard tube with ribbon and secure it with fabric glue or tape to make the wand.
Step 13
Decorate the cape hat and wand using colouring materials stickers and glitter glue to add magic designs.
Step 14
Put on your magician costume and ask an adult to help make any final adjustments so it fits safely.
Step 15
Take a picture or tell the world about your magician costume and share your finished creation on DIY.org
Help!?
What can we use if we don't have the exact materials like fabric, ribbon, or cardboard?
Use an old bedsheet or large T-shirt folded in half for the cape (Steps 2–4), a scarf or shoelace instead of ribbon/elastic for the neck tie in Step 8, and a cereal box or junk mail cardboard cut into a cone for Step 10 with a pencil or chopstick replacing the wand stick in Step 12.
What should we do if the cape neck opening is too tight or the edges keep fraying?
If the semicircle cut in Step 5 is too tight, enlarge it slightly before folding and hemming in Step 6, and if edges fray despite the 1 cm fold in Step 6, secure them with fabric glue or extra stitches when you Sew along the folded edges in Step 7.
How can I adapt this activity for younger or older kids?
For younger children, have an adult pre-measure (Step 2), pre-cut the cape (Steps 3–4) and use fabric glue or safety pins instead of Sewing in Step 7, while older kids can draft their own cone template (Step 10), sew the hem in Step 7, and design complex decorations in Step 15.
How can we enhance or personalize the magician costume beyond the basic instructions?
Personalize the costume by sewing or gluing a small pocket inside the cape after Step 7 for magic props, adding battery fairy lights along the hem before finishing Step 7, or decorating the wand wrapped in Step 12 with sparkly ribbon and stickers from Step 15.
Watch videos on how to make a magician costume
How to Make Magician Hat | DIY Snowman Hat For Fancy Dress Competition | magician hat for kids
4 Videos
How to Make Magician Hat | DIY Snowman Hat For Fancy Dress Competition | magician hat for kids

PLAY | 5 Magic Tricks Kids Can DO!
Cute Halloween Costume to make with Kids 💖 from Just Cardboard! 📦
Easy DIY Halloween Costumes for Kids with Shannon Doherty
Facts about costume making and sewing for kids
🪄 The magician's wand became a stage symbol in the 1800s — before that, performers used staffs and everyday objects for tricks.
🎩 The famous "rabbit out of a hat" trick was popularized in the 19th century after magicians started using top hats as surprise props.
🧵 Two easy hand stitches for beginners are the running stitch and the whip stitch — perfect for quick costume repairs and decorations.
♻️ Cardboard is lightweight, sturdy, and super-friendly to decorate with paint, markers, and glue — great for kid-safe props and hats.
✨ A knee-length cape gives dramatic swooshy movement while staying safer and easier for kids to walk and perform in.
How do you make a magician costume?
What materials do I need for a magician costume?
What ages is this activity suitable for?
What safety tips and variations should I consider?
