Create a habitat diorama
Build a shoebox habitat diorama showing plants, animals, and climate using craft materials, glued models, and labeled facts to learn about ecosystems.


Step-by-step guide to build a shoebox habitat diorama
How to make Grassland Habitat Model/Grassland Habitat Diorama School project for kids.
Step 1
Gather all the materials listed and place them on a clear workspace.
Step 2
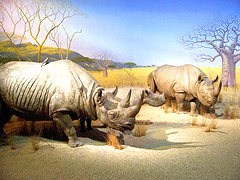
Choose one ecosystem to build such as forest desert ocean grassland or tundra.
Step 3
Turn the shoebox on its side so the open side faces you and the box sits steady.
Step 4
Line the inside back and floor of the shoebox with construction paper to create the sky and ground and secure the paper with tape or glue.
Step 5
Build landforms by shaping hills dunes or water areas from crumpled paper or modelling clay and glue them into the box.
Step 6
Make plants by cutting leaves grasses and trees from green paper or by arranging twigs and leaves and glue them into place.
Step 7
Create animals by sculpting them from modelling clay or by cutting animal shapes from cardstock and glue or press them into the scene.
Step 8
Add climate features like cotton ball clouds or a sun cut from yellow paper and attach them to the background.
Step 9
Write a small label for each plant animal and climate feature with its name and one short fact on cardstock.
Step 10
Attach each label next to the matching item using tape so viewers can read the facts.
Step 11
Add finishing textures such as small rocks sand or a bit of moss to make the scene more realistic.
Step 12
Press any glued pieces gently and let the diorama dry completely before moving it.
Step 13
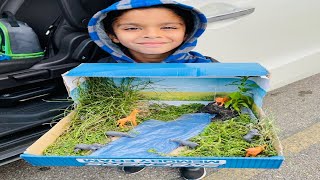
Share your finished habitat diorama on DIY.org.
Help!?
What can we use instead of a shoebox, construction paper, or modelling clay if those are hard to find?
Use a similarly sized cereal or pizza box turned on its side instead of the shoebox, colored printer paper or painted scrap paper in place of construction paper, and salt-dough, playdough, or rolled-up tissue as a substitute for modelling clay.
My glued plants or landforms keep falling over — how can we fix them?
Secure crumpled-paper hills and glued plants by adding a strip of tape or a dab of stronger glue to their base, press any glued pieces gently as the instructions say, and weigh them while the diorama dries to hold them in place.
How can this diorama be adjusted for different ages?
For preschoolers, pre-cut larger plant and animal shapes and use stickers and simple one-line labels, while older kids can sculpt detailed animals from modelling clay, add finishing textures like small rocks or sand, and write more advanced facts on the cardstock labels.
How can we extend or personalize the finished habitat beyond the basic steps?
Personalize the scene by painting the inside background, adding LED tealight lighting or blue cellophane water, creating a small food-web poster to attach inside the box, and then photograph and share your finished habitat diorama on DIY.org.
Watch videos on how to build a shoebox habitat diorama
DIY Wild Habitat Diorama- Animal World Preschool Project- educational video for kids
3 Videos
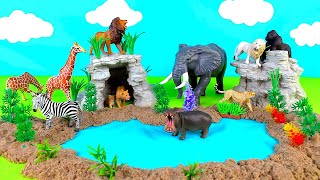
DIY Wild Habitat Diorama- Animal World Preschool Project- educational video for kids
Grassland Habitat Diorama Project By Shahadat | Kindergarten Habitat School Project Using Shoe Box
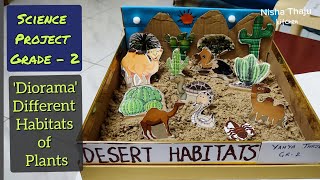
Science Project Grade 2 ~ Diorama Different Habitats of Plants & Animals ~ Desert Habitat
Facts about ecosystems and habitats
🌍 Tropical rainforests cover about 6% of Earth's land but house roughly half of all species.
🐝 Around 75% of the world's food crops benefit from pollinators like bees, butterflies, and bats.
🐘 Elephants are ecosystem engineers — their digging and tree-felling can create habitats for dozens of other species.
🌱 It can take hundreds to thousands of years to form just one inch of healthy soil.
🔋 Only about 10% of energy passes from one trophic level to the next, which helps explain why food chains are usually short.
How do I build a shoebox habitat diorama?
What materials do I need to make a shoebox habitat diorama?
What ages is a shoebox habitat diorama suitable for?
What are the benefits of making a shoebox habitat diorama?
