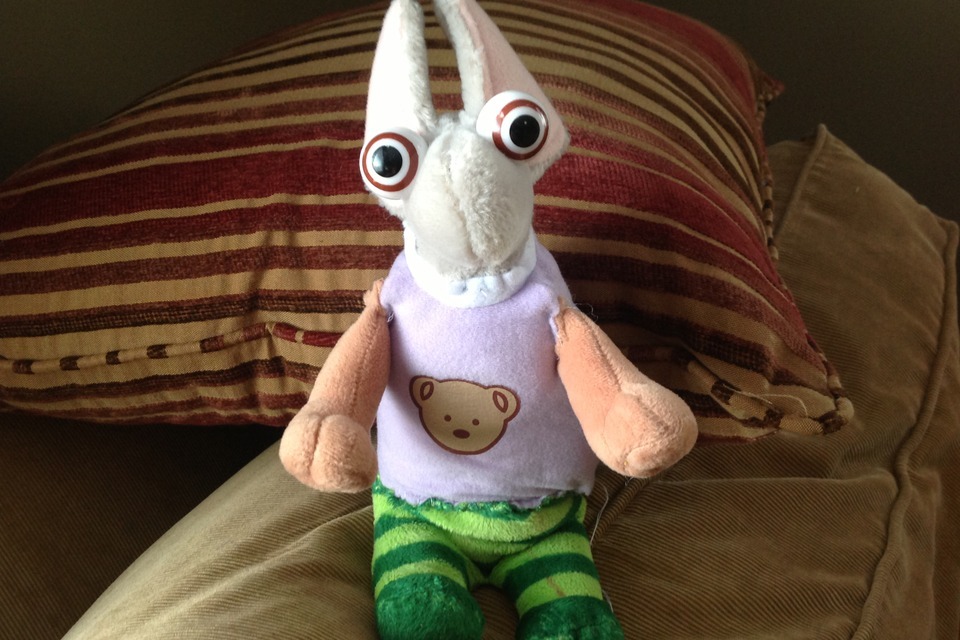
Create a Frankentoy
Combine parts from old toys and recyclable materials to build a new Frankentoy, using glue, tape, and decoration to explore creativity and simple engineering.


Step-by-step guide to create a Frankentoy
Let's Make 12 MOST VIRAL Paper Fidget Toy Crafts || EASY TUTORIAL🤩
Step 1
Spread the protective mat or newspaper on your workspace.
Step 2
Gather all the materials and place them on the mat.
Step 3
Choose one sturdy old toy to be your Frankentoy's body.
Step 4
Pick a fun theme or name for your Frankentoy.
Step 5
Find extra parts from other toys and recyclables that match your theme.
Step 6
Ask an adult to help you remove stuck pieces or trim parts safely.
Step 7
Arrange the parts on the body until you like the layout.
Step 8
Attach one part at a time to the body using glue or tape.
Step 9
Press each attached part firmly for a few seconds so it sticks.
Step 10
Add recyclable pieces like cardboard or bottle caps to strengthen any weak joints.
Step 11
Let glue dry completely before touching the glued areas.
Step 12
Decorate your Frankentoy with colouring materials stickers and googly eyes.
Step 13
Gently test moving parts for sturdiness and ask an adult to help fix anything loose.
Step 14
Take a photo and share your finished Frankentoy on DIY.org
Help!?
What can we use instead of glue or tape if we don't have them?
If you don't have glue or tape for the attach step (step 8), secure parts temporarily with strong string, pipe cleaners, twist ties, or reusable zip ties and reinforce weak joints with cardboard or bottle caps as suggested in step 10.
Parts keep coming loose—what should we try?
If parts won't stick or joints are floppy, ask an adult to remove stuck pieces or trim parts safely (step 6), press each attached part firmly after gluing or taping (step 9), add cardboard or bottle caps to strengthen weak joints (step 10), and let glue dry completely before testing (step 11).
How can I adapt the activity for different age groups?
For ages 3–5 have an adult pre-remove stuck pieces and let the child arrange and tape large recyclables and stickers (steps 6, 7, 8, 12), for 6–9 let them trim with safety scissors and glue parts with supervision (steps 5–9), and for 10+ encourage building moving joints and reinforcing with cardboard or bottle caps and photographing the result for DIY.org (steps 10, 13, 14).
How can we make the Frankentoy more special or challenging?
Personalize and extend the project by painting and adding googly eyes or stickers (step 12), installing small battery LED lights or creating movable joints reinforced with bottle caps or cardboard (steps 10, 12), and build a cardboard diorama to stage the photo for DIY.org (step 14).
Watch videos on how to create a Frankentoy
10 Creative and Easy Kids Craft | Fun Crafts for Kids | Handmeyd Treasures
4 Videos
10 Creative and Easy Kids Craft | Fun Crafts for Kids | Handmeyd Treasures
Mind-Blowing DIY Crafts Your Kids Will Actually Love
Easy Crafts for Kids with NO GLUE! - 30 MIN COMPILATION
Arts and Crafts for Kids to Make at Home | Highlights Parents
Facts about upcycling and simple engineering for kids
🧩 Upcycling turns old or broken items into new, useful creations—perfect for making Frankentoys and reducing waste.
♻️ Recycling one ton of paper can save about 17 mature trees, so reusing toy parts helps the planet!
🧸 Archaeologists have found toy dolls and tiny models that are over 4,000 years old—kids have always loved playtime.
🛠️ Building with mixed parts boosts fine motor skills and creative problem-solving in kids (and grown-ups too!).
🎨 Using non-toxic glue, tape, and recycled materials lets kids safely experiment with texture, color, and design.
How do you make a Frankentoy by combining old toys and recyclables?
What materials do I need to build a Frankentoy?
What ages is the Frankentoy activity suitable for?
What safety tips should I follow when making a Frankentoy?


