Create a Beach Using Paper
Make a mini beach diorama from colored paper, torn sand textures, blue water, paper shells and palm trees to explore texture, layering, and creativity.


Step-by-step guide to create a beach using paper
Step 1
Gather all the materials listed and put them on a clear workspace.
Step 2
Place the shoebox with the open side facing you on the table.
Step 3
Cut a sheet of blue paper so it fits the back and bottom inside of the box.
Step 4
Glue the blue paper to the back and bottom of the box to make the sea.
Step 5
Tear the tan or brown paper into many small pieces to make sand.
Step 6
Lightly crumple some of the torn sand pieces to add bumpy texture.
Step 7
Glue the torn sand pieces across the bottom of the box to form the beach.
Step 8
Tear thin strips of white paper to look like wave foam.
Step 9
Glue the white strips along the edge where the blue paper meets the sand to make waves.
Step 10
Cut palm tree trunks from brown paper and leaves from green scrap paper.
Step 11
Glue the trunk and leaves together to build each palm tree.
Step 12
Glue your palm tree(s) to the back or side of the box so they stand up.
Step 13
Cut small shell shapes from scrap colored paper for beach decorations.
Step 14
Glue the paper shells and any extra decorations onto the sand.
Step 15
Share your finished mini beach diorama on DIY.org.
Help!?
What can we use if we don't have a shoebox or blue paper?
Use a cereal or small cardboard box turned with the open side toward you and either paint the back and bottom blue or glue on blue fabric or magazine pages in place of the 'Glue the blue paper' step.
My torn sand pieces keep falling off—how can I fix that?
Apply a stronger craft glue or a thin layer of white glue to both the box bottom and the back of each lightly crumpled tan/brown paper piece, press them down and let them dry under a heavy book so the sand in the 'Glue the torn sand pieces' step adheres securely.
How can I adapt this activity for toddlers, younger kids, and older kids?
For toddlers, have an adult pre-cut the blue background and sand pieces and give them a glue stick to place pieces; for younger kids let them tear paper and glue palm tree parts; for older kids challenge them to cut detailed palm fronds, layer waves, or paint sky details as extensions of the 'Cut palm tree trunks' and 'Tear thin strips' steps.
How can we personalize or expand the mini beach diorama once it's finished?
Sprinkle real sand over wet glued paper sand, add sequins or extra cut paper shells for decoration, glue a small paper umbrella on a toothpick into the sand, or tape a battery tea light behind the blue background to create a sunset before sharing on DIY.org.
Watch videos on how to create a beach using paper
Paper plate Beach Craft
4 Videos
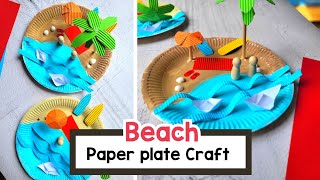
Paper plate Beach Craft
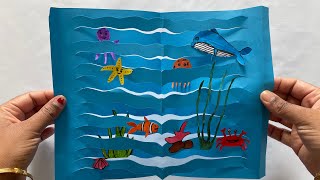
Paper crafts for kids/Sea animals/How to make sea creatures paper craft for preschooler/Summer craft
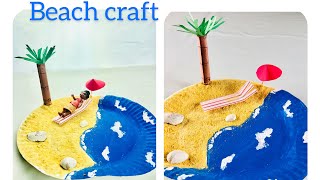
Beach craft for kids🌊 🌊|How to make Beach craft with cornflakes as sand🏖🏝 |Summer craft ideas☀️

Easy Sea Beach Pastel Drawing: A Beginner's Guide
Facts about paper crafts for kids
🏖️ Beaches can be made of sand, pebbles, shells, or even black volcanic ash—so your mini beach can look wildly different!
✂️ Papercraft artists create texture and depth by tearing, crumpling, folding, and layering paper—perfect for making realistic sand and waves.
🌴 There are about 2,600 species of palm trees worldwide, so your paper palm can be tall, short, bushy, or skinny!
🐚 Seashells are the hard homes left by mollusks and each shell’s pattern is unique—great for inspiring one-of-a-kind paper shells.
🎭 The diorama idea goes back to the 1800s when inventors like Louis Daguerre created dramatic painted scenes with changing light called dioramas.
How do you make a mini beach diorama from paper?
What materials do I need to create a paper beach diorama?
What ages is a paper beach diorama suitable for?
What are the benefits of making a paper beach diorama?
